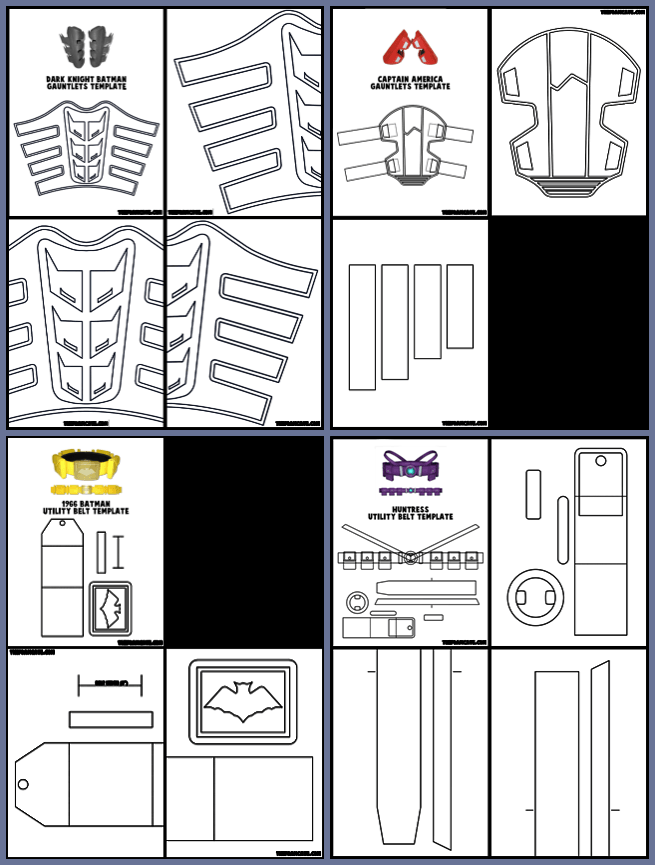
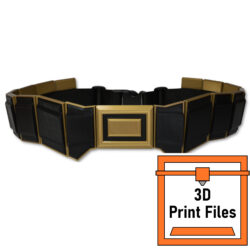
This tutorial will walk you through the construction of the Ant utility belt. The template is available for purchase here:
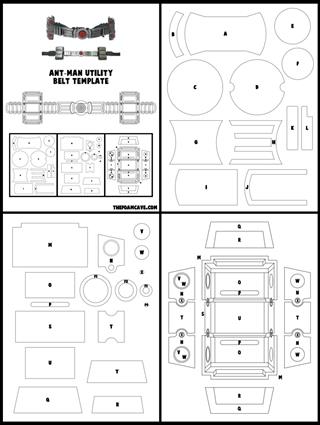
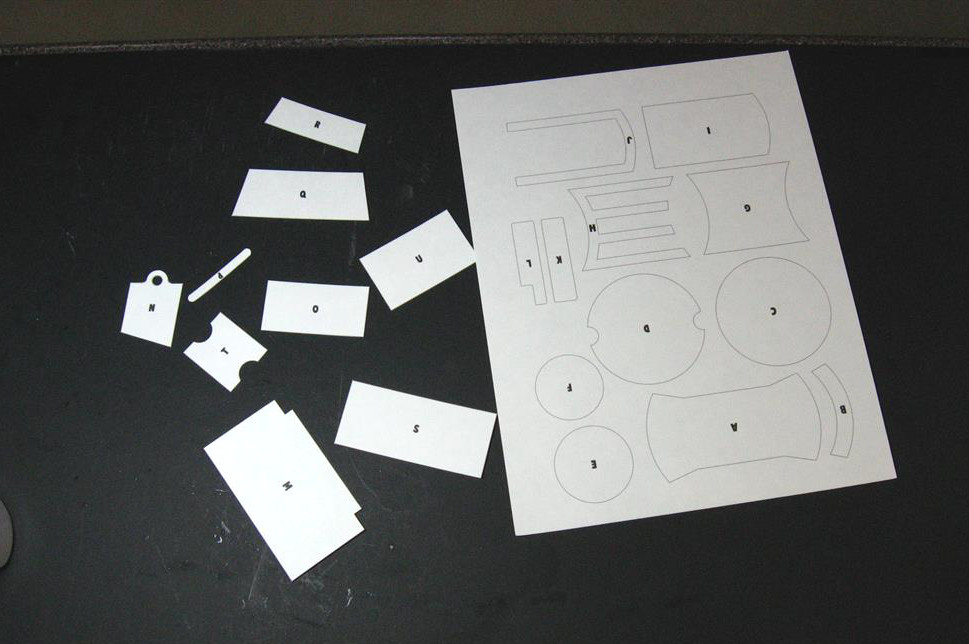
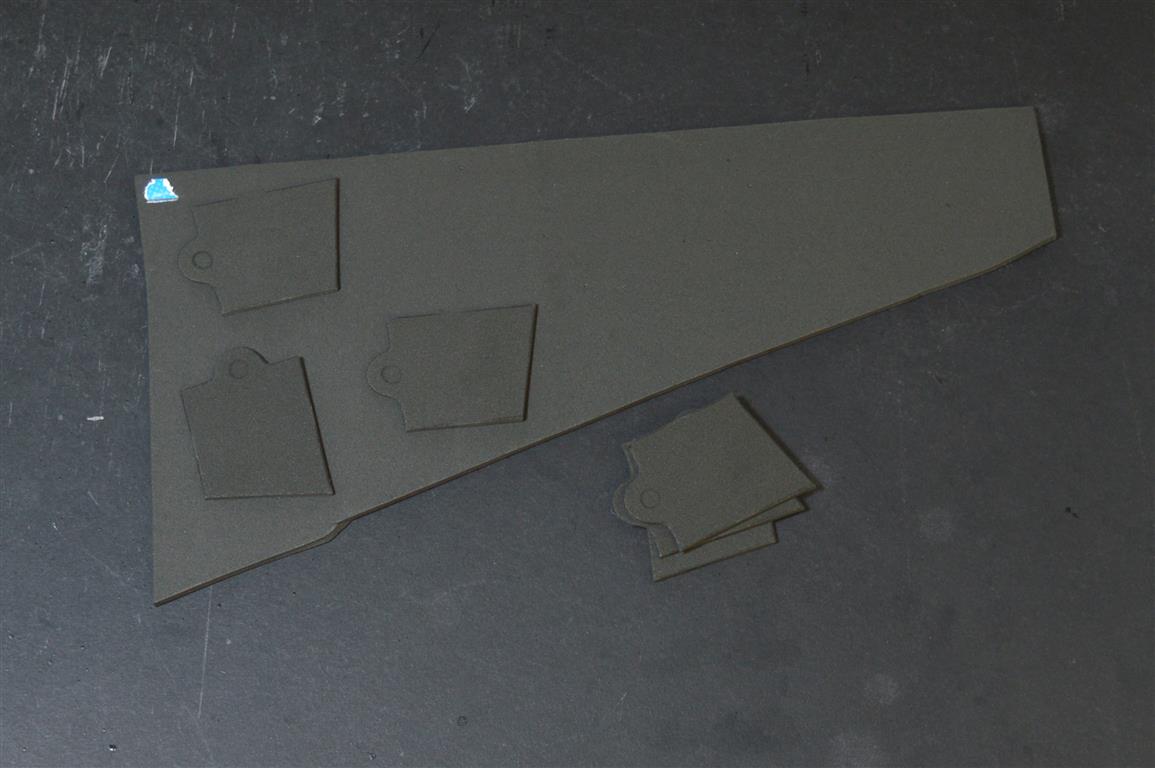
If this is your first build, check out the Introduction Page first, Print out the template onto thick printer paper (ideally a poster board paper) to make it easier to trace. Cut out all the pieces and trace them onto your foam sheets. Use a few pieces of scotch tape to hold the template in place on the foam when tracing. You can use a regular ball point pen; at the moment I like those space pens as they flow smoothly over the foam. I recommend 3mm thick foam for most of these pieces, and a couple will be 5mm or 2mm as noted below.
as well as the Supply Page for links to the foam, glue, and necessary tools.
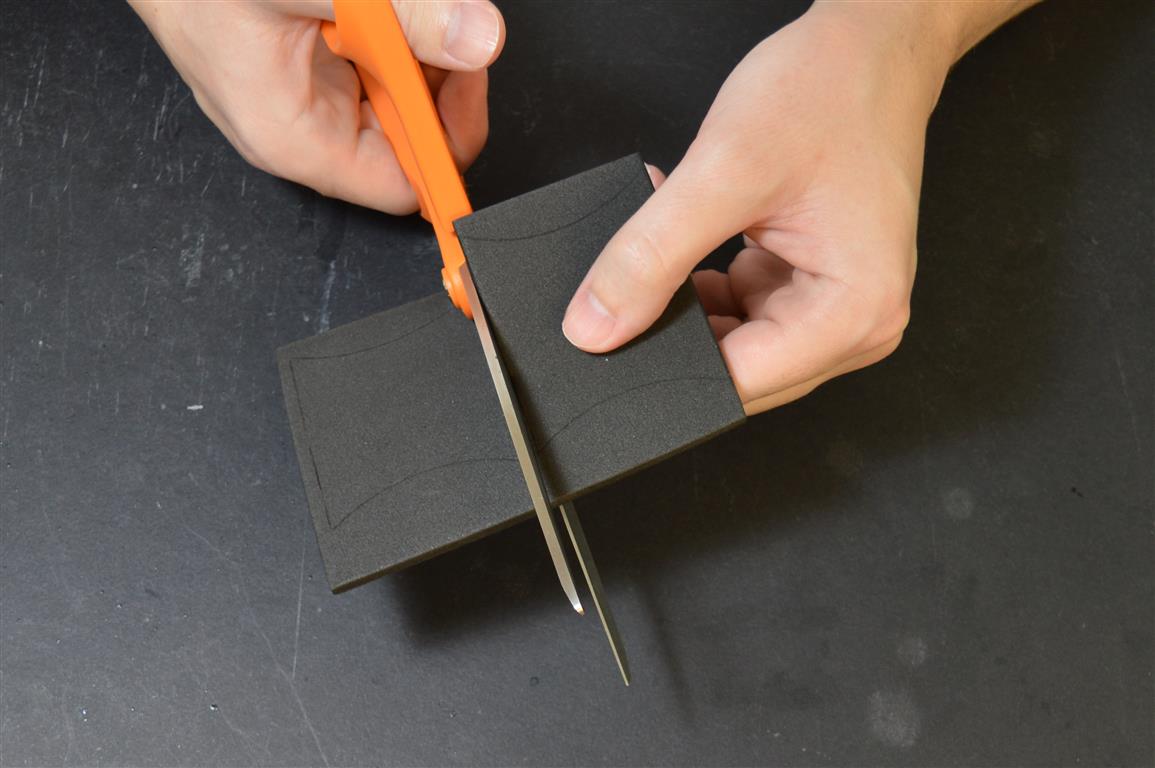
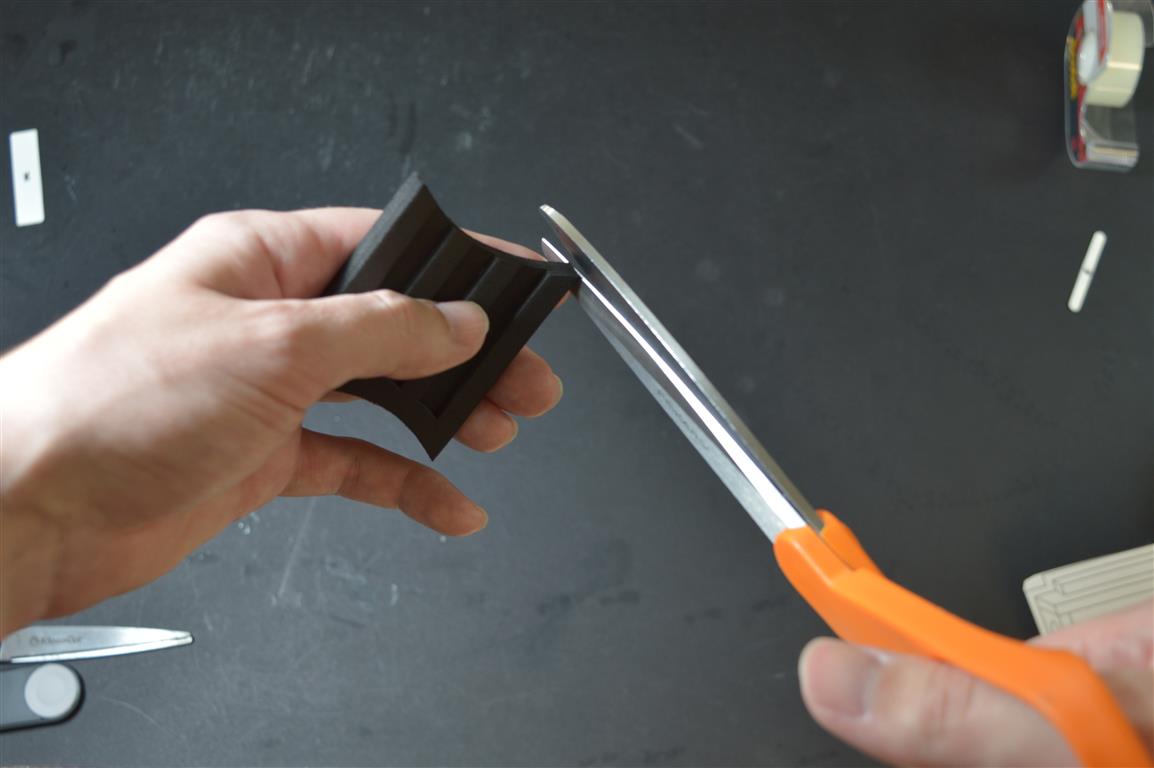
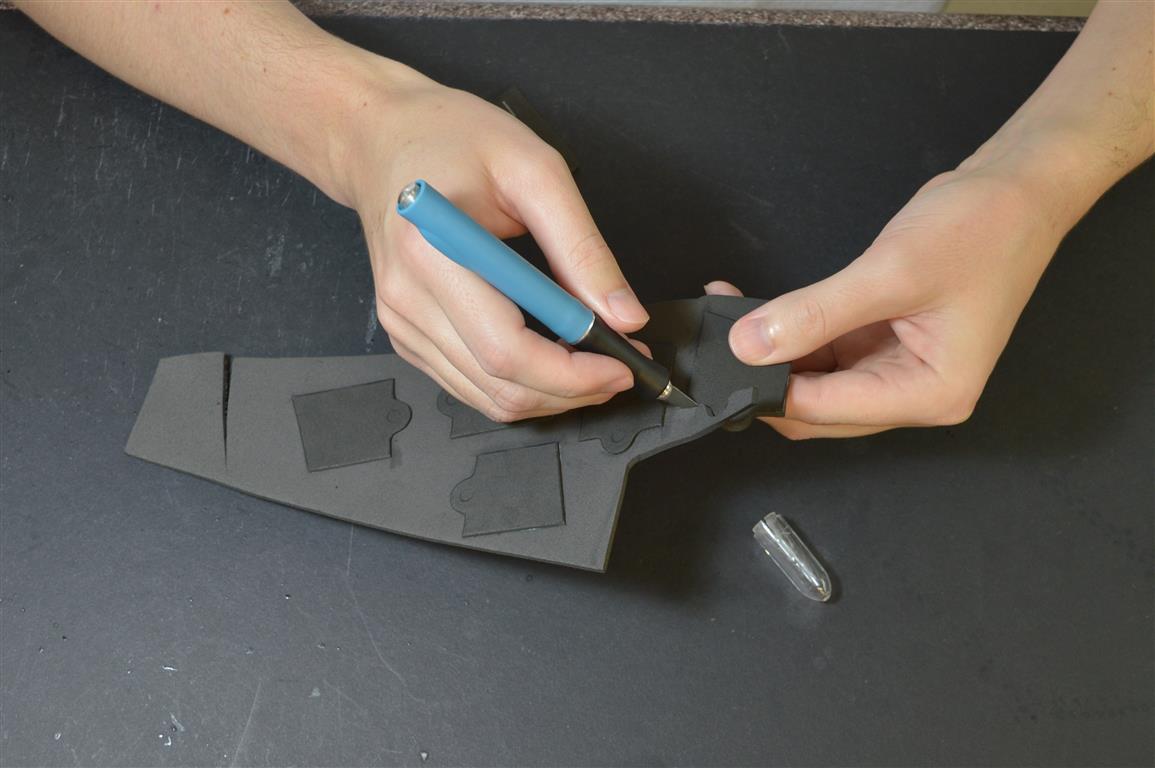
Use a regular pair of office scissors to cut the foam. When cutting the internal sides of piece H, it may be easier to use an xacto knife.
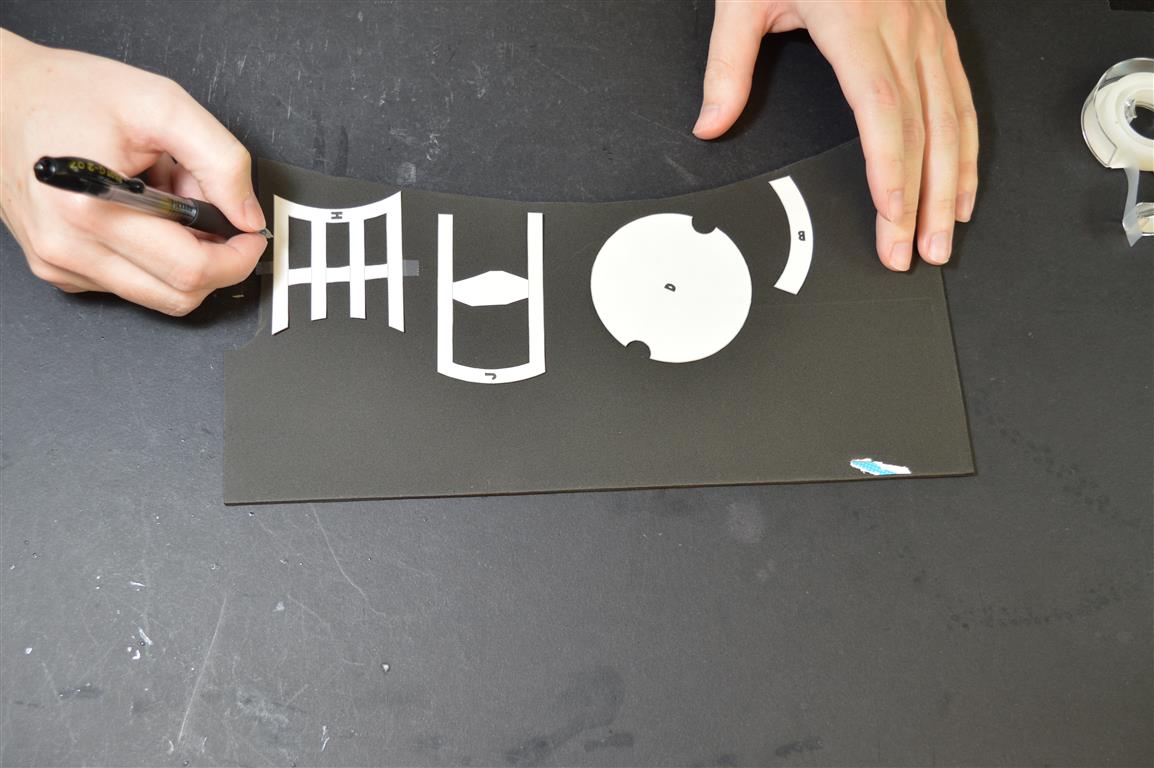
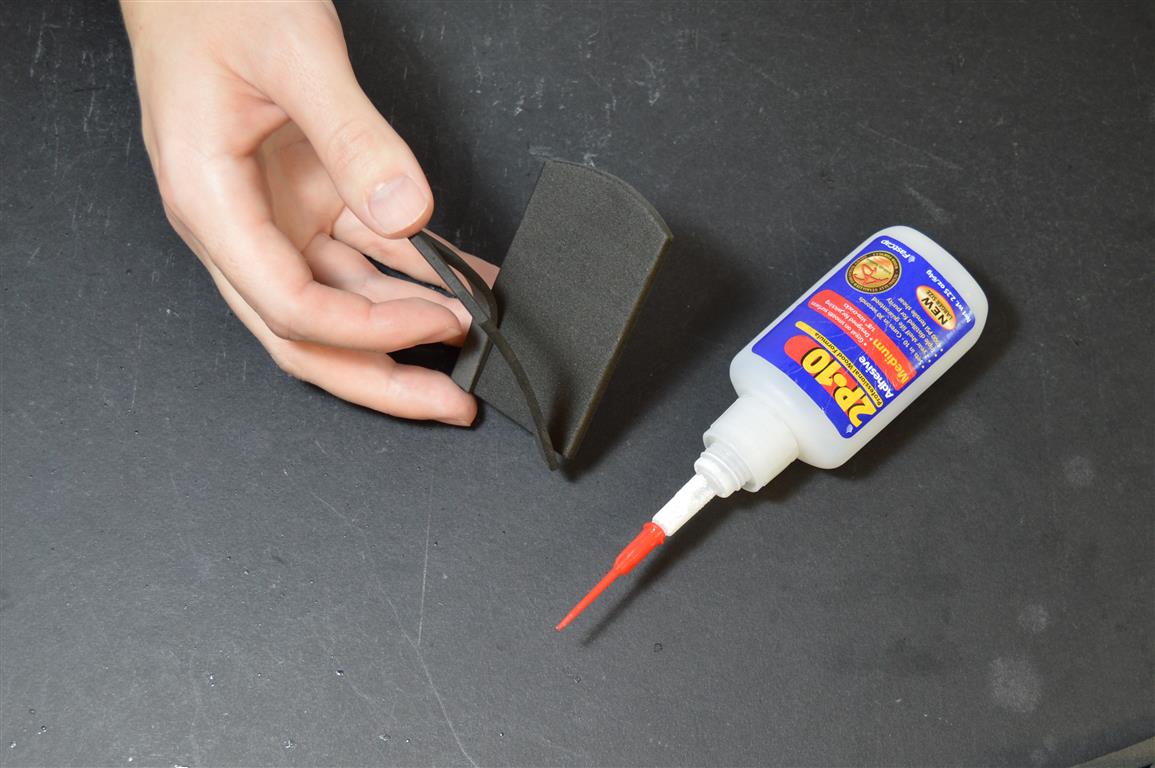
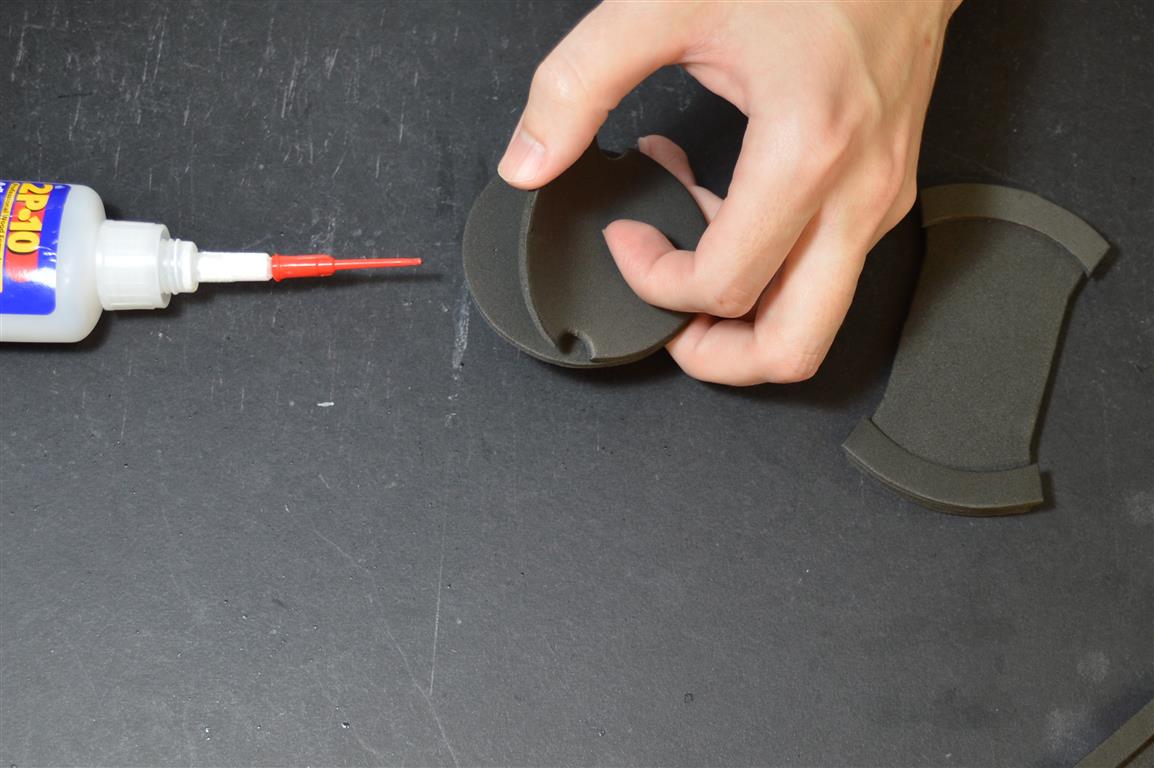
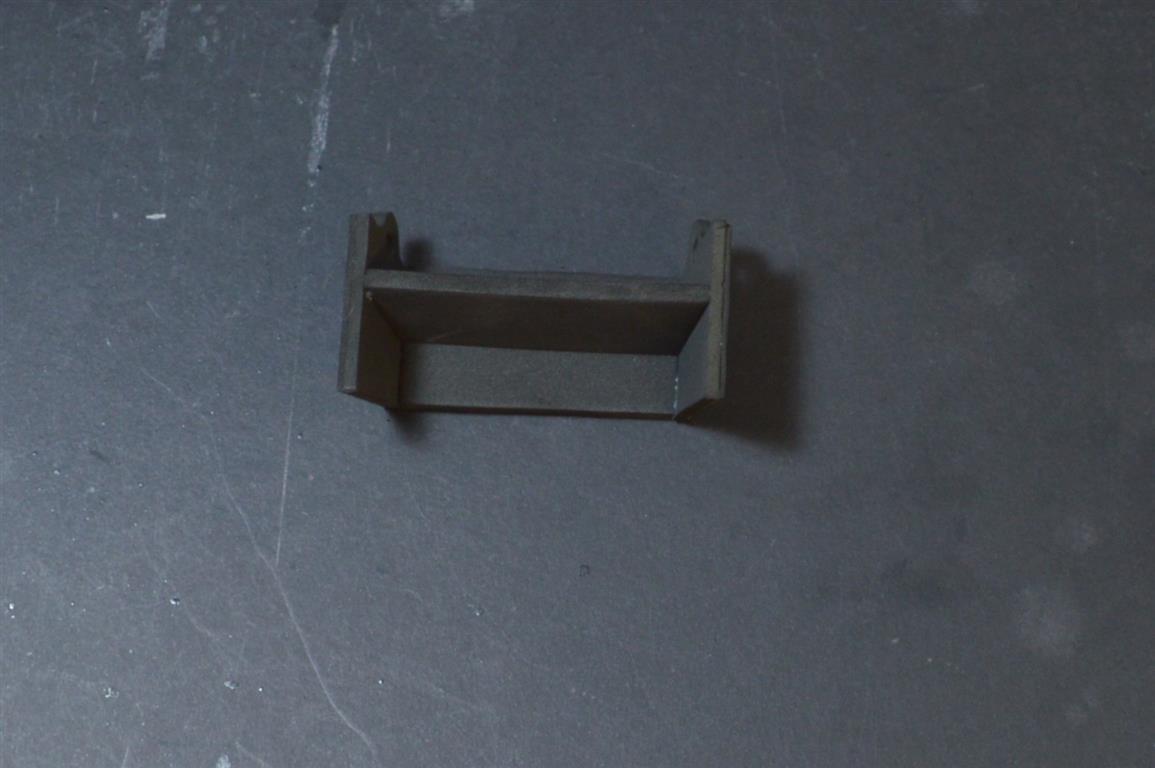
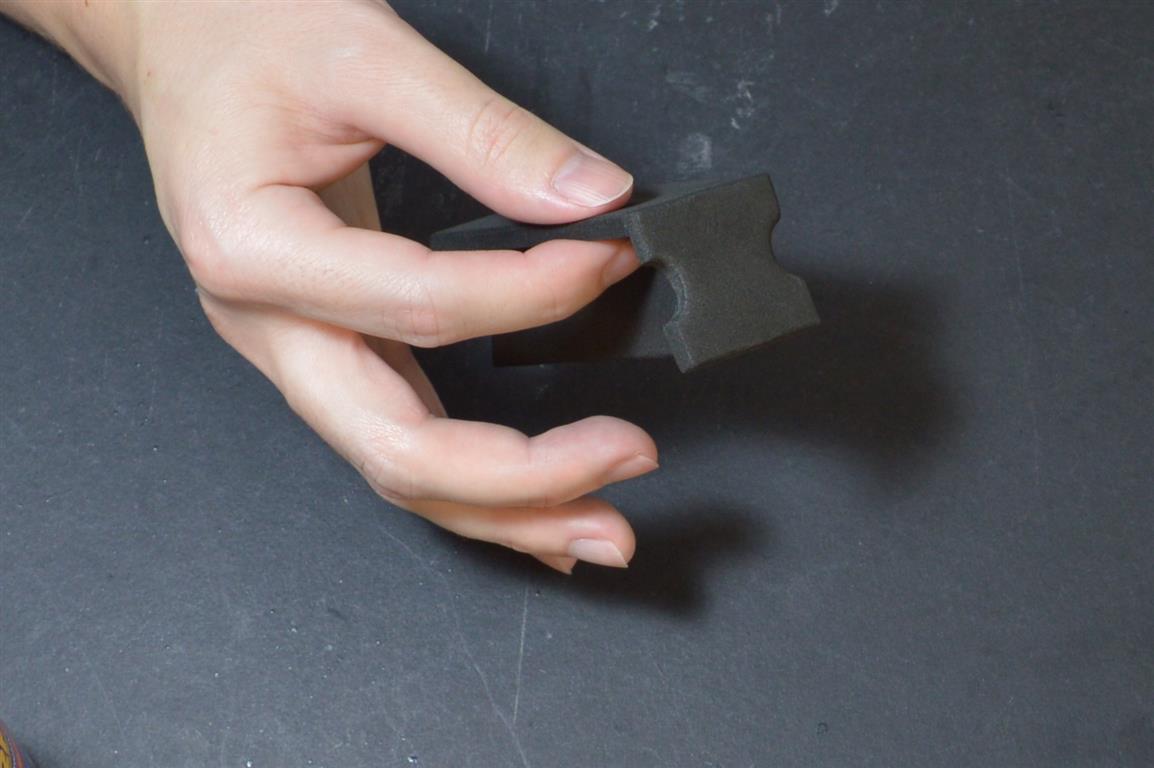
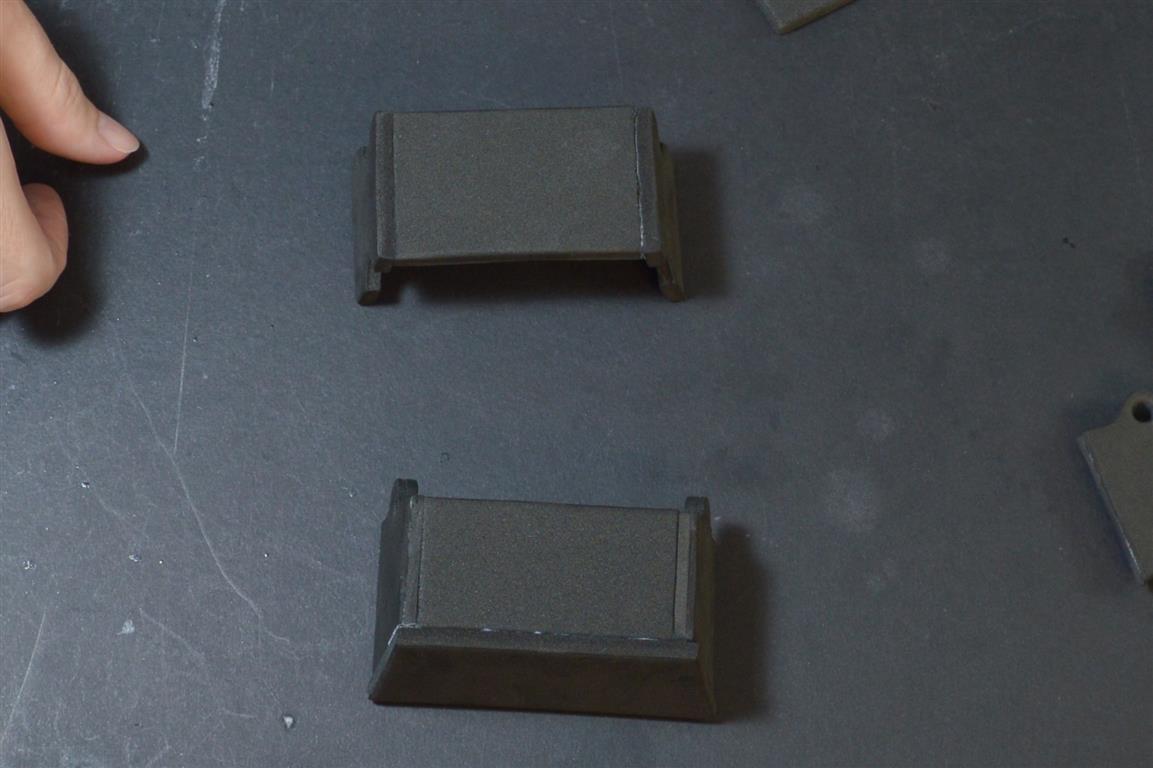
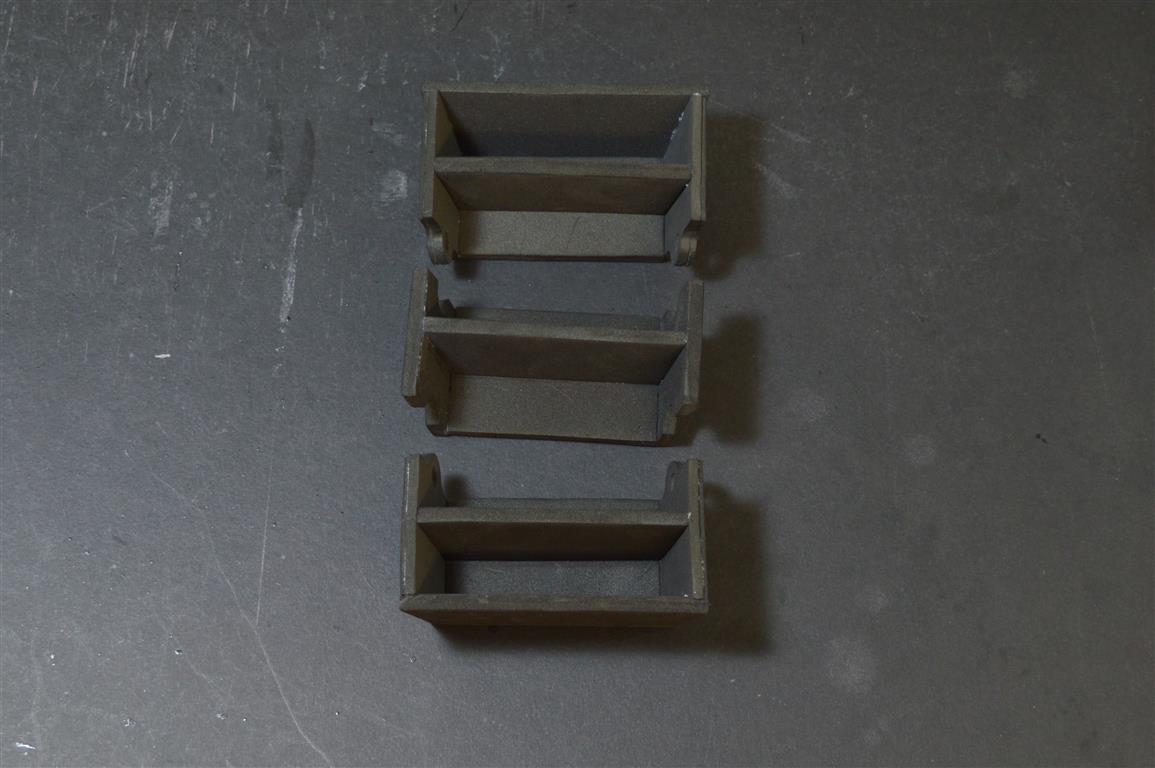
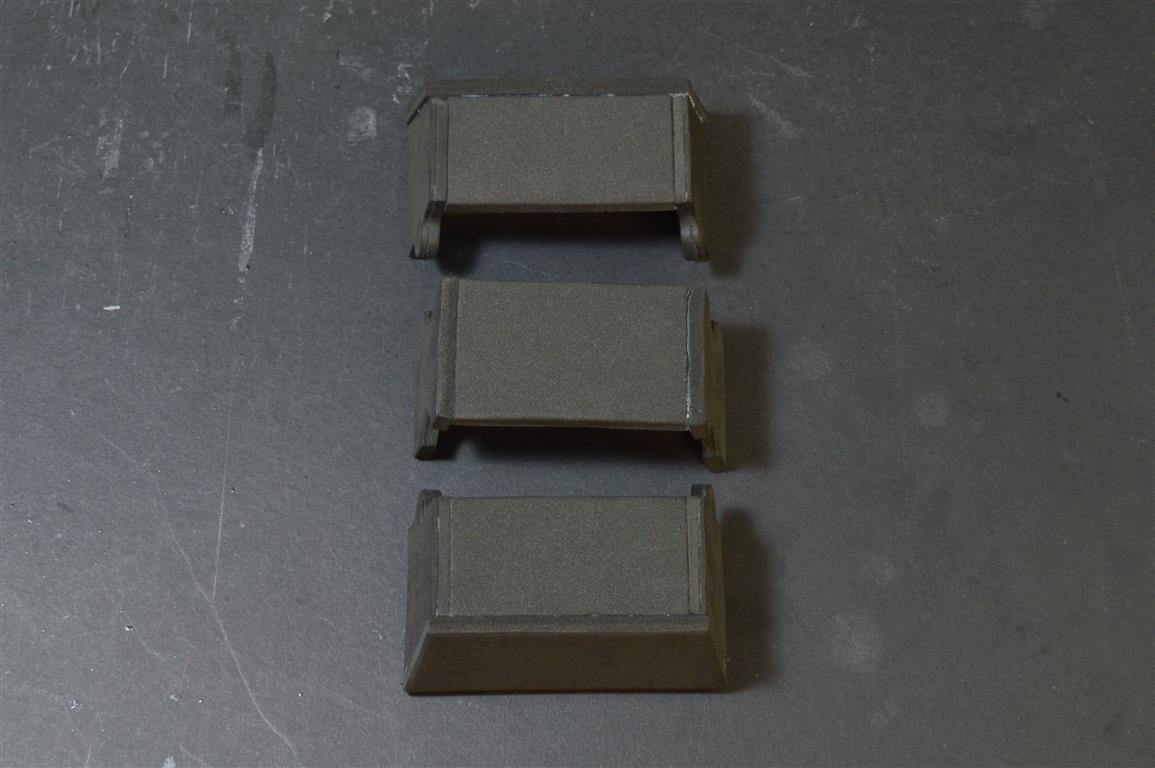
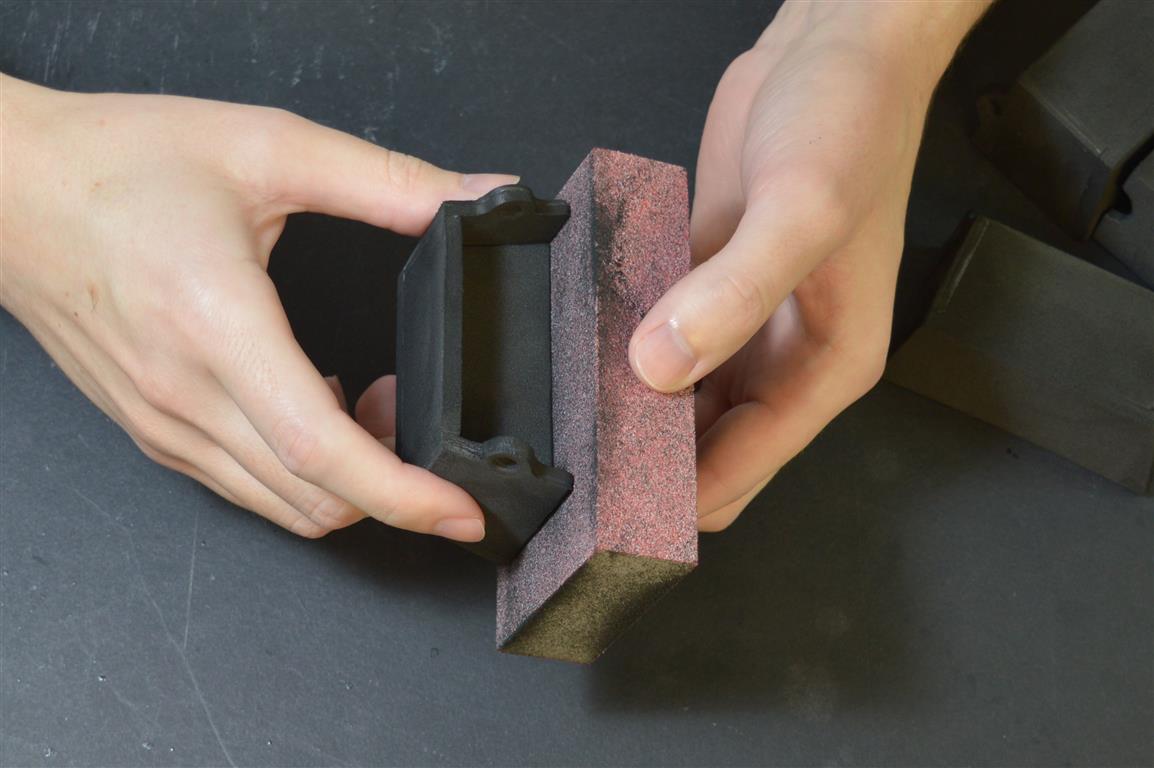
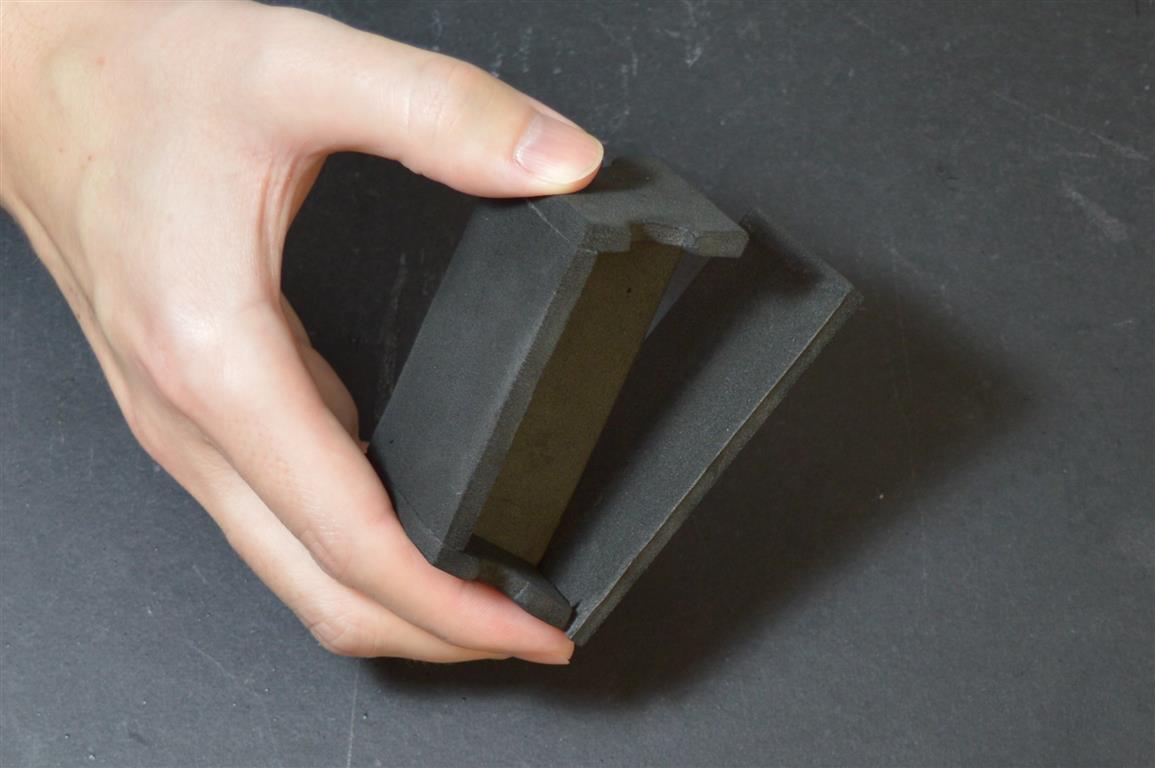
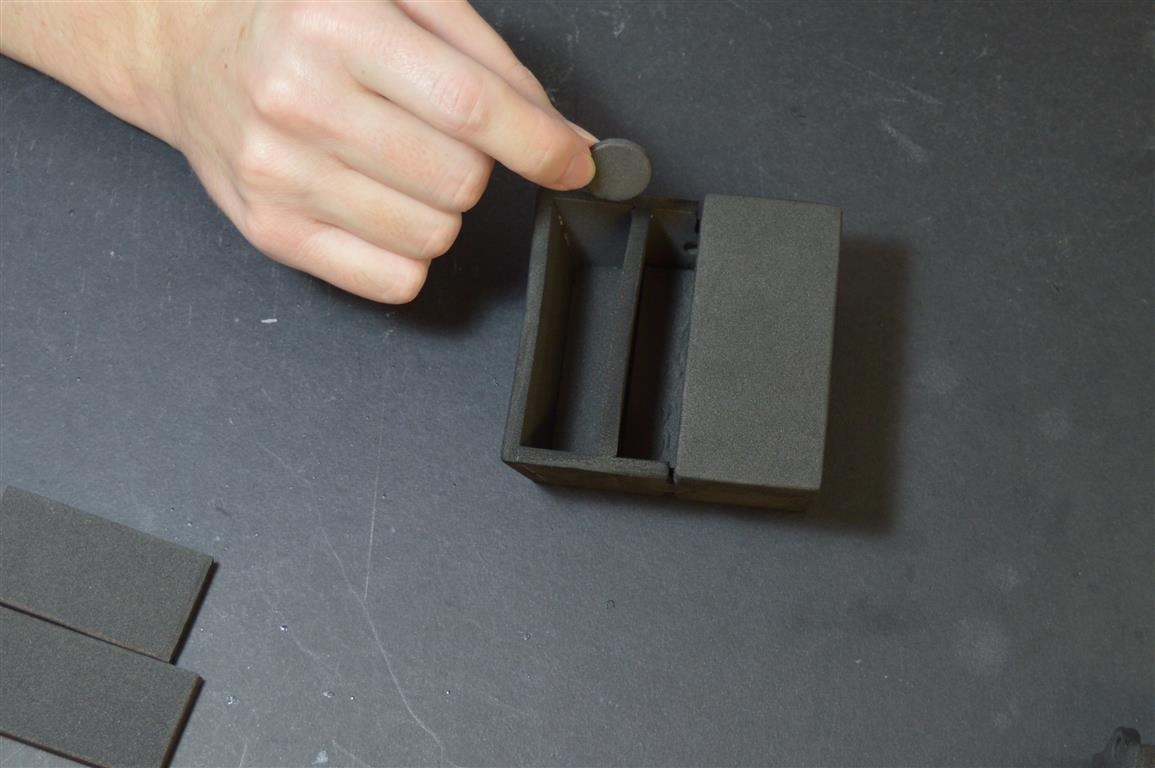
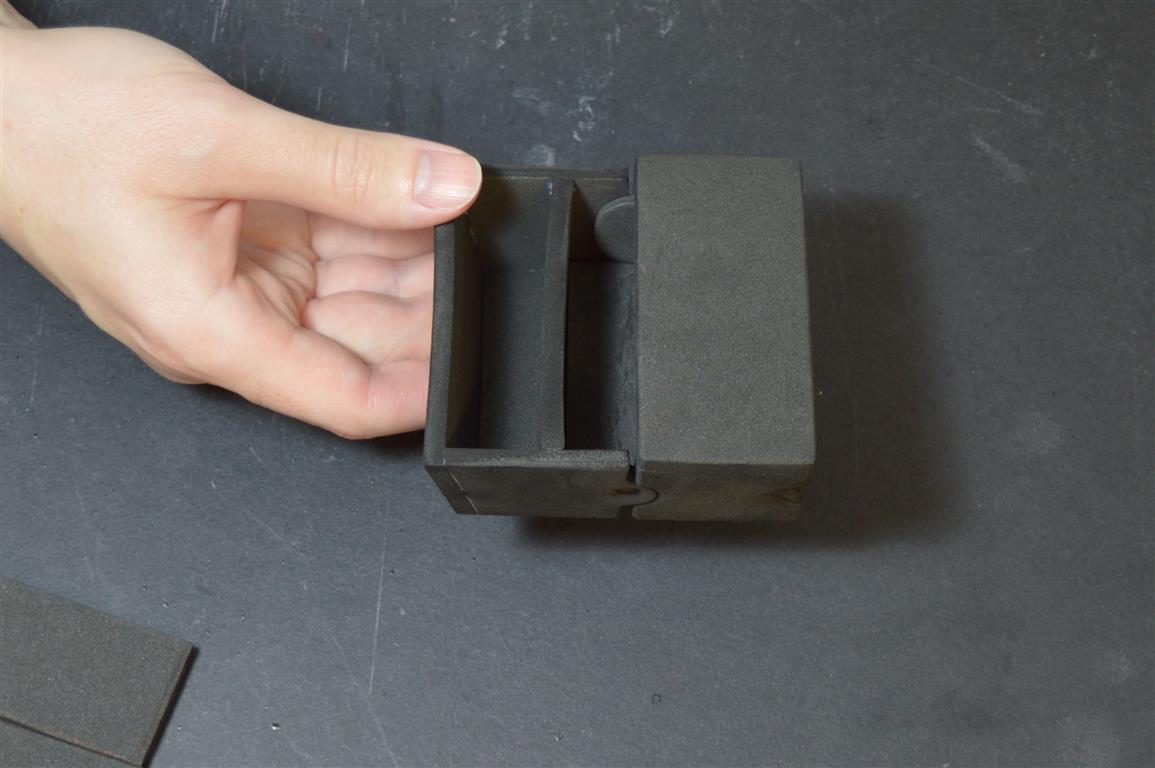
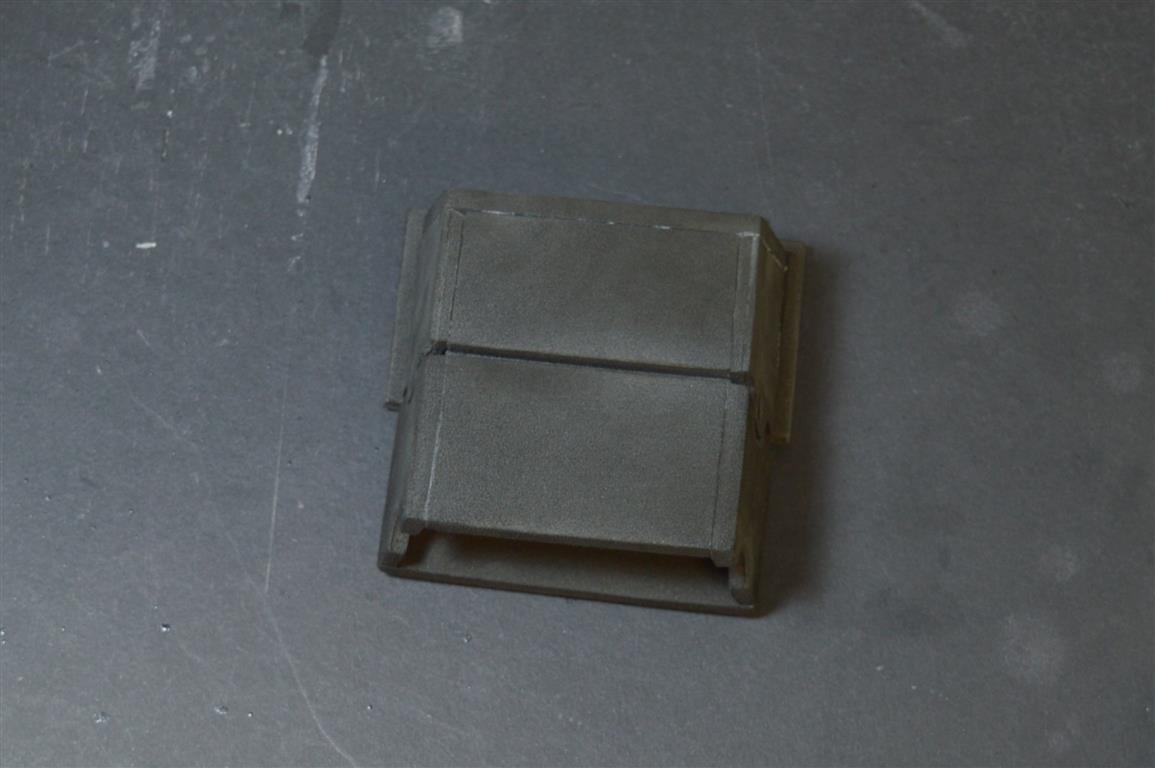
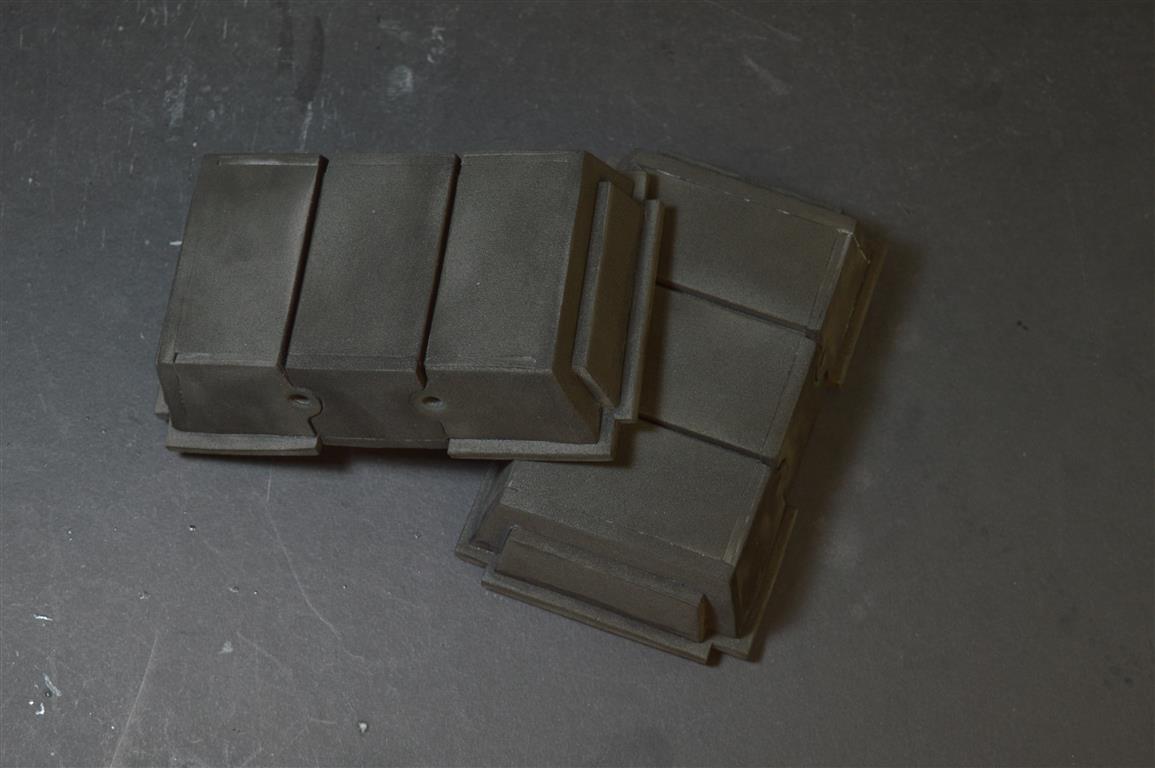
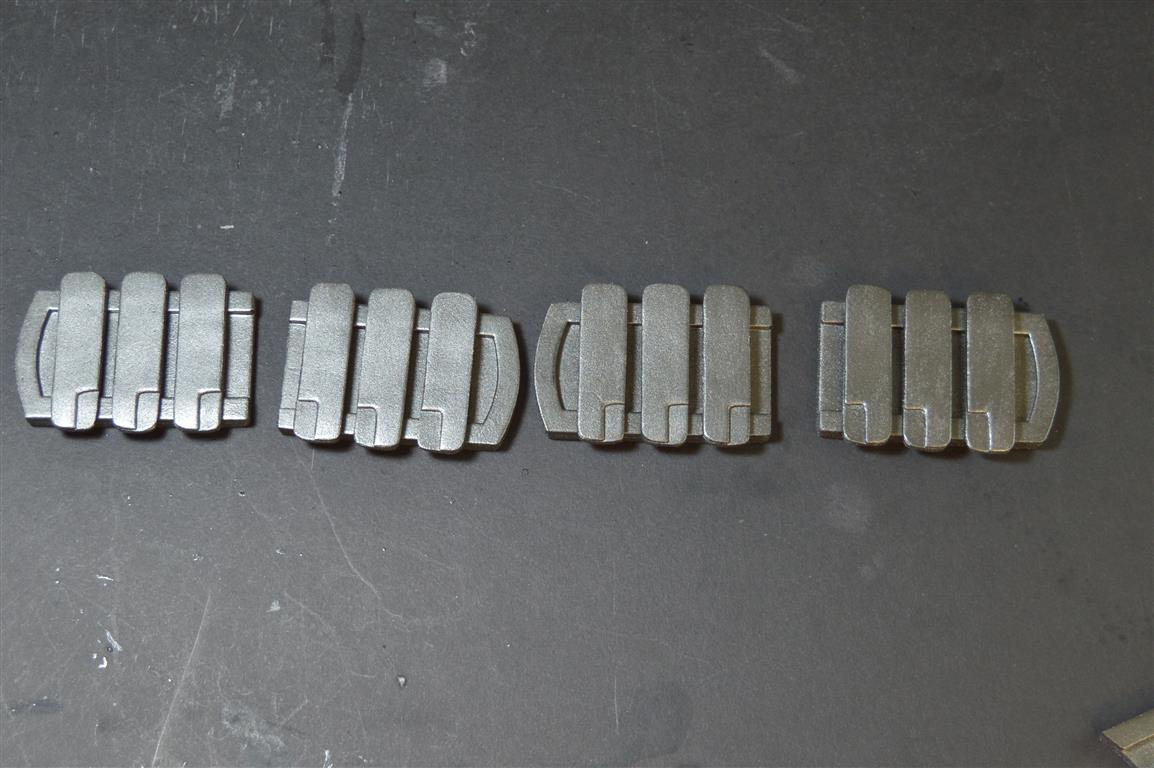
Cut two H pieces out of 3mm foam and two G pieces out of 5mm foam. Glue the H’s on top of the G’s. I like using super glue for all my projects, mainly Rhino Glue and Fastcap 2p10. To help with alignment, lay them on top of each other where they will go first, and then bend back one corner and apply a small amount of glue and then let that dry before finishing gluing the rest of the piece. Do the same with four J pieces (3mm) and four I pieces (5mm).

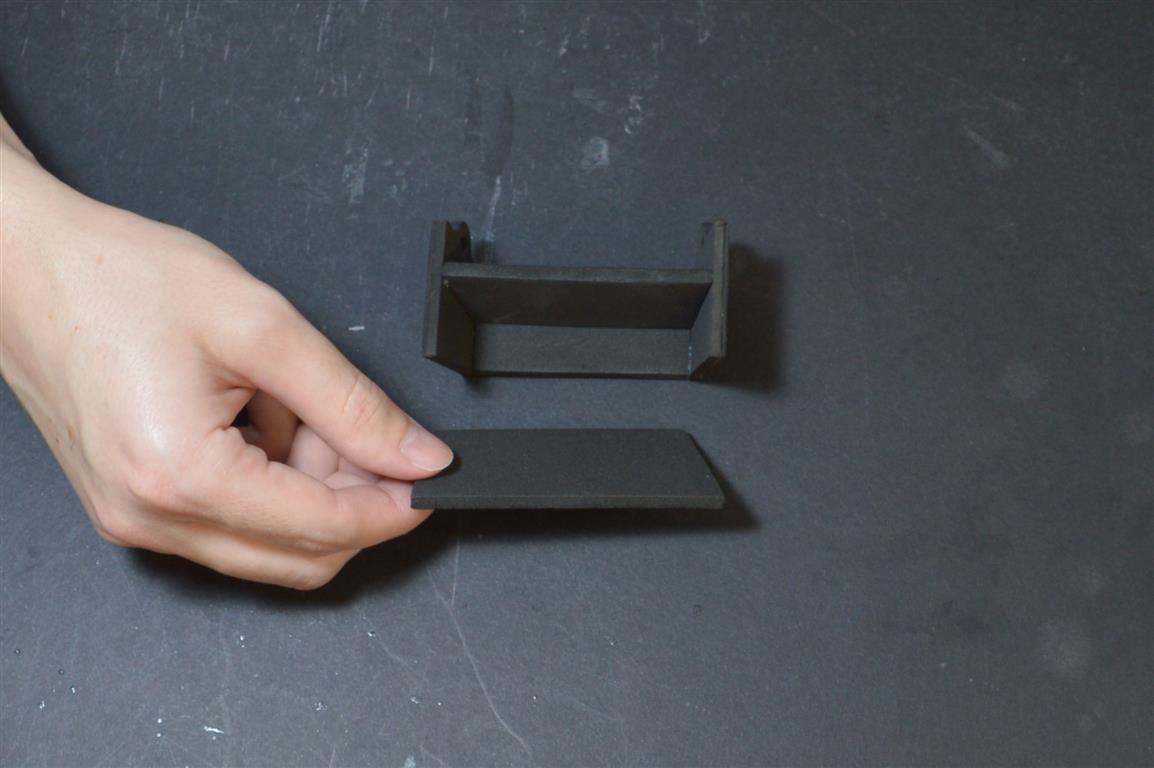
Cut out one A piece out of 5mm and two B pieces out of 3mm foam, and glue the B’s on the top left and right edges of A. Cut the outside shape of D out with scissors (3mm) and then use a hole punch set if you have one for the internal half-circle cut outs. Cut a C out of 3mm and glue D on top of C.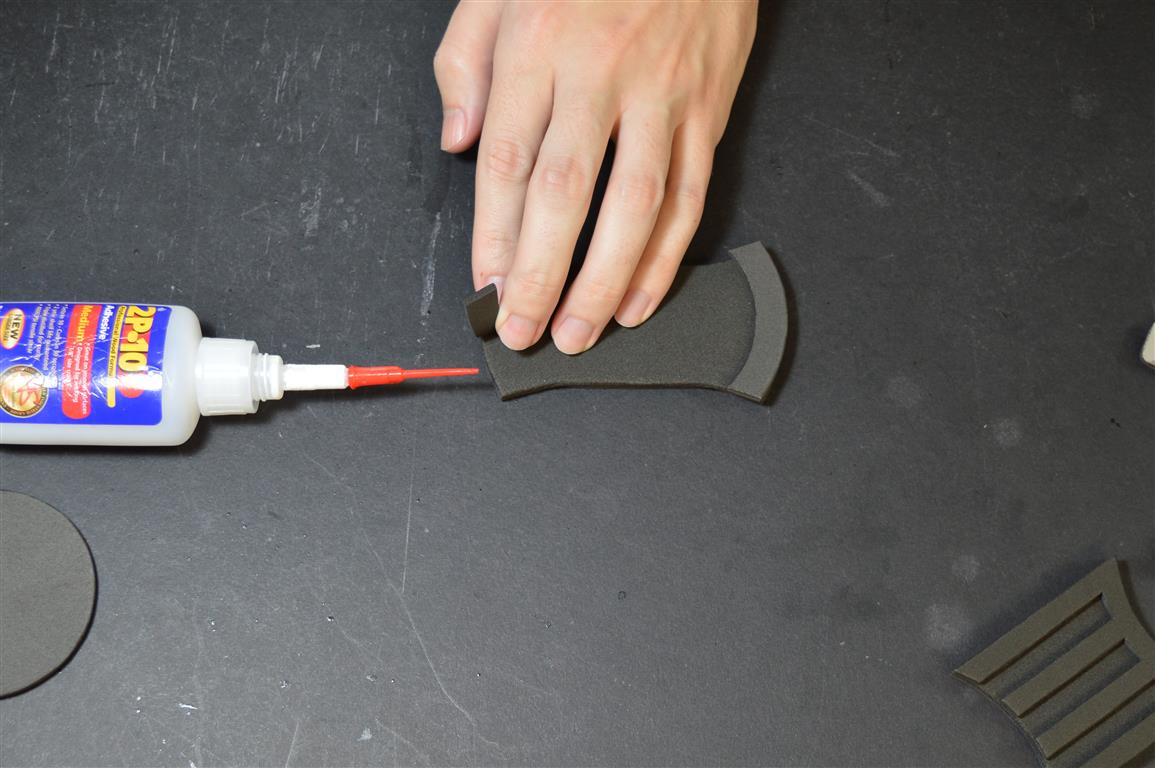
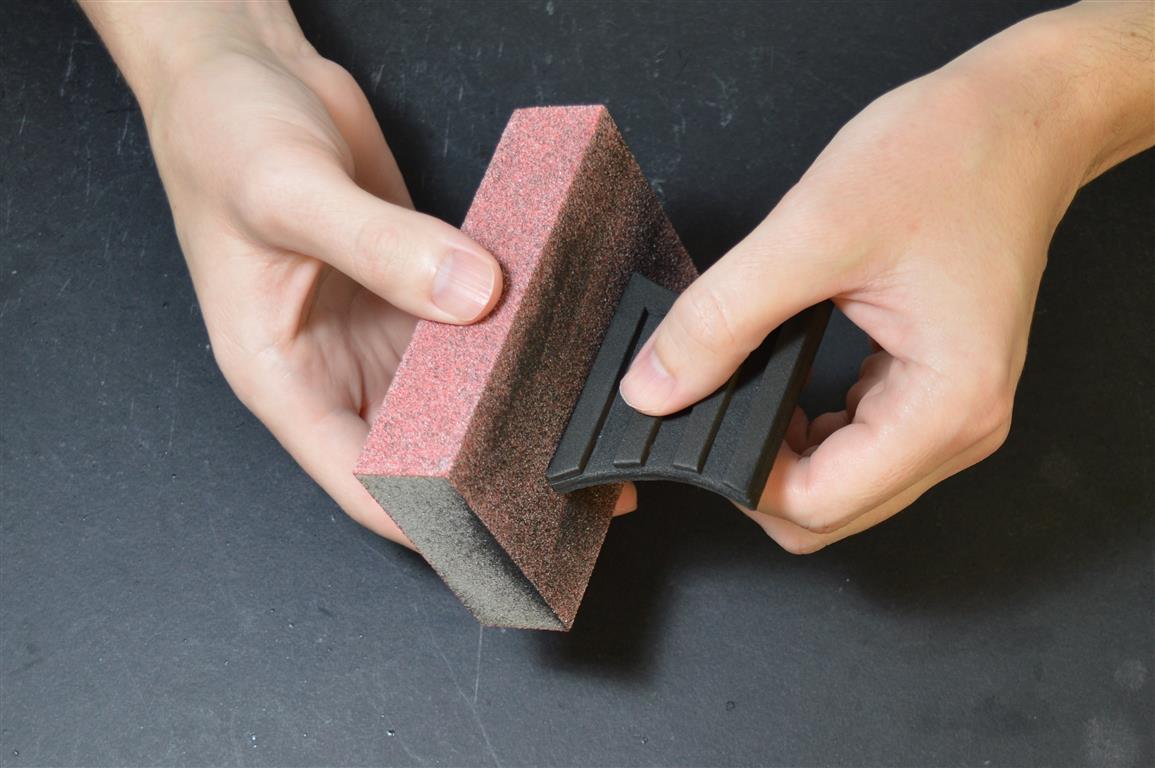
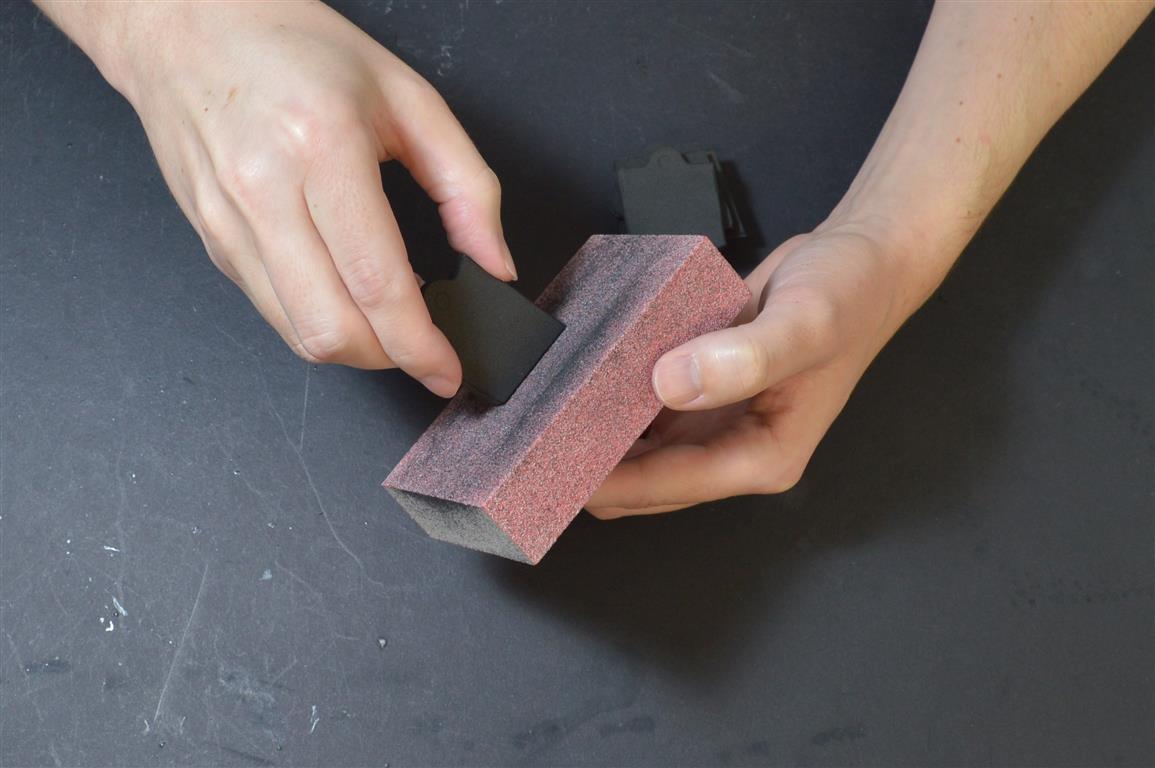
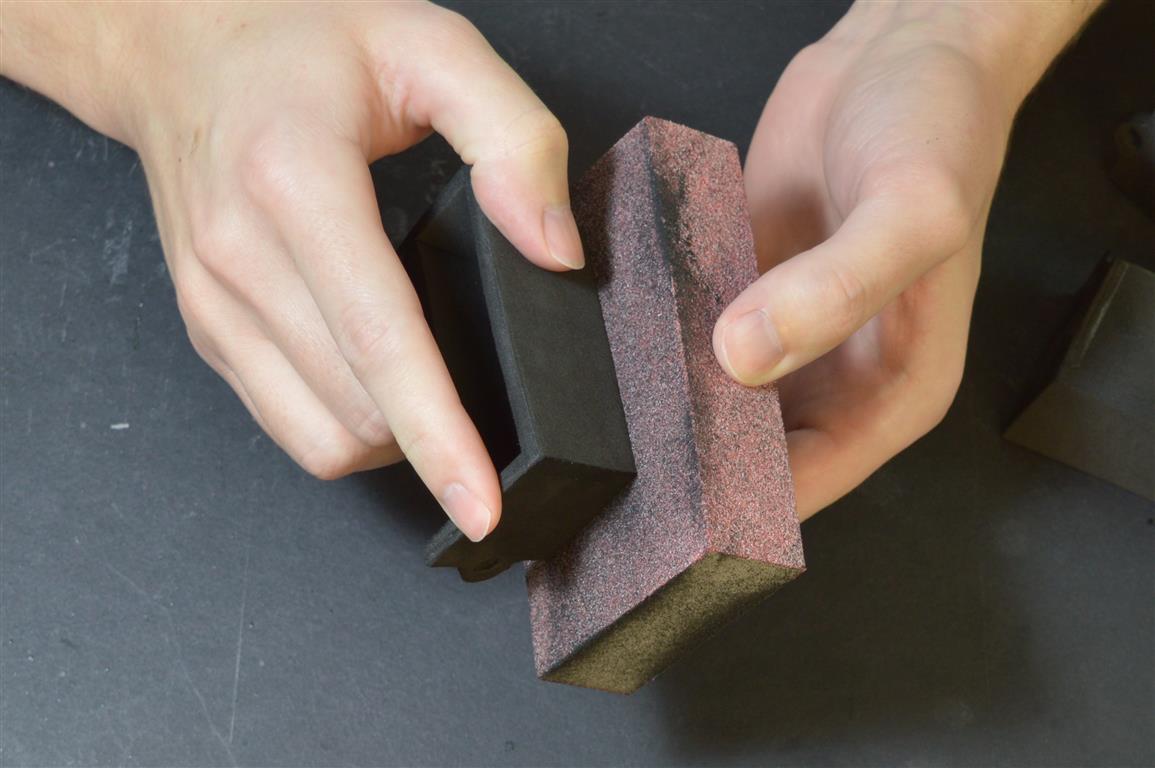
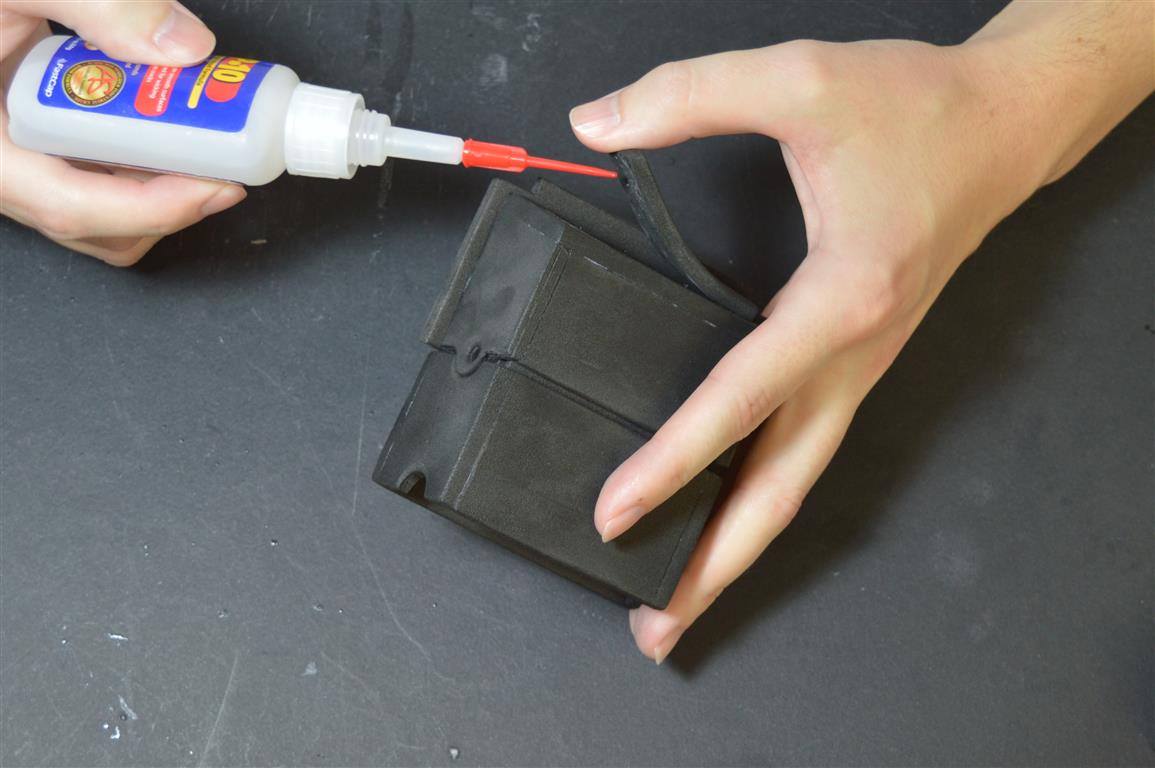
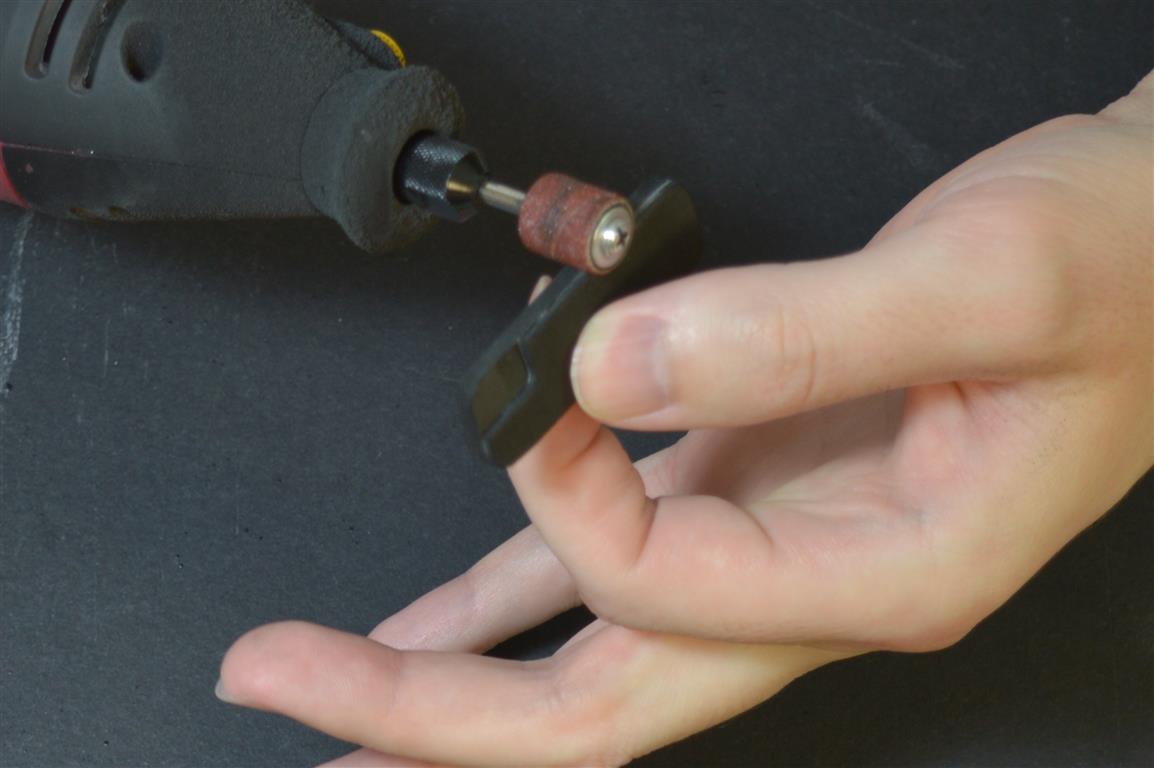
The pieces may need some sanding after gluing to smooth the edges. I normally use a dremel with a sanding bit, but this time I tried some sanding blocks from Home Depot. They worked pretty well, and I especially liked that they maintain a nice straight, wide edge, unlike a dremel which can leave an uneven surface. I think I picked up an 80 grit and 180 grit version. For the internal curves I did need to use the dremel, and then I used scissors to trim any frayed edges.

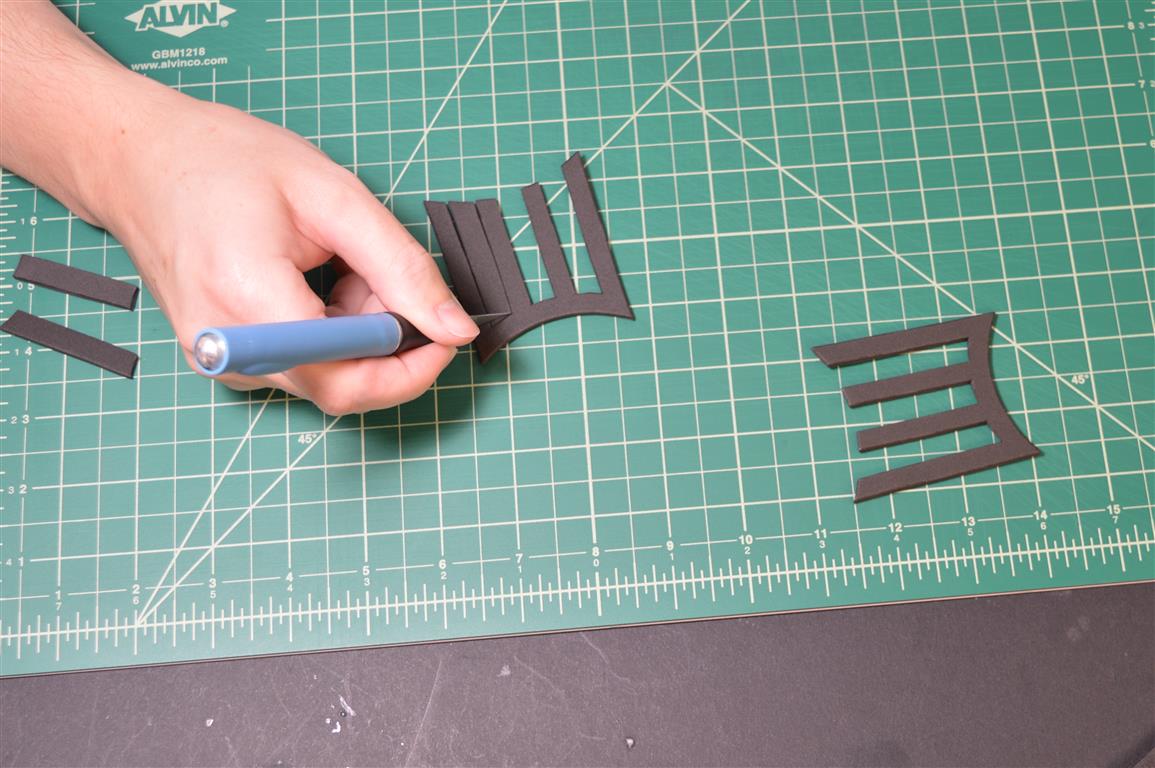
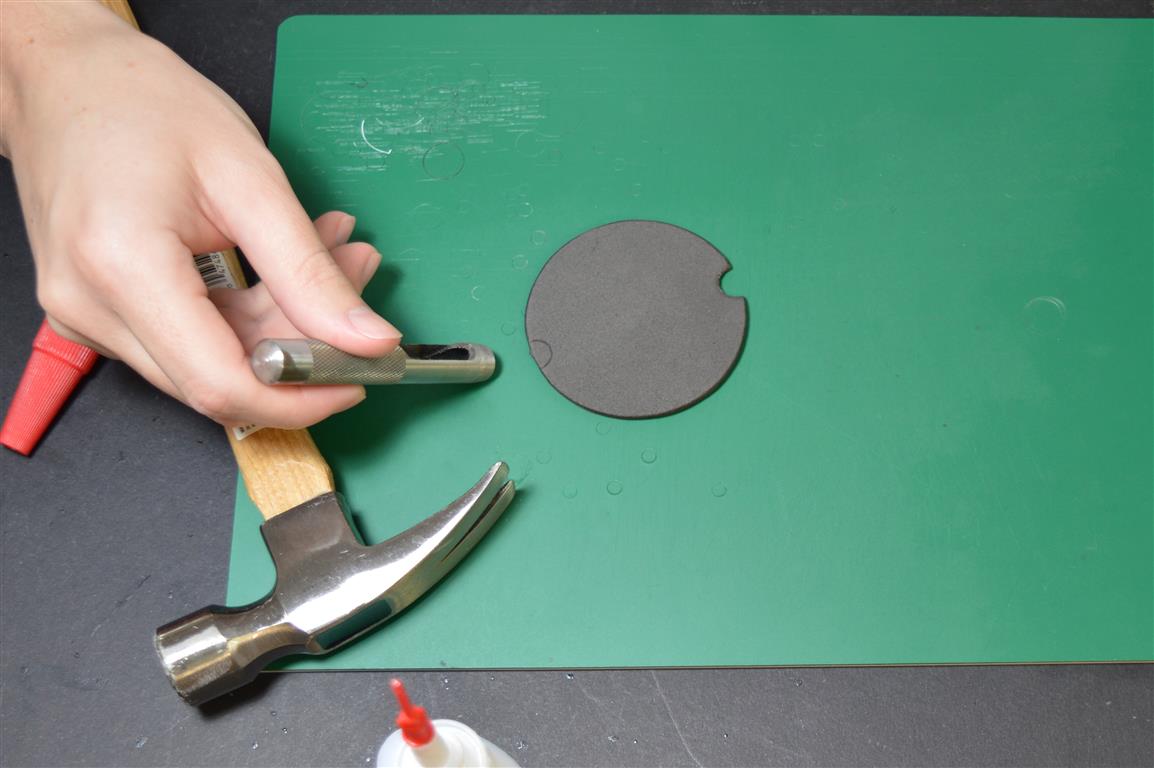
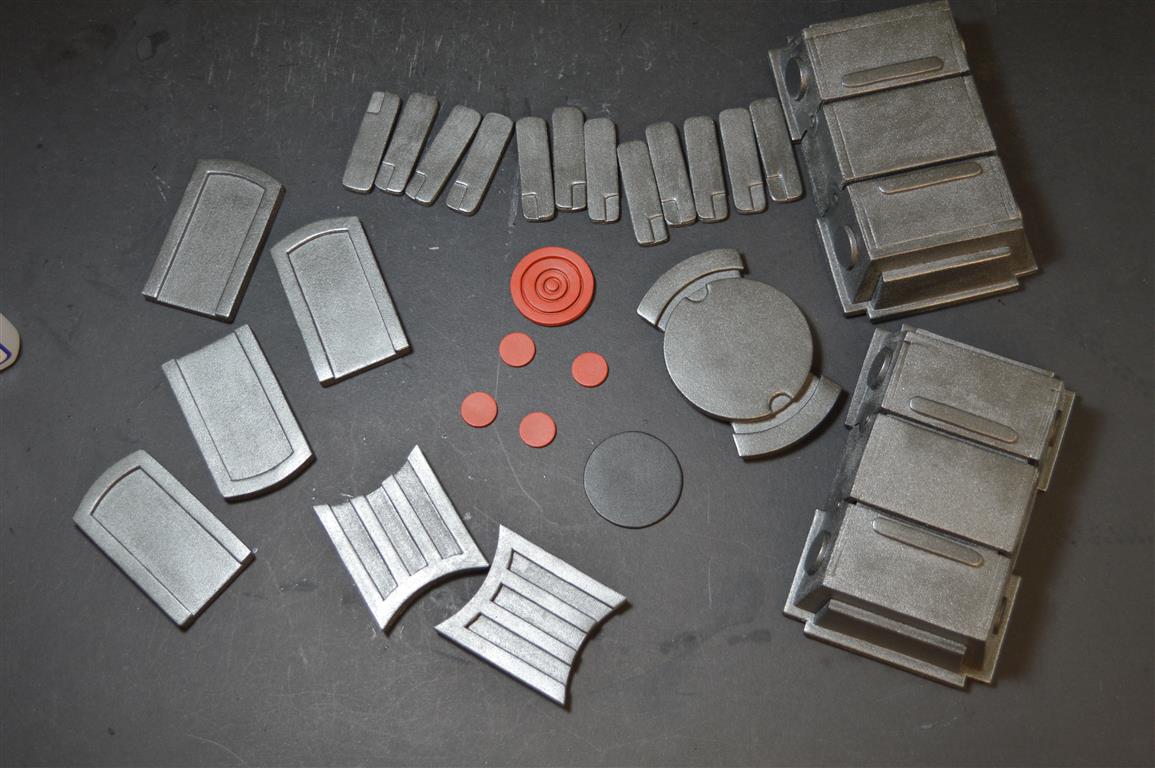
You can use the punch set again to make all the small circle shapes, 8 W’s out of 2mm and 4 V’s out of 3mm. Most of the M through U pieces should be 5mm (except P which is 3mm) to ensure they fit together properly. N may be too difficult to cut out of 5mm due to the tight curves at the bottom, so for that piece you may want to cut it out first in 2mm foam and then glue it to a sheet of 3mm foam and then cut it out again using an xacto knife, to end up with a combined 5mm piece. It can then be sanded as before, and the hole punched.


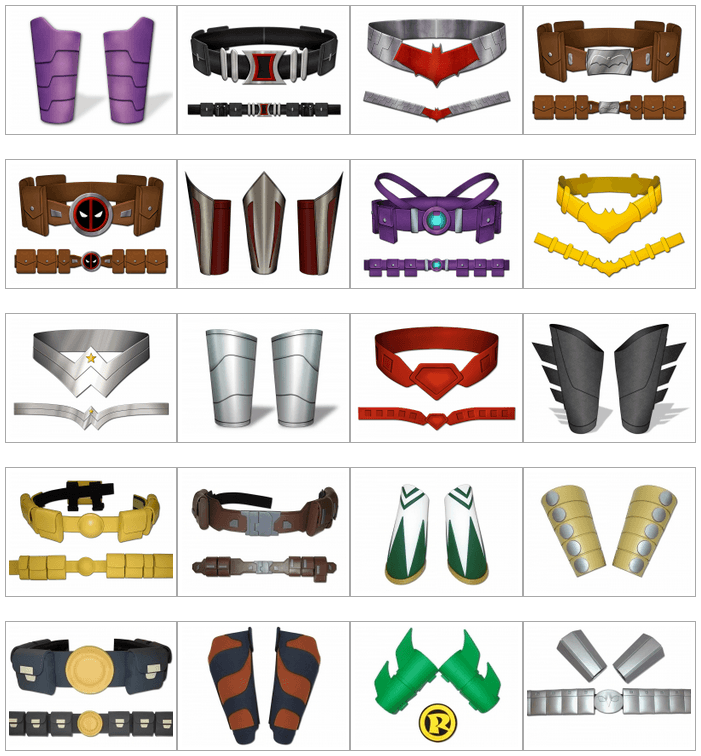
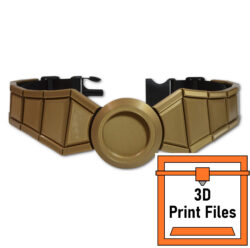
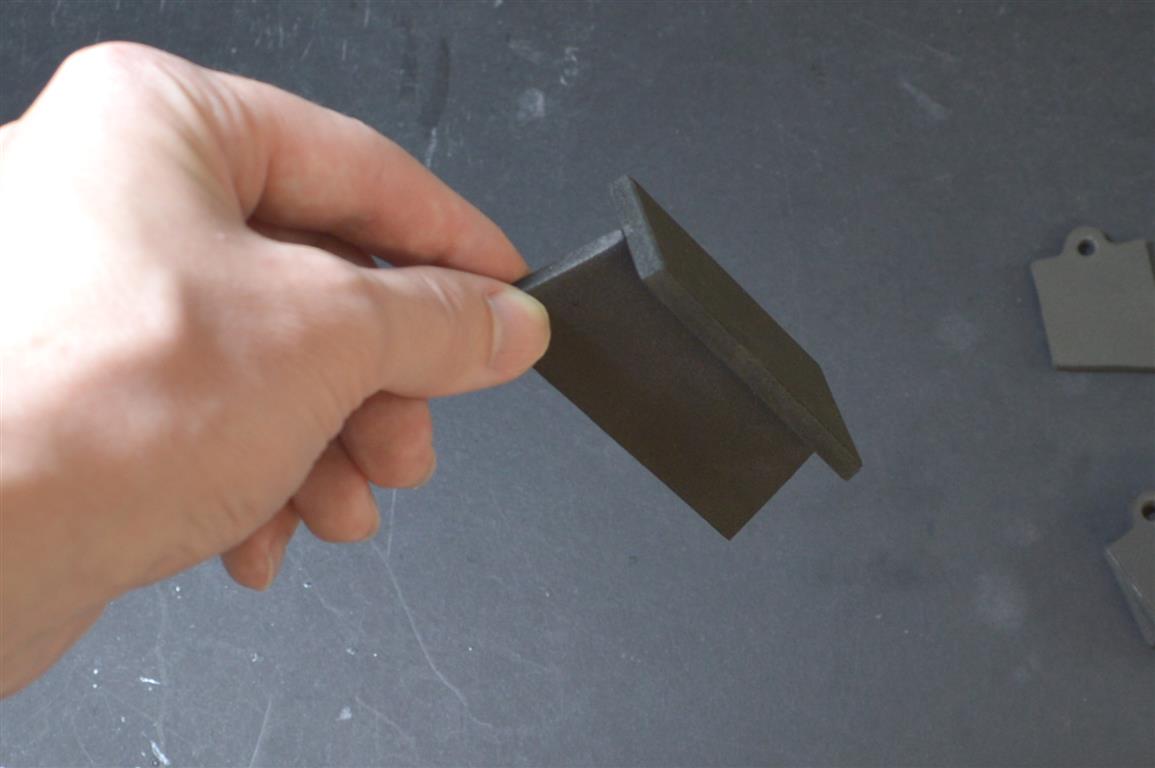
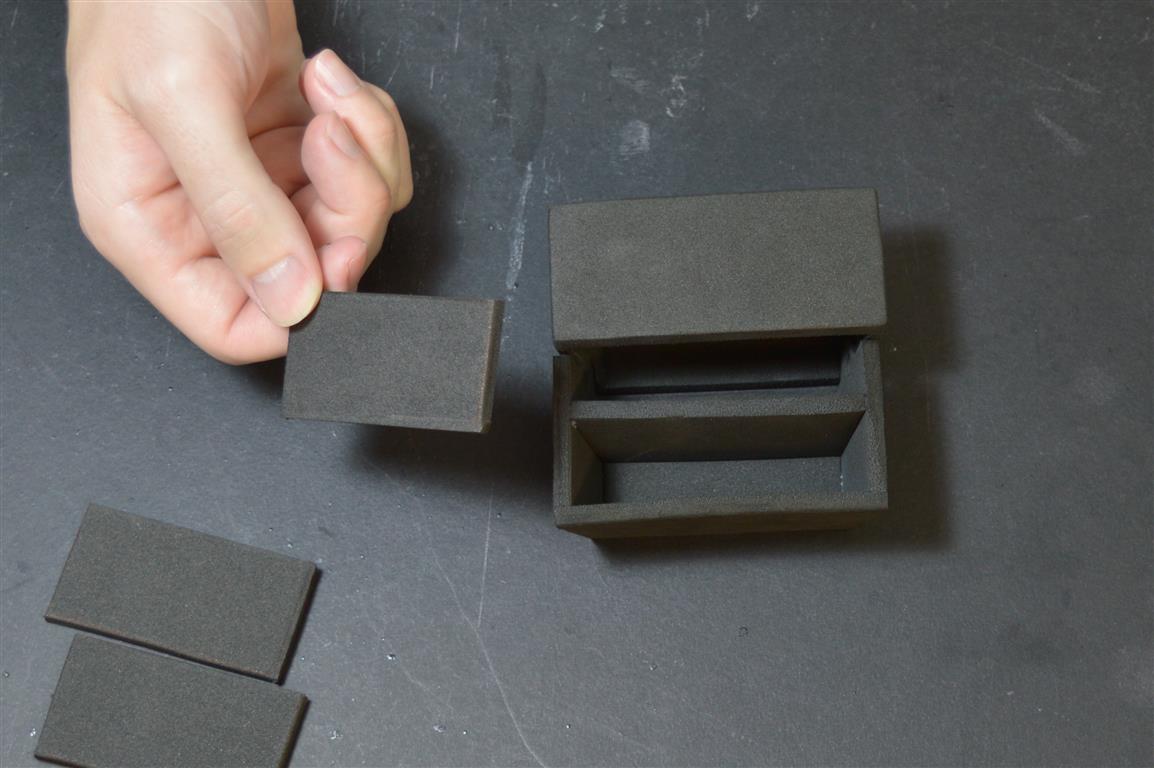
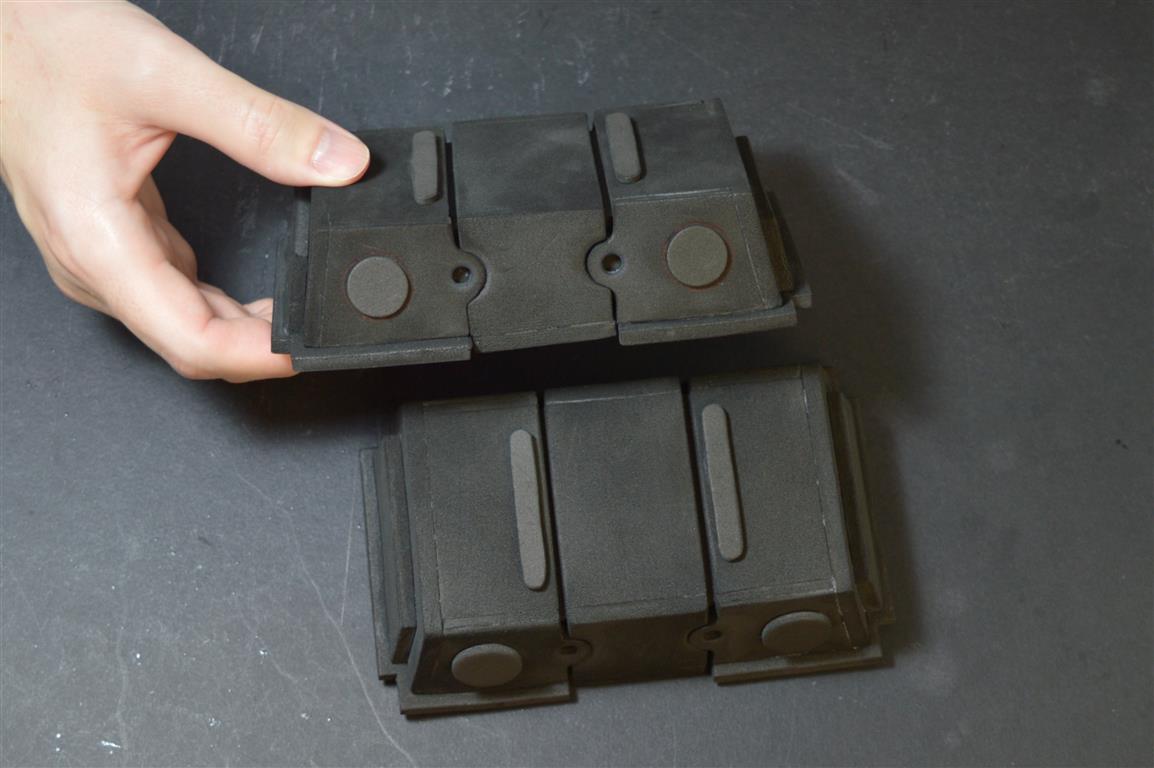
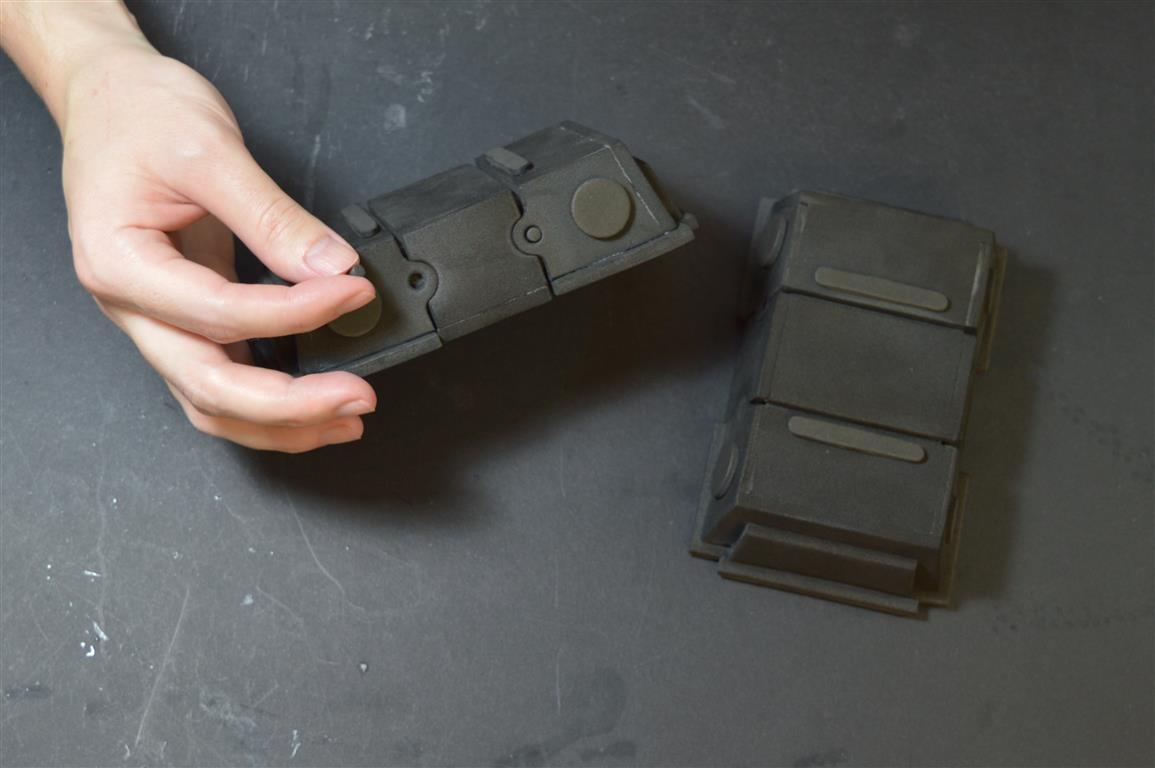
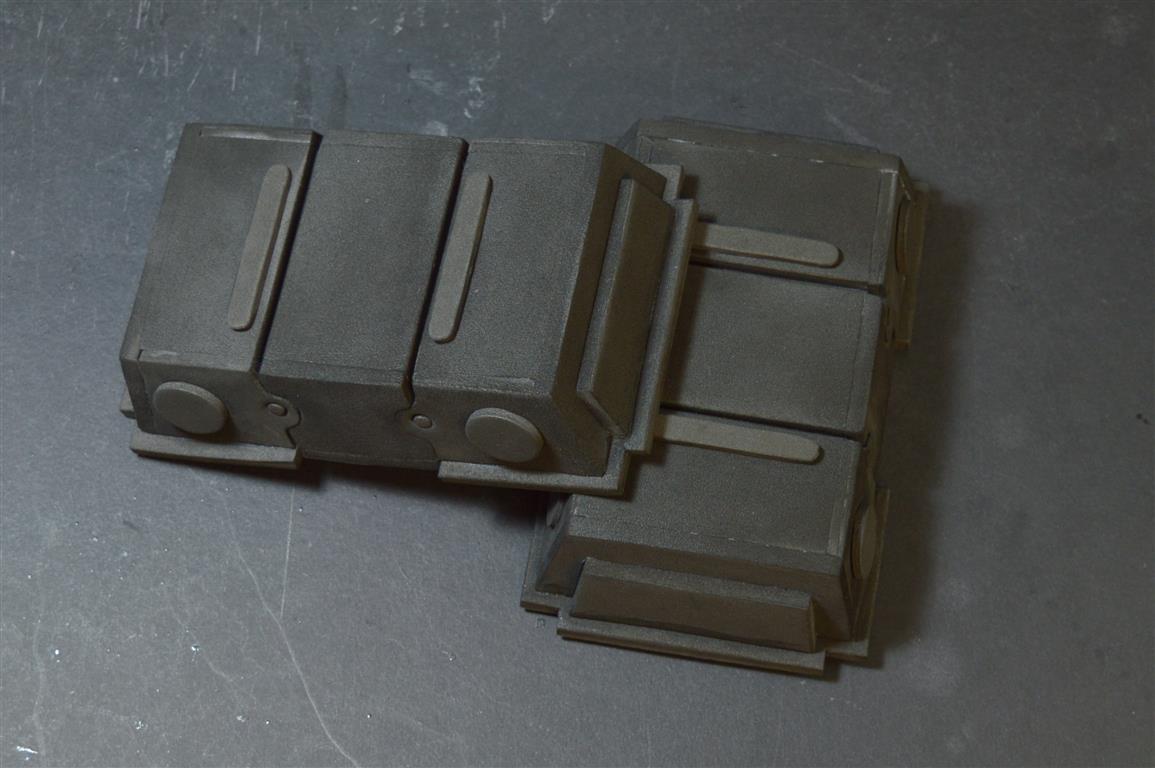
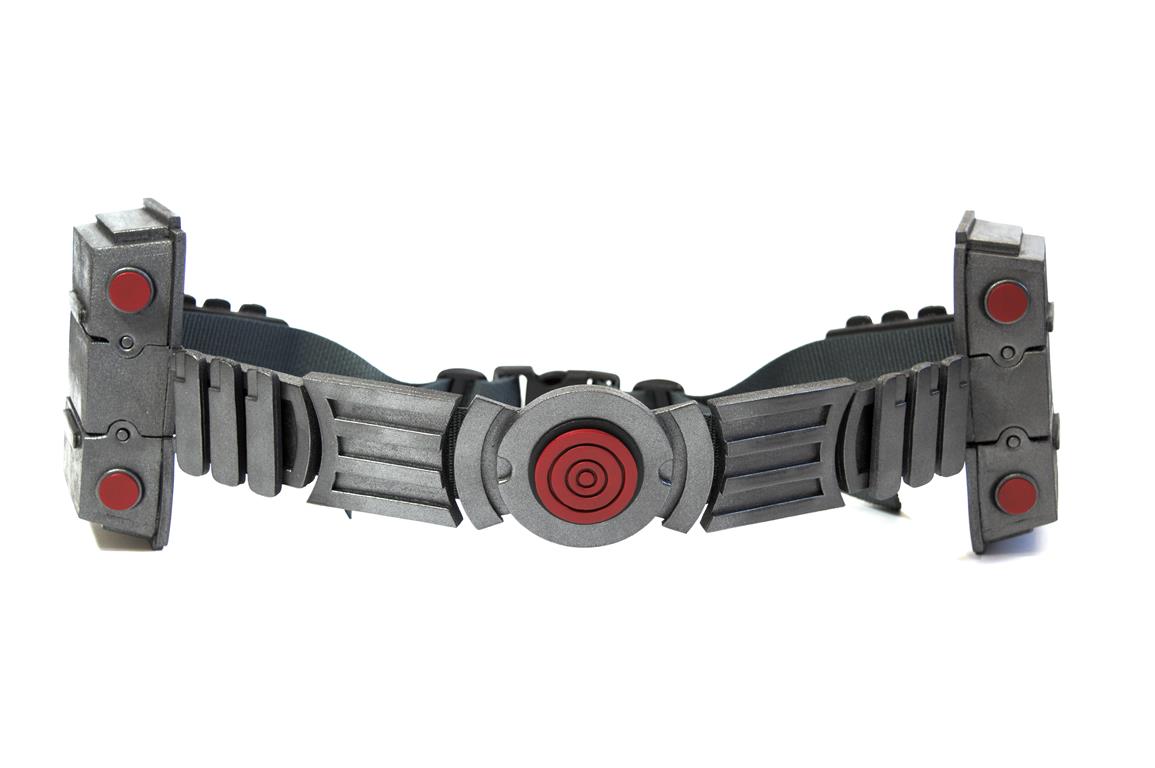
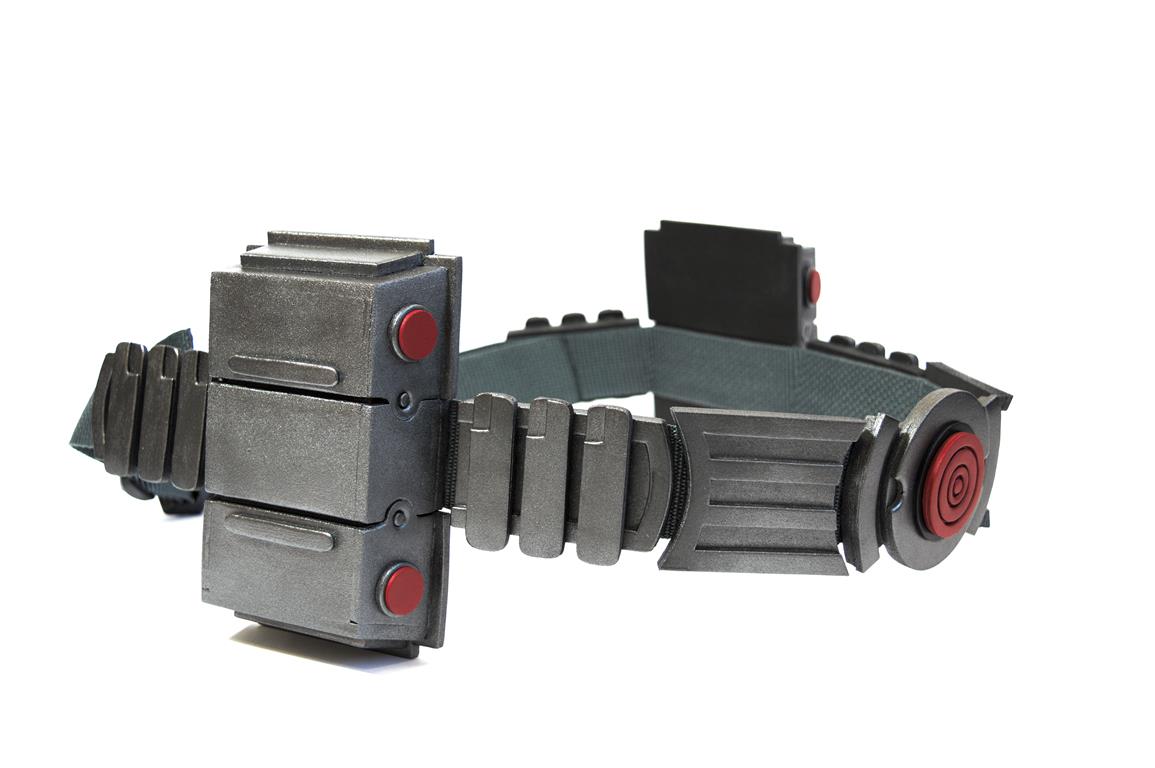
Glue one Y perpendicular to the middle of one O. Next glue an N onto both sides, and finally one Q on top. When gluing, make the N’s and Q as flush as possible with O. Repeat the steps to make one more identical piece.

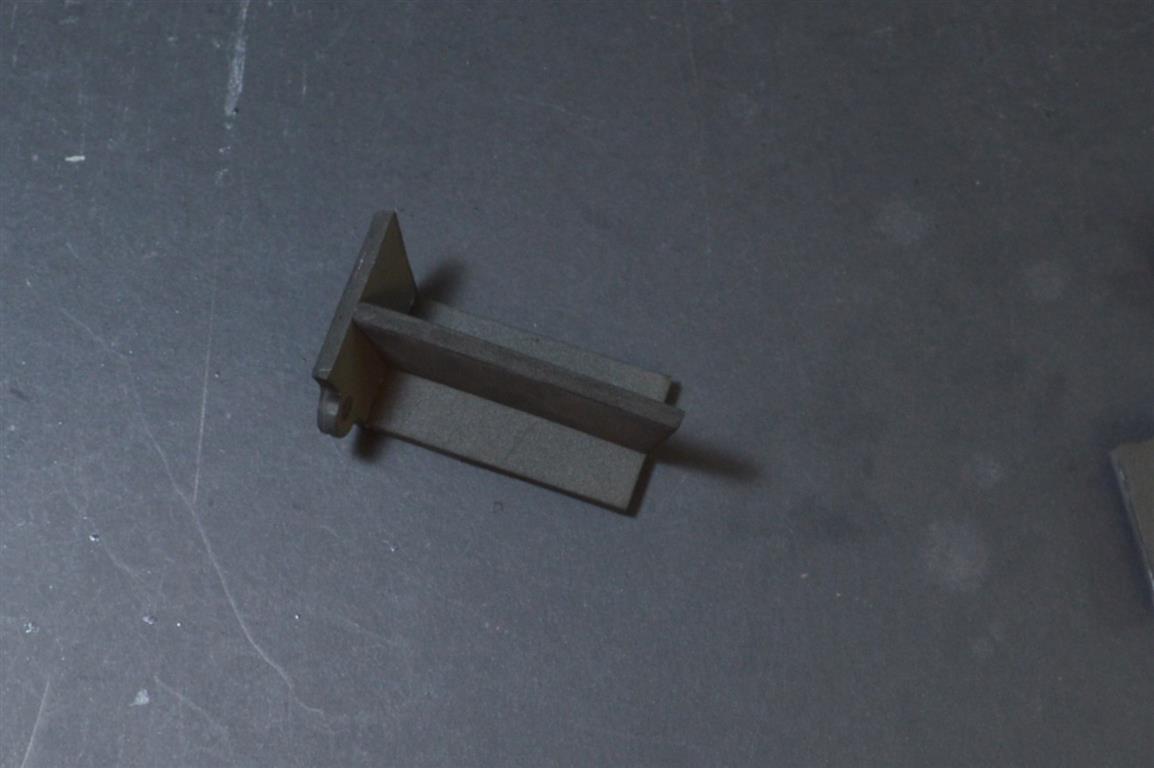
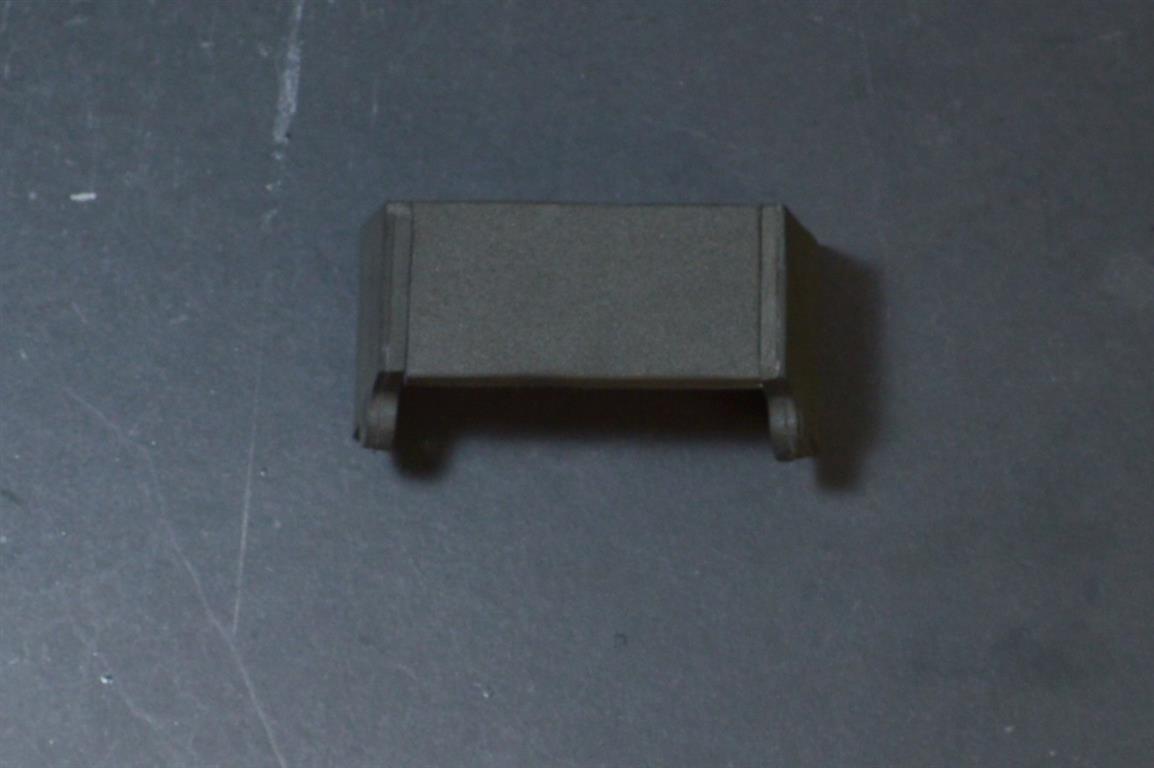
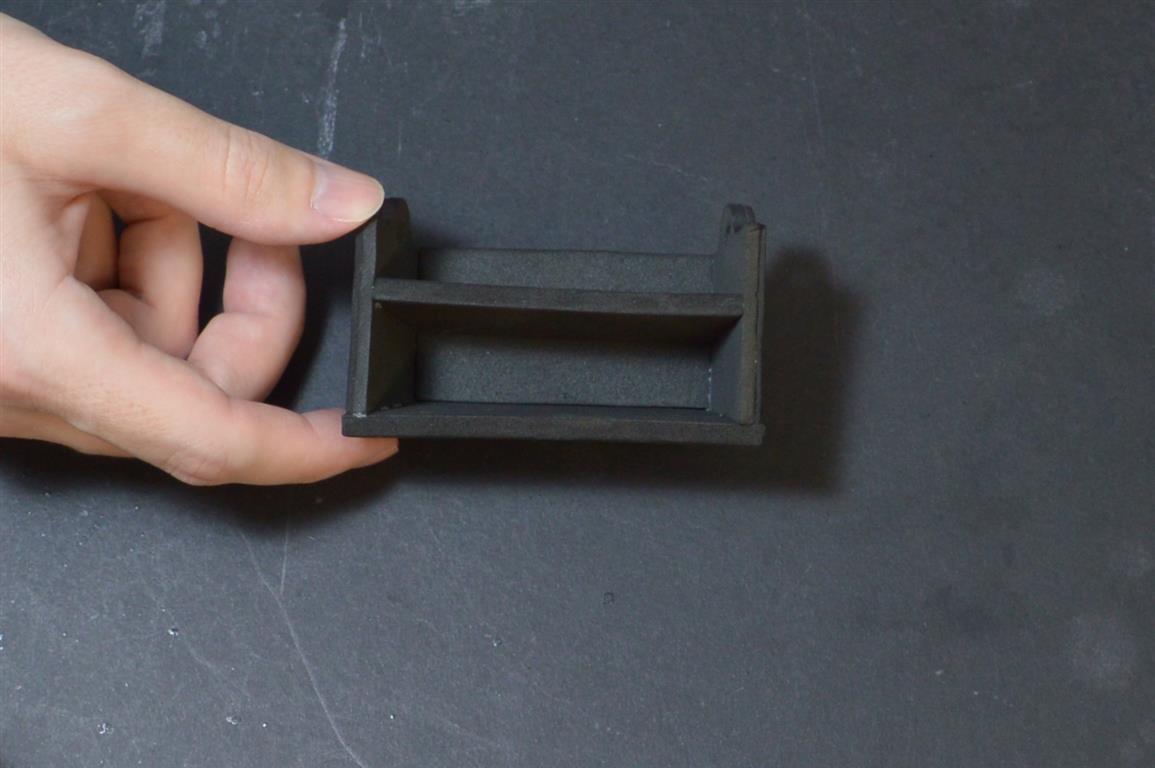
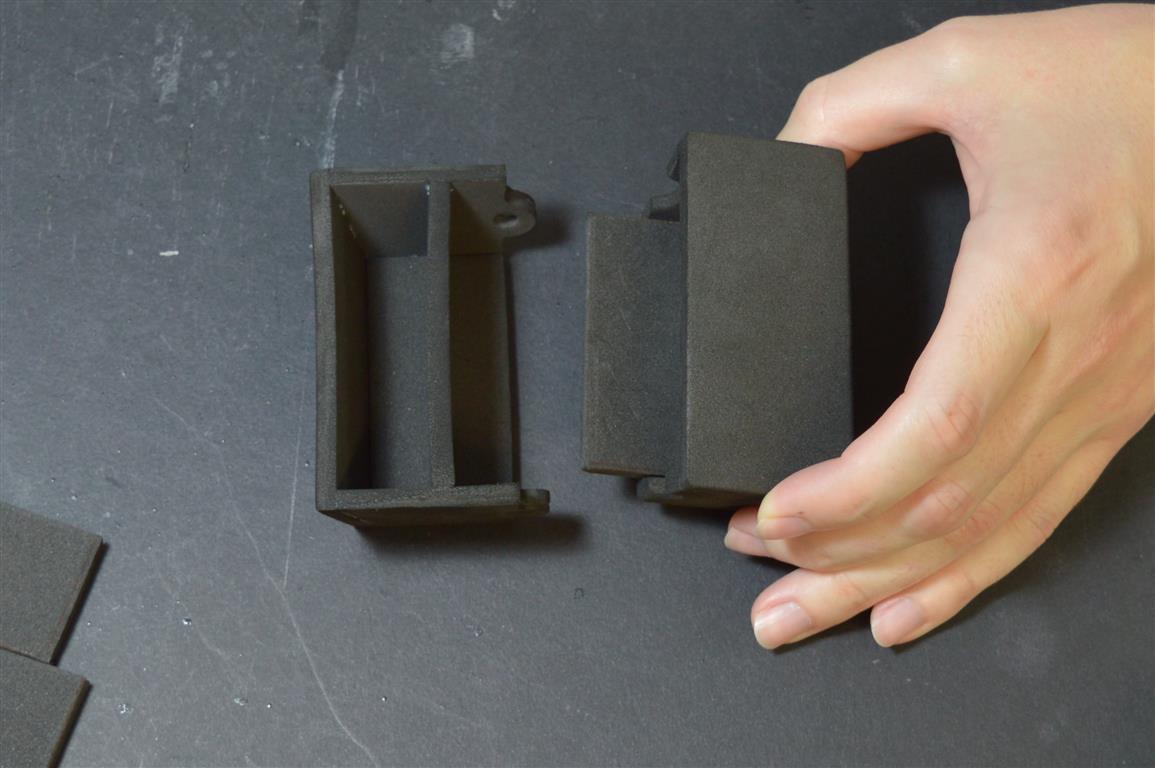
Glue one Y perpendicular to the middle of one U, and two T’s to the sides, flush with U. Use the sanding blocks to smooth out the front and sides of the pieces, as well as to fix the angle of the back edges so they can be glued flush to the back pieces M and S. The more time you spend here with the sanding block using a high grit number, the smoother the surface will be and the better your finish will be later after painting.
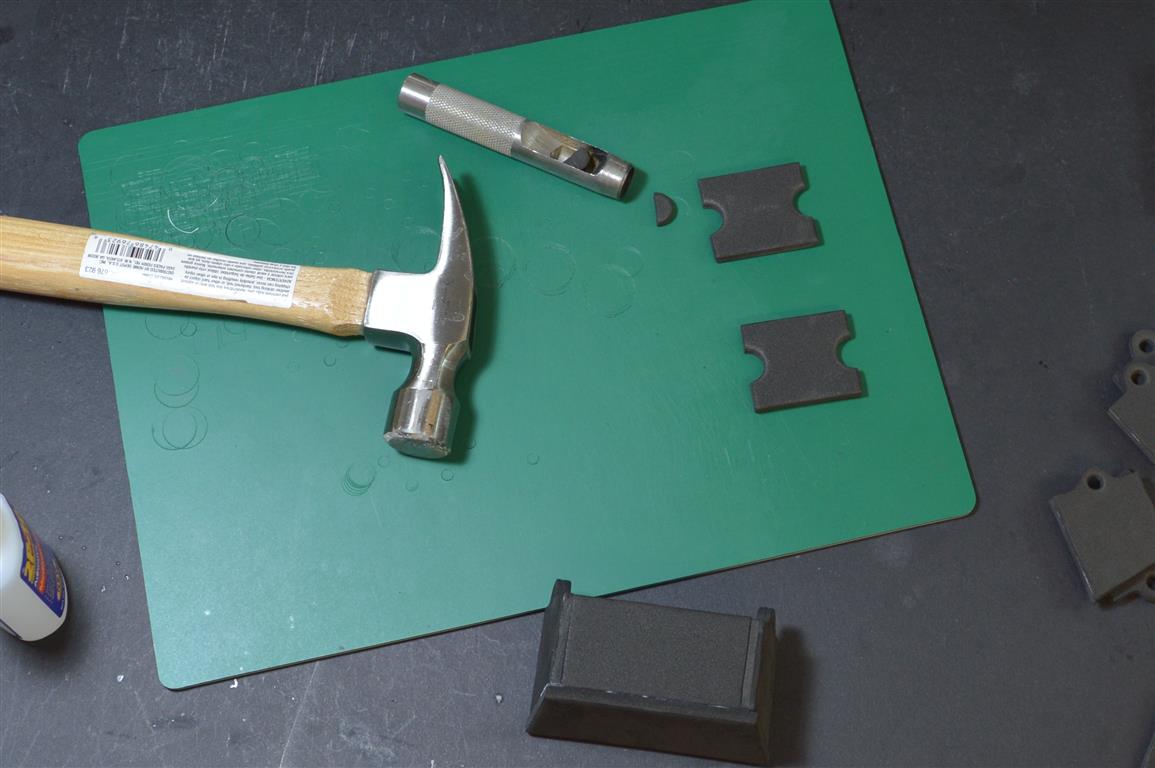
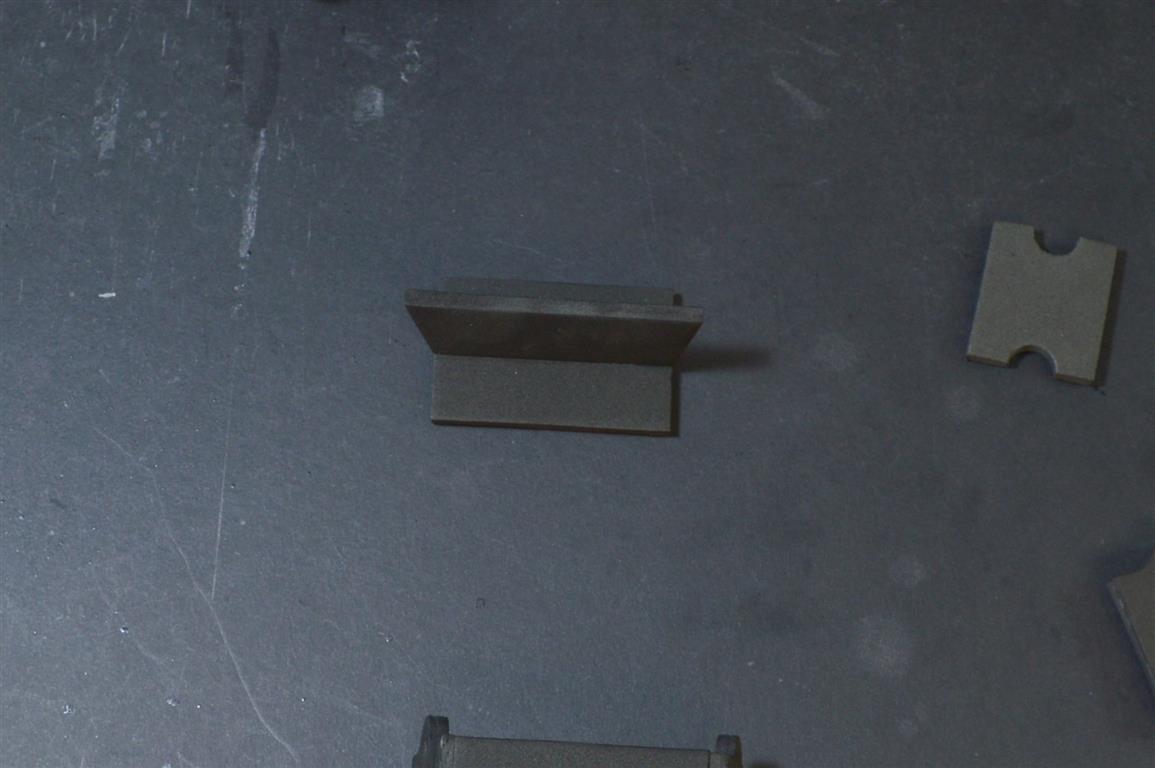
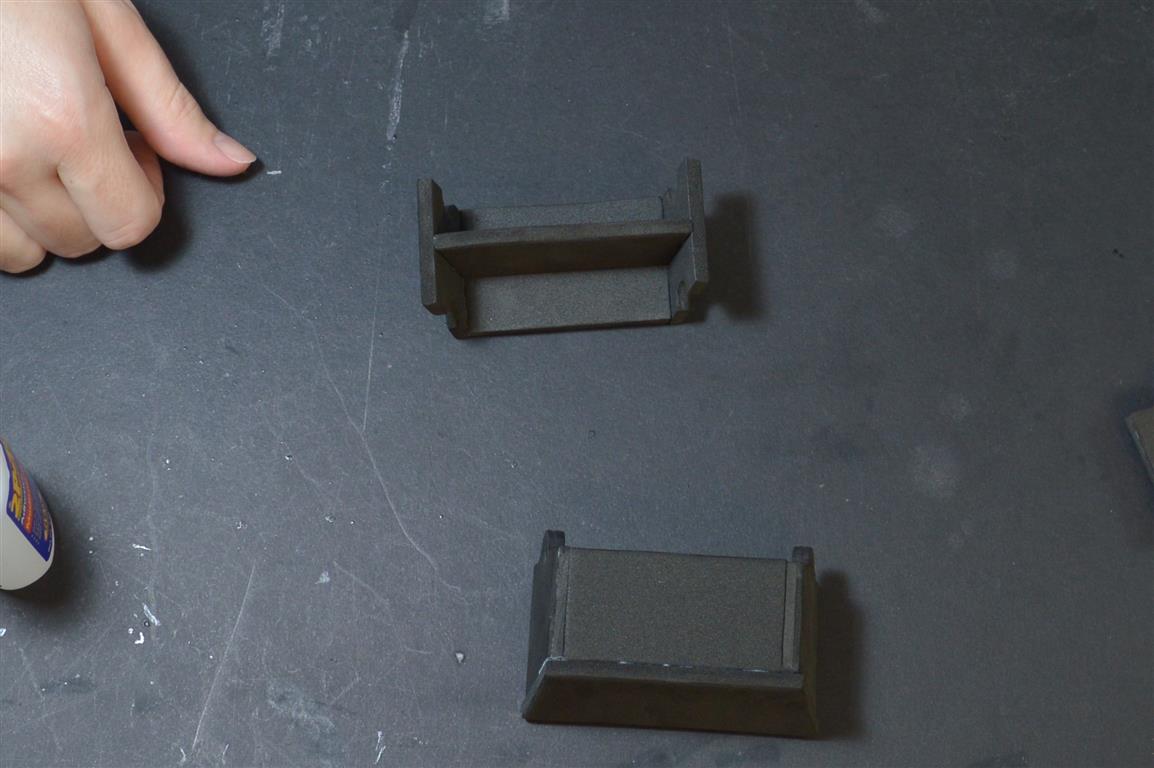
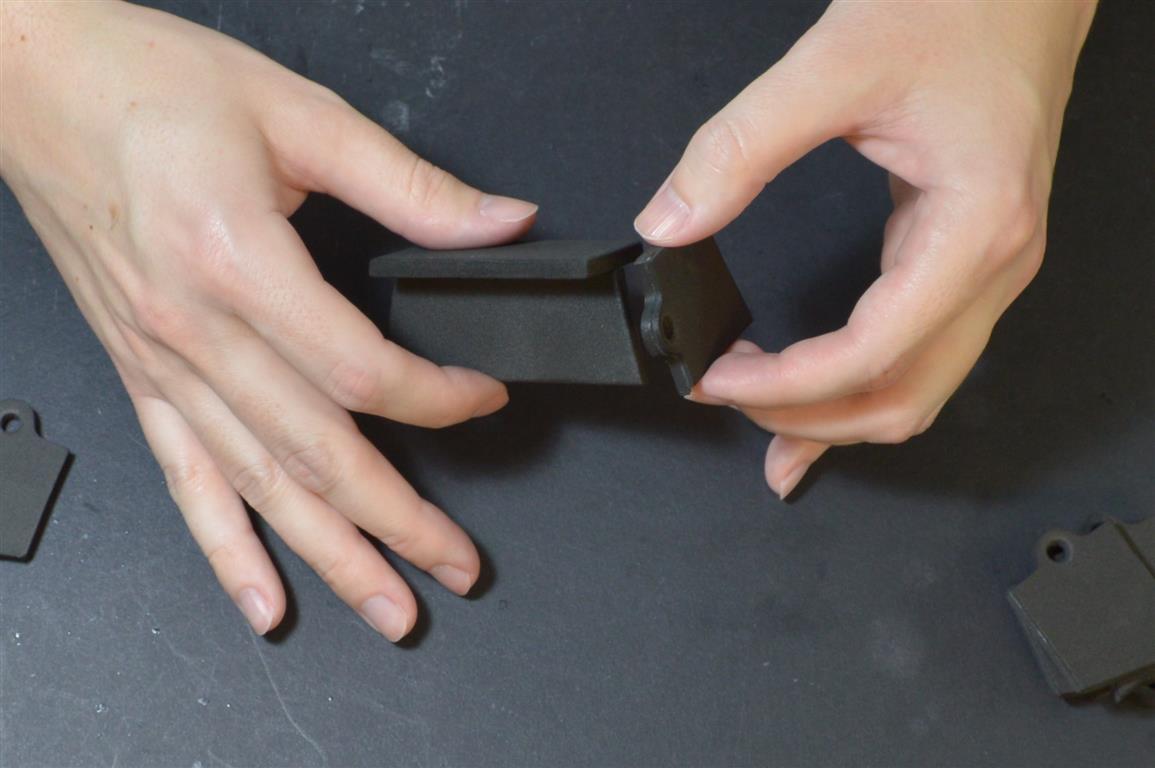
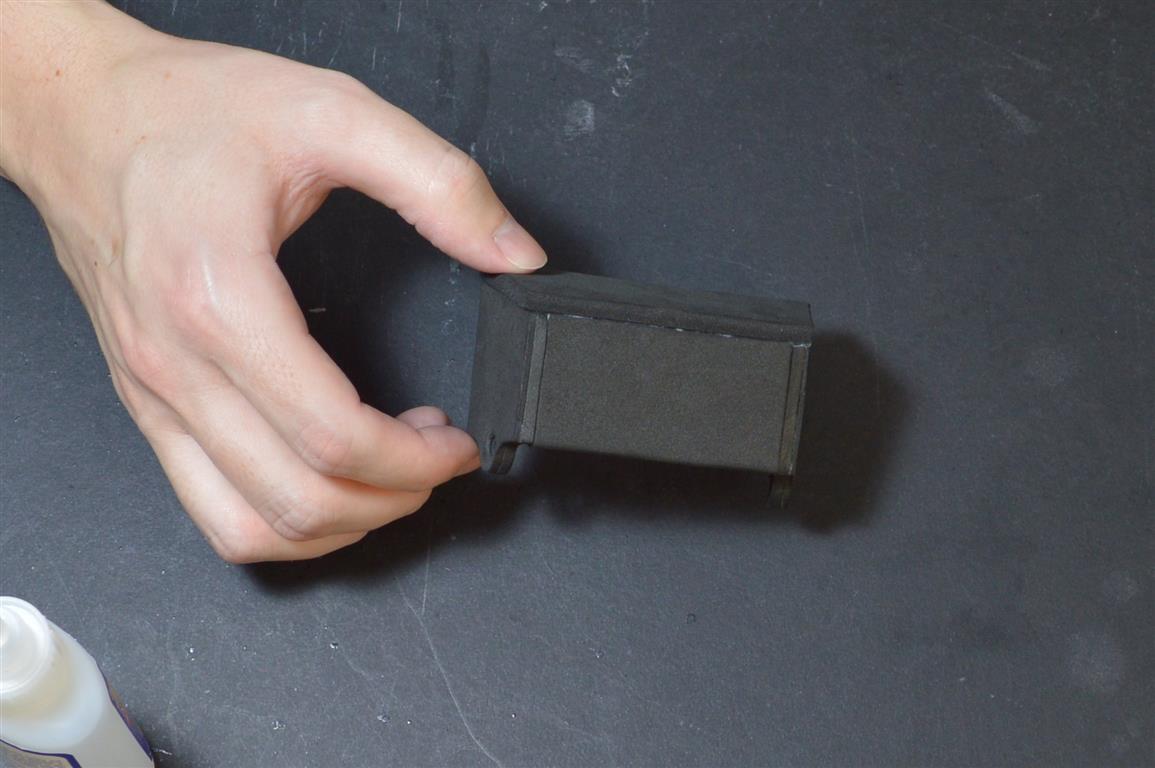
Glue S onto the back of the middle piece, and then sand the sides if necessary. Cut another O piece and use it to connect the top piece to the middle piece by gluing it to the back side of the front of each piece. Cut a couple extra V pieces to use to reinforce the sides and provide a gluing surface for the X’s later. Glue M to the back of the top piece, and R on top of Q. Do the same for the bottom piece, and then repeat the whole process again to make the second whole piece.
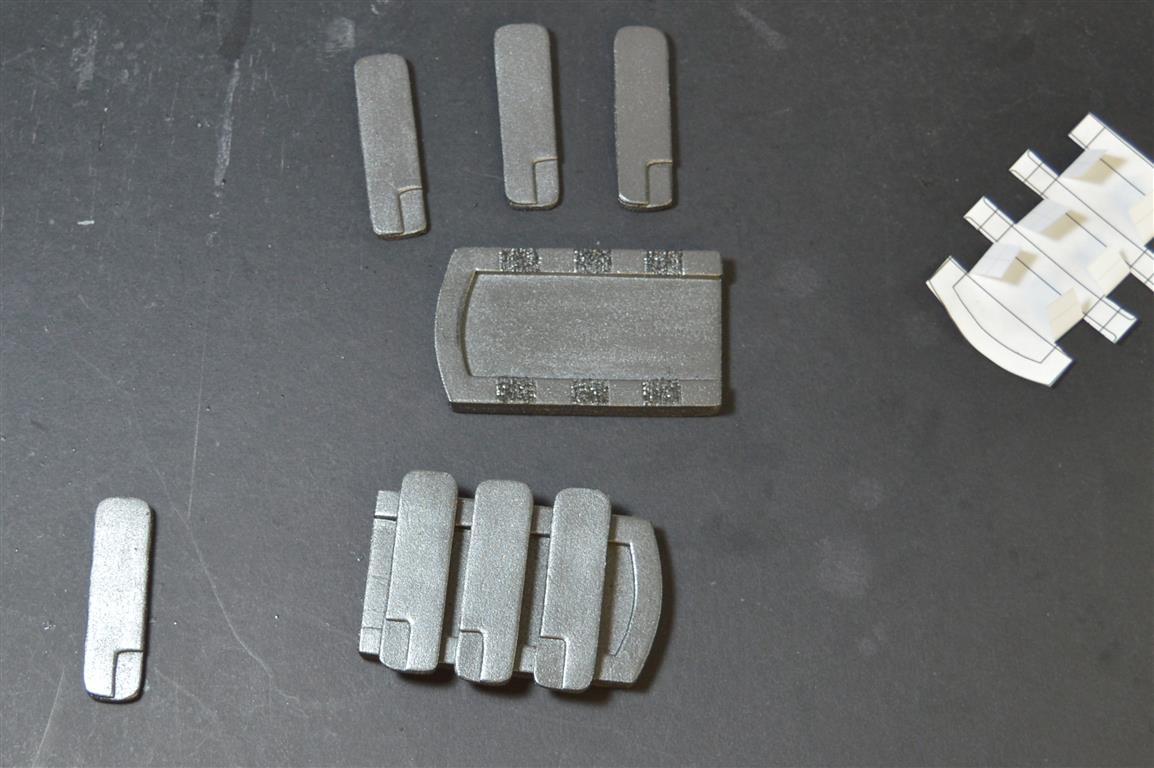
For the 12 K/L pieces use 2mm for L and 3mm for K. Also note that for half of the pieces, L is flipped over. Use a dremel to smooth the edges.
Cut E and F out of 2mm foam. For F1-4 (2mm as well), try to use the hole punch set for as many of the circles as possible, and then use scissors for the largest circles. Glue F1-4 to F, and C/D to the middle of A, but don’t glue F, E, and D together yet.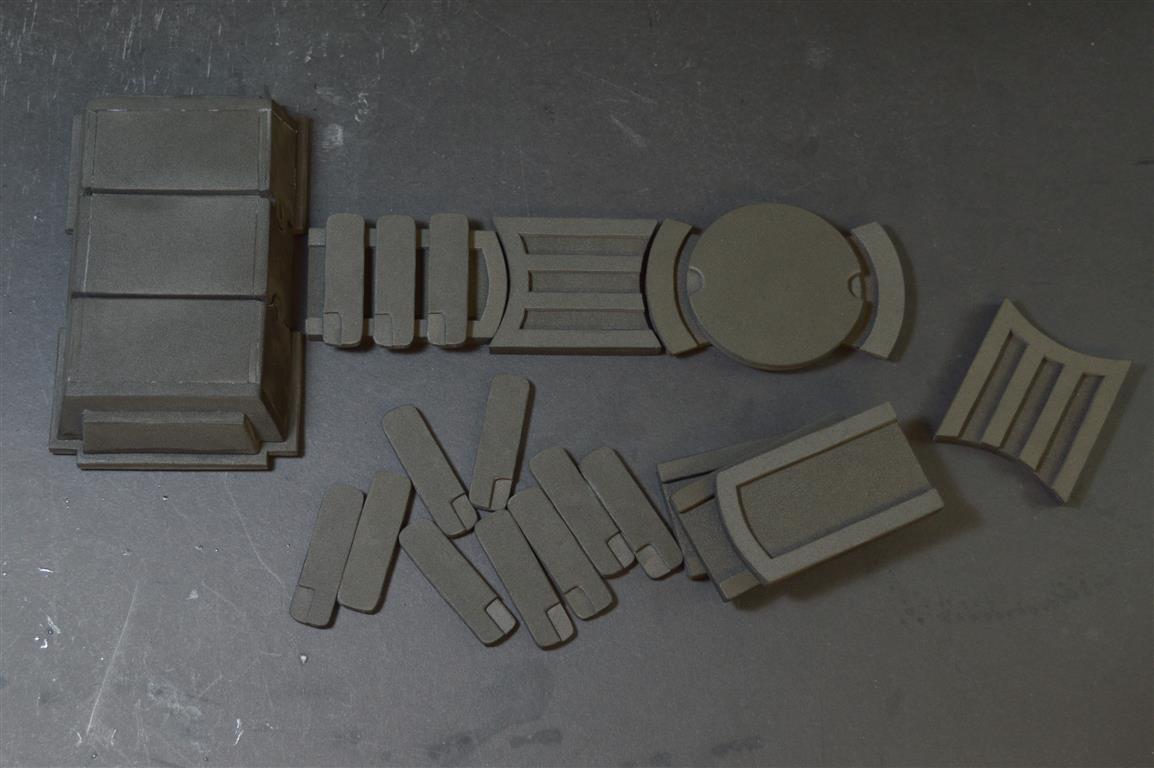
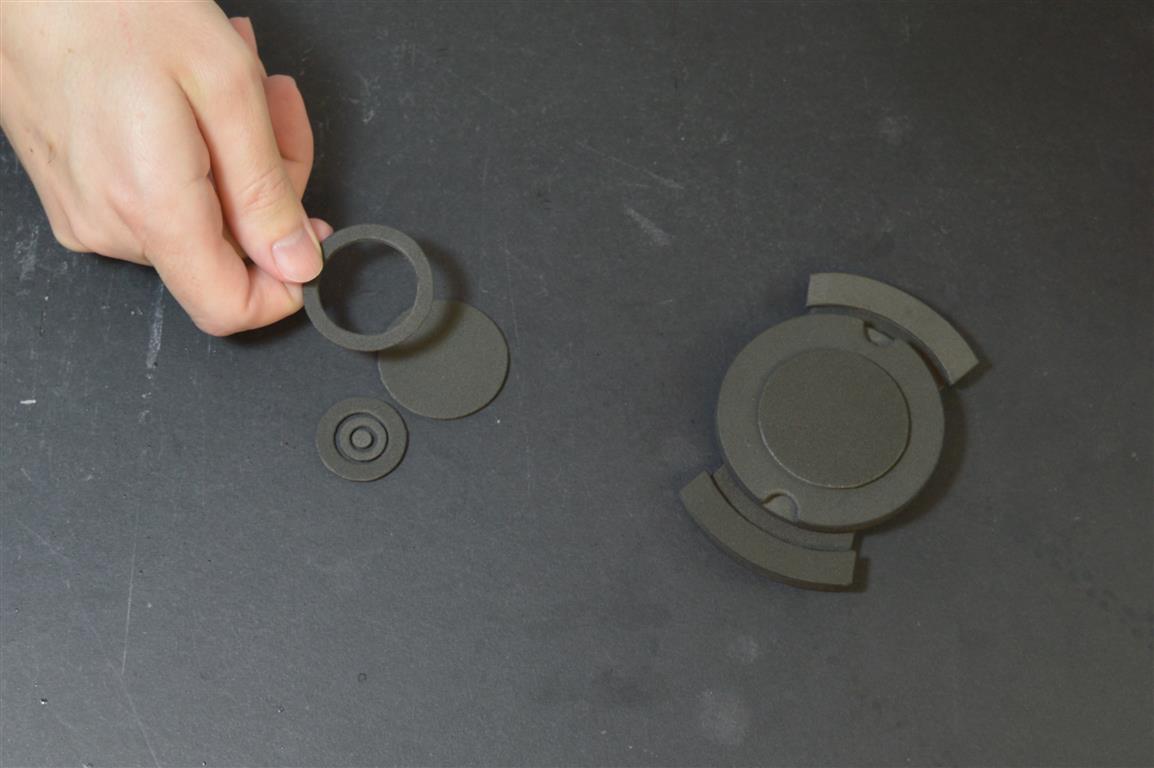
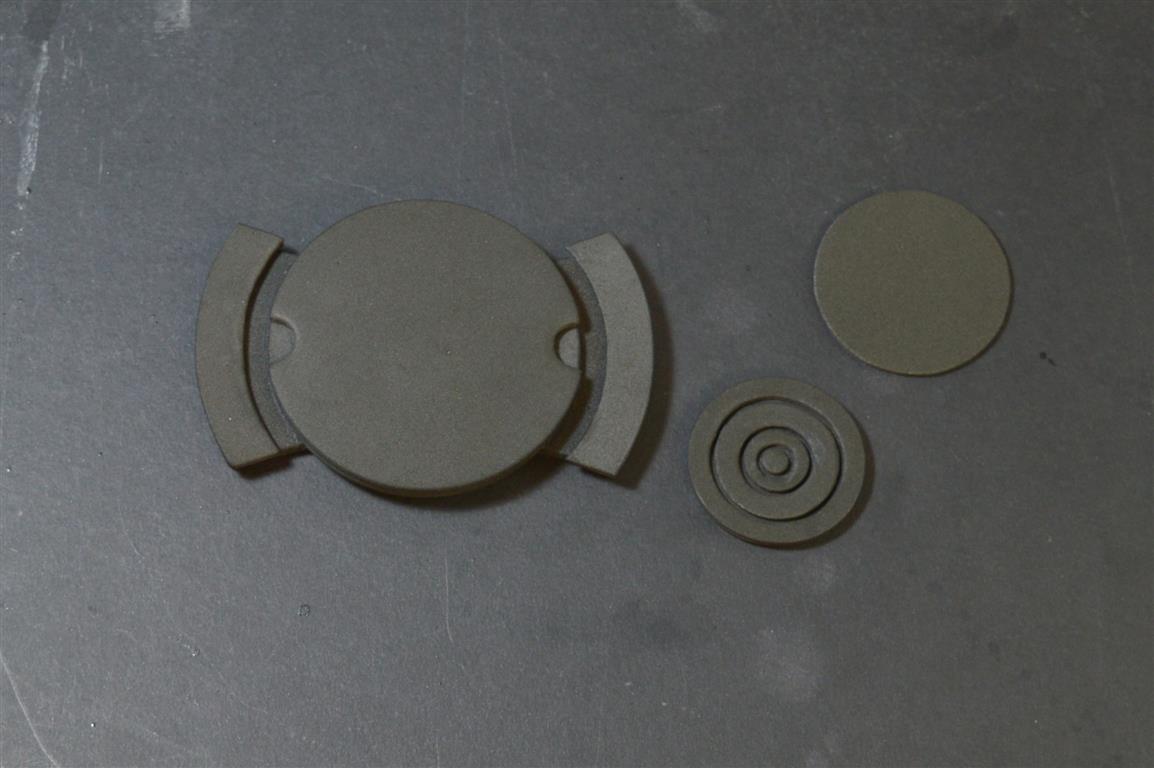
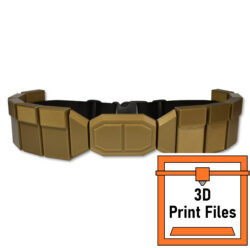
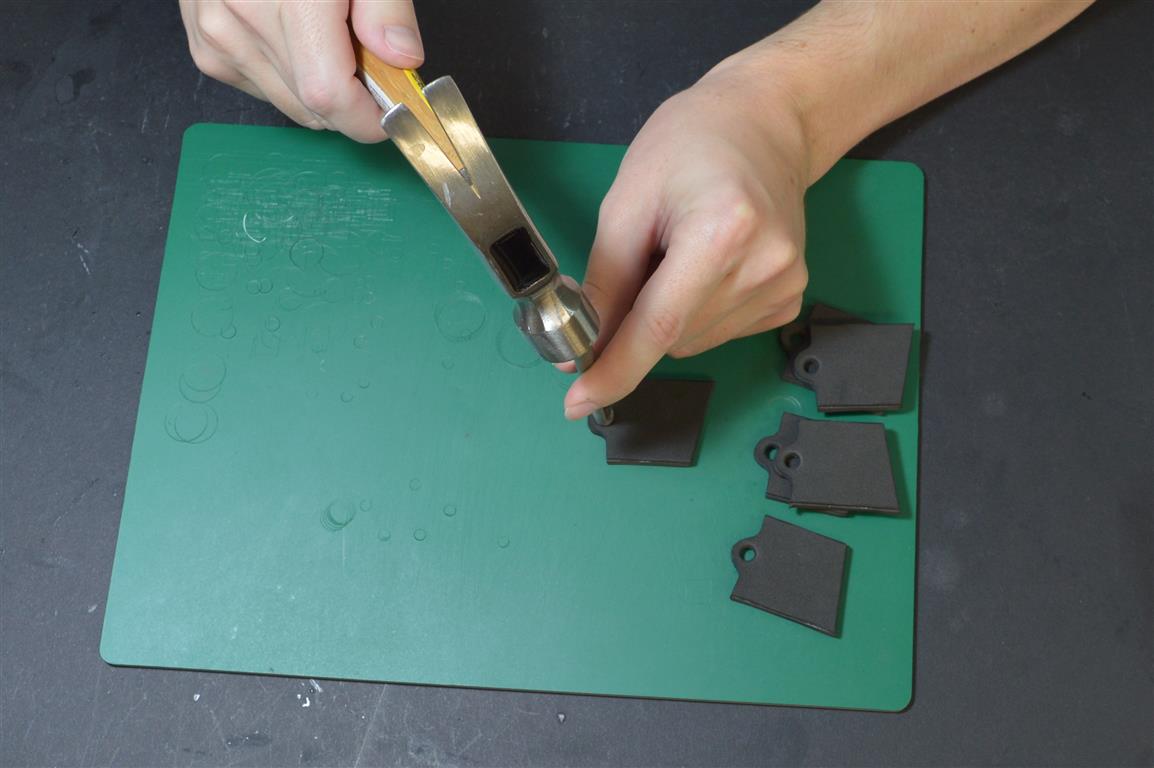
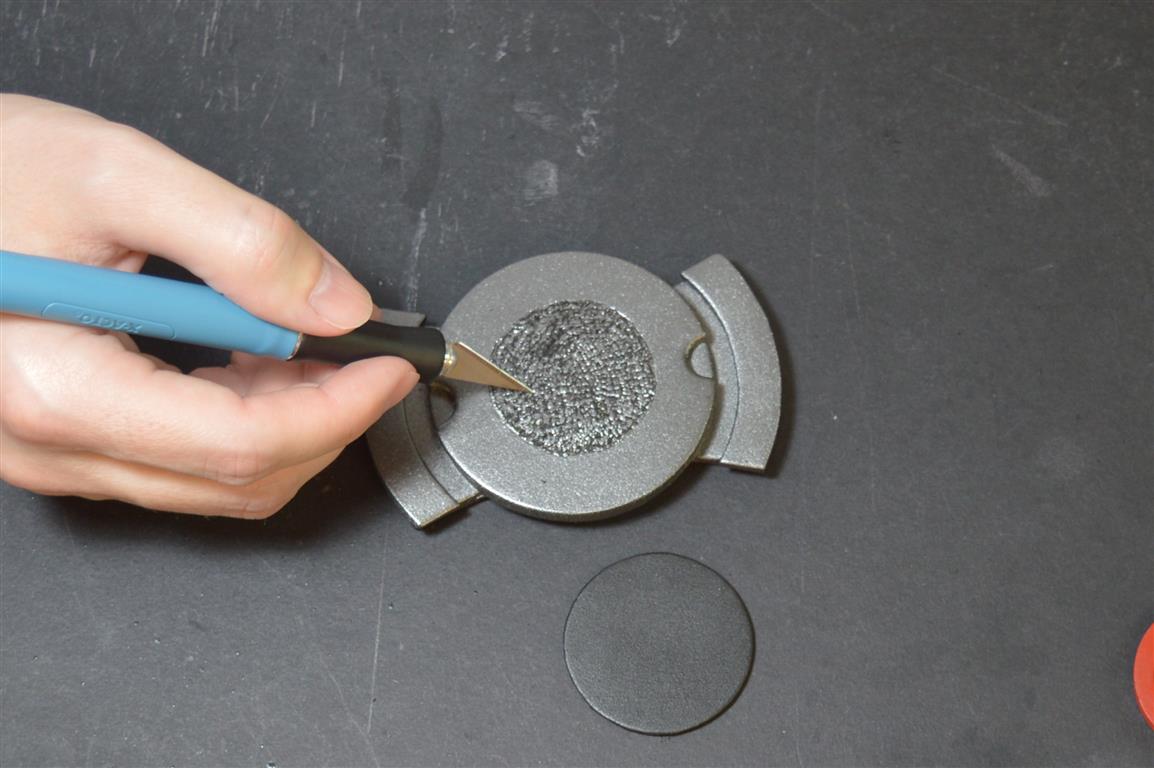
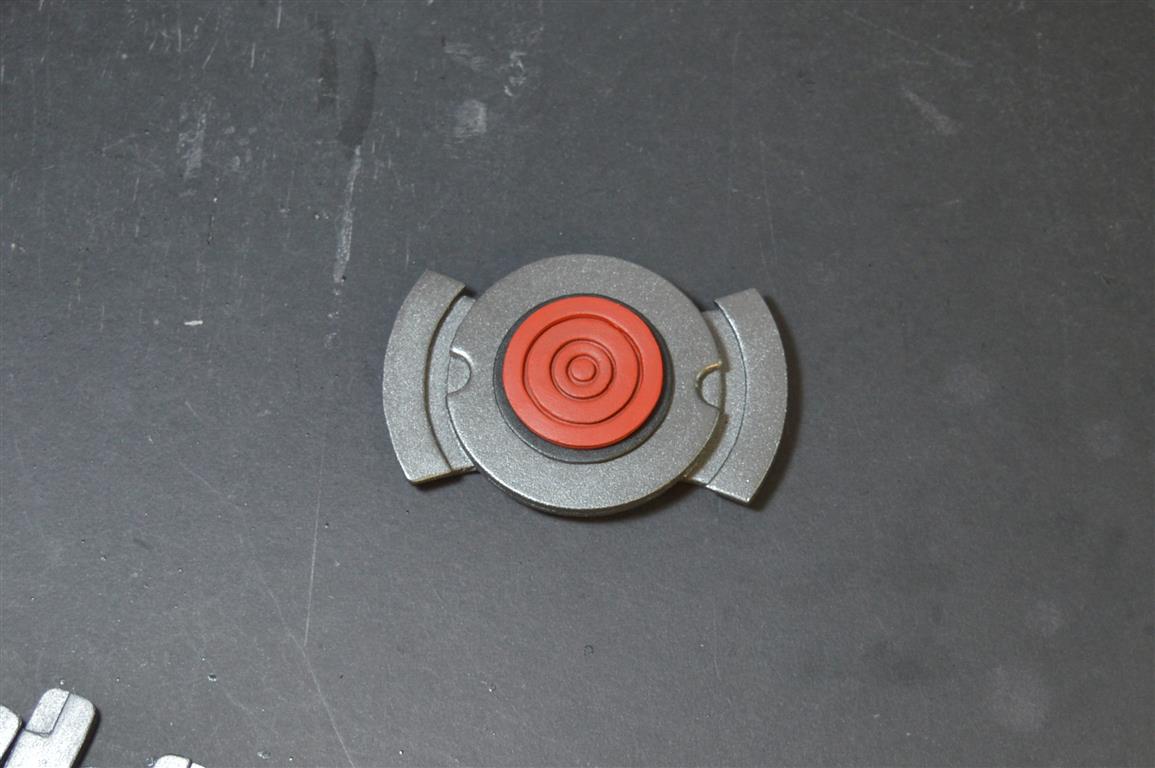
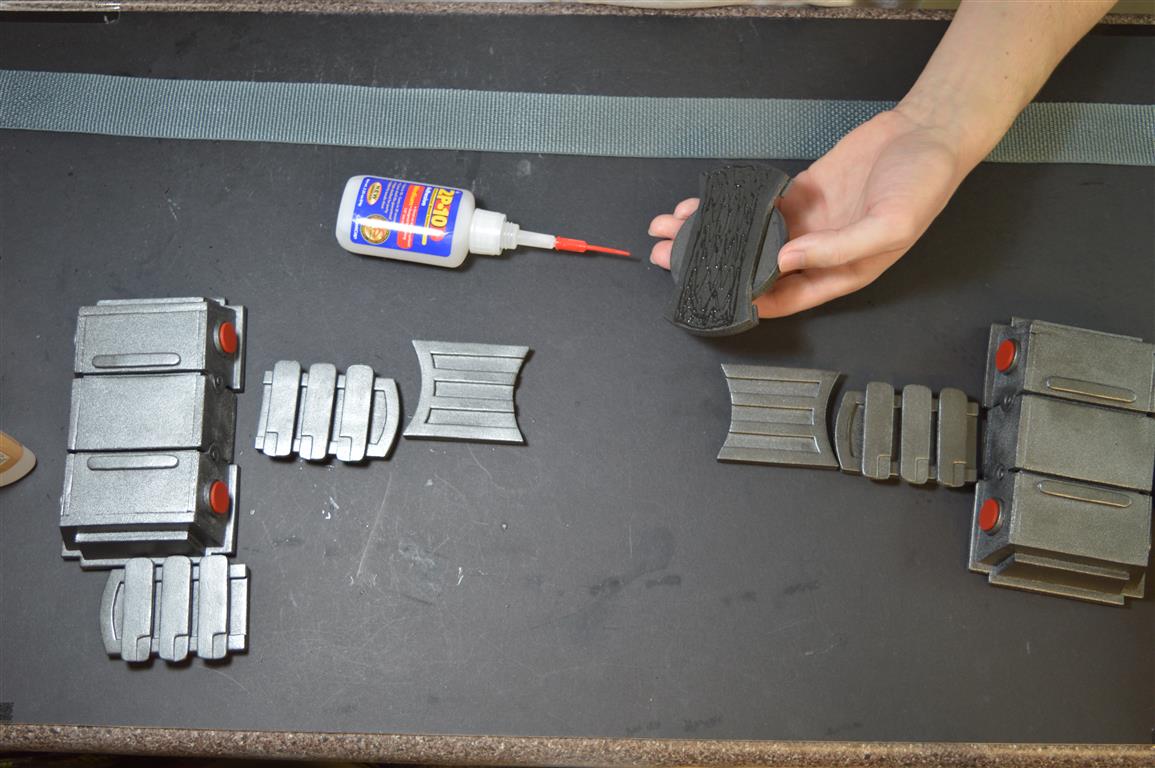
Glue the P pieces (3mm) to bottom center of the O pieces. Glue the four V pieces (3mm) to one side of each of the large pouch pieces, and four of the W pieces to the other sides. Cut the dashed circle lines out of the N template shape and use it to mark where the circle pieces will go to help with alignment. Squirt a drop of glue into the small holes in the N pieces and then drop an X piece (5mm) into each hole. (The X pieces by the way happened to be the exact same size as the largest bit on my leather rotary hole punch, which is a little easier to use than the other hole punch set and makes cutting out the shapes a snap.)
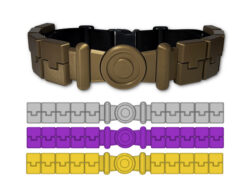
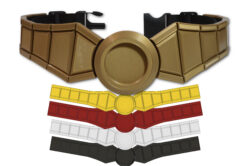
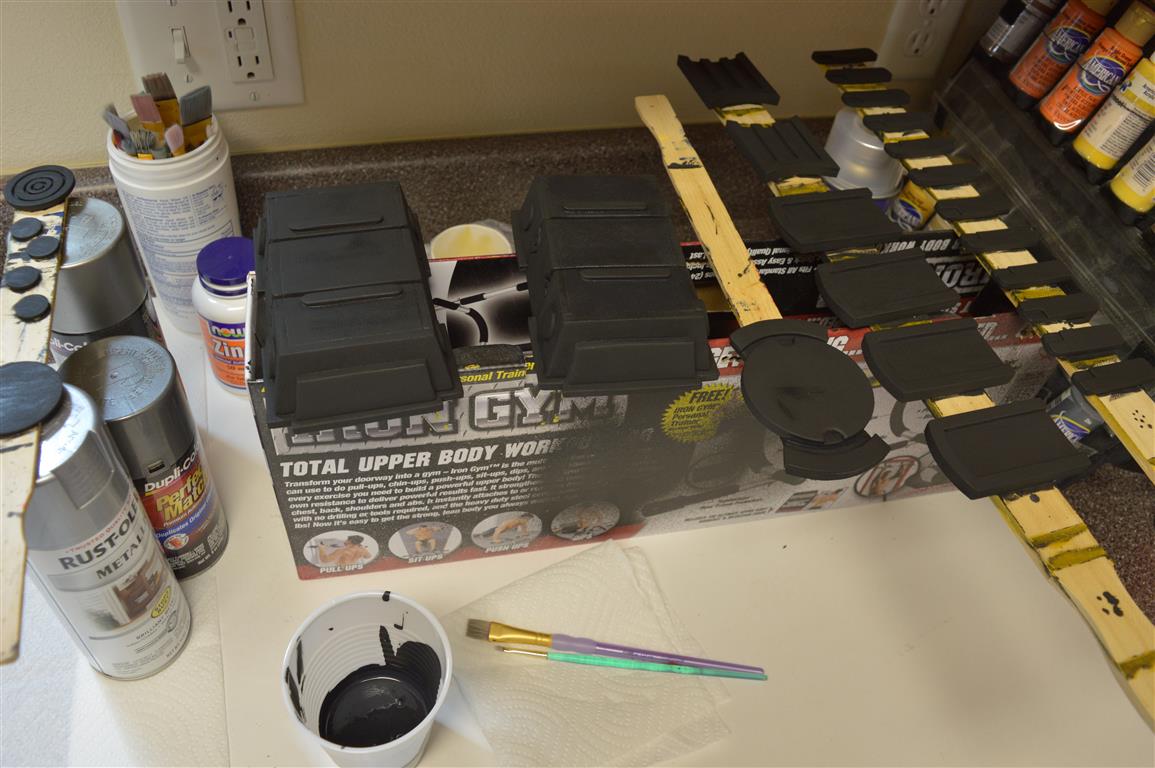
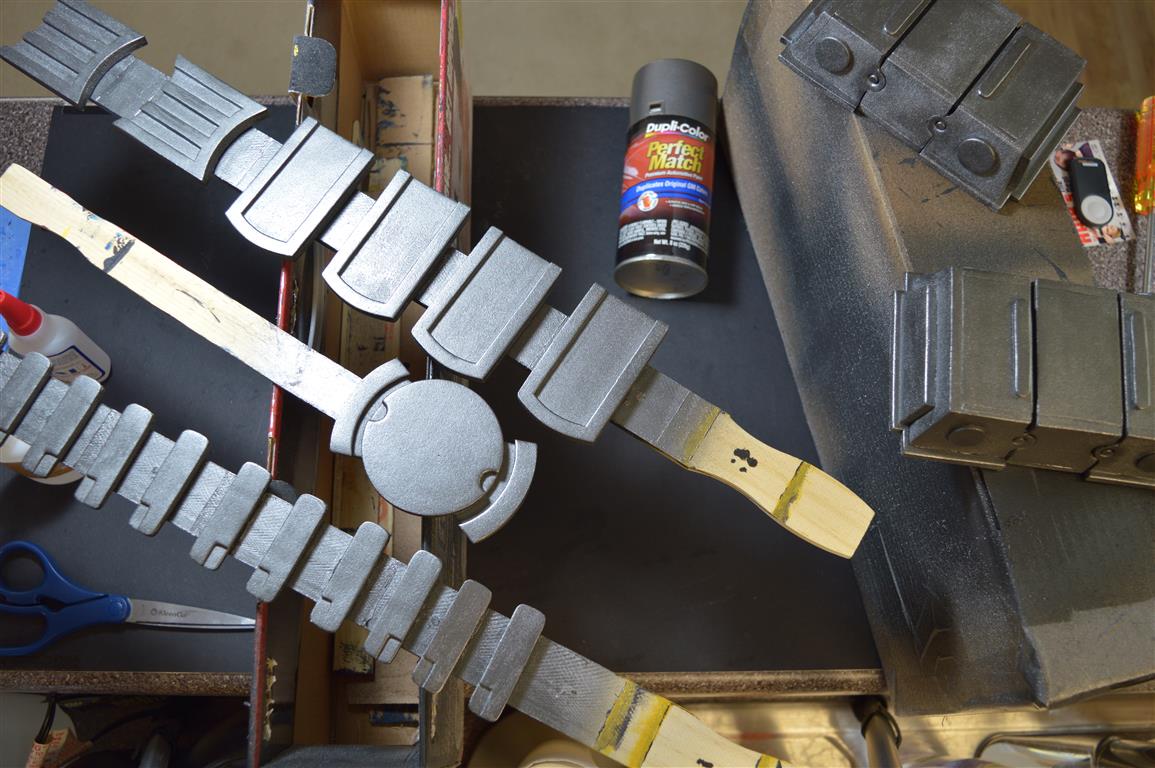
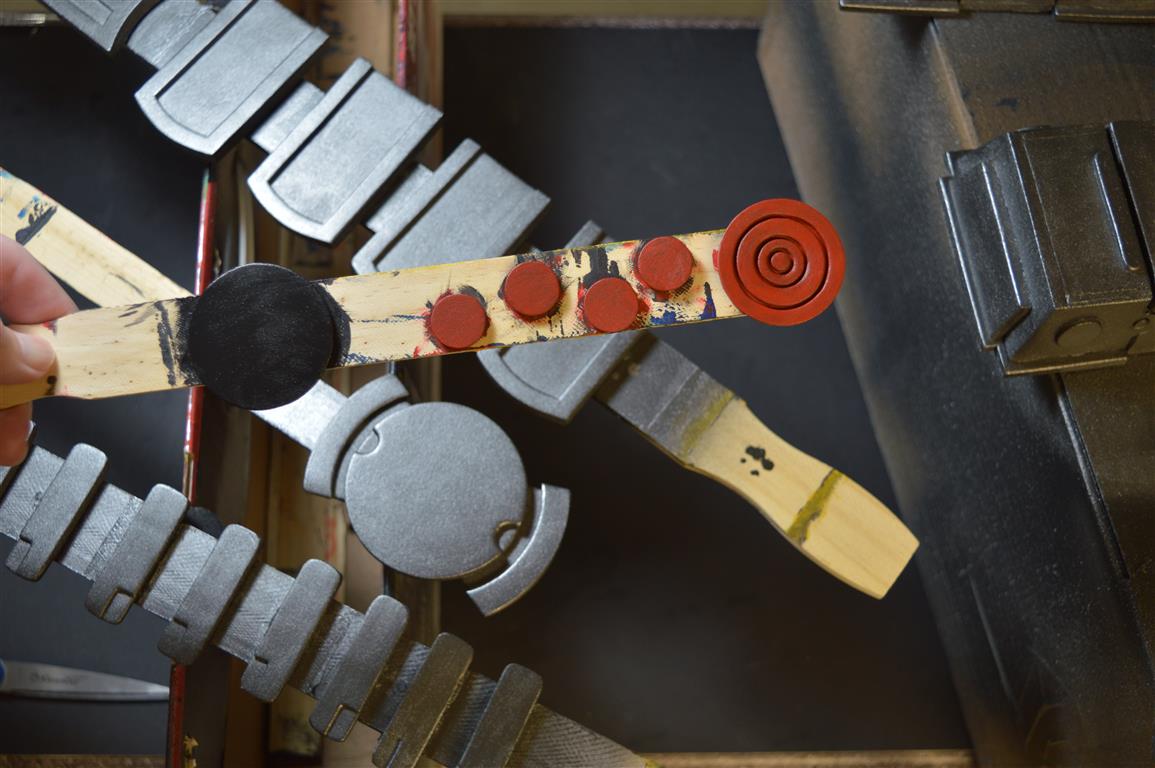
The pieces are now ready for painting. I like to brush on a thick coat of Benjamin Moore Aura first to help smooth out the slight texture of the foam. I used a Dupli-Color gunmetal metallic spray paint for the silver, and a brush on red acrylic for the red pieces, as well as an acrylic black for piece E. (Note that E is probably not actually black in the movie belt. I simply saw it that way in one of my reference pictures and liked that look better.) I taped the pieces to paint sticks to make them easier to paint. I might also recommend spraying on a couple coats of clear Plasti Dip to help protect the finish. Just make sure to practice spraying several coats onto something else first, as it can become cloudy and speckled if applied incorrectly. For more information on painting, see the Painting tutorial here.
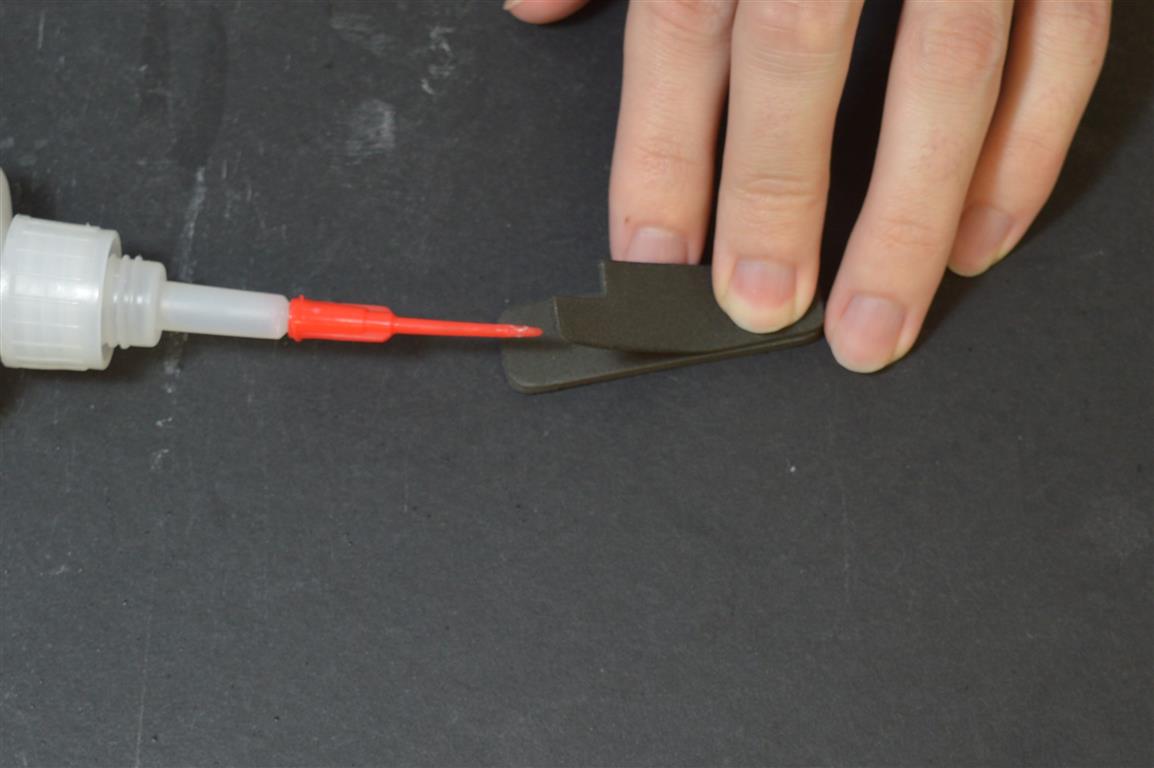
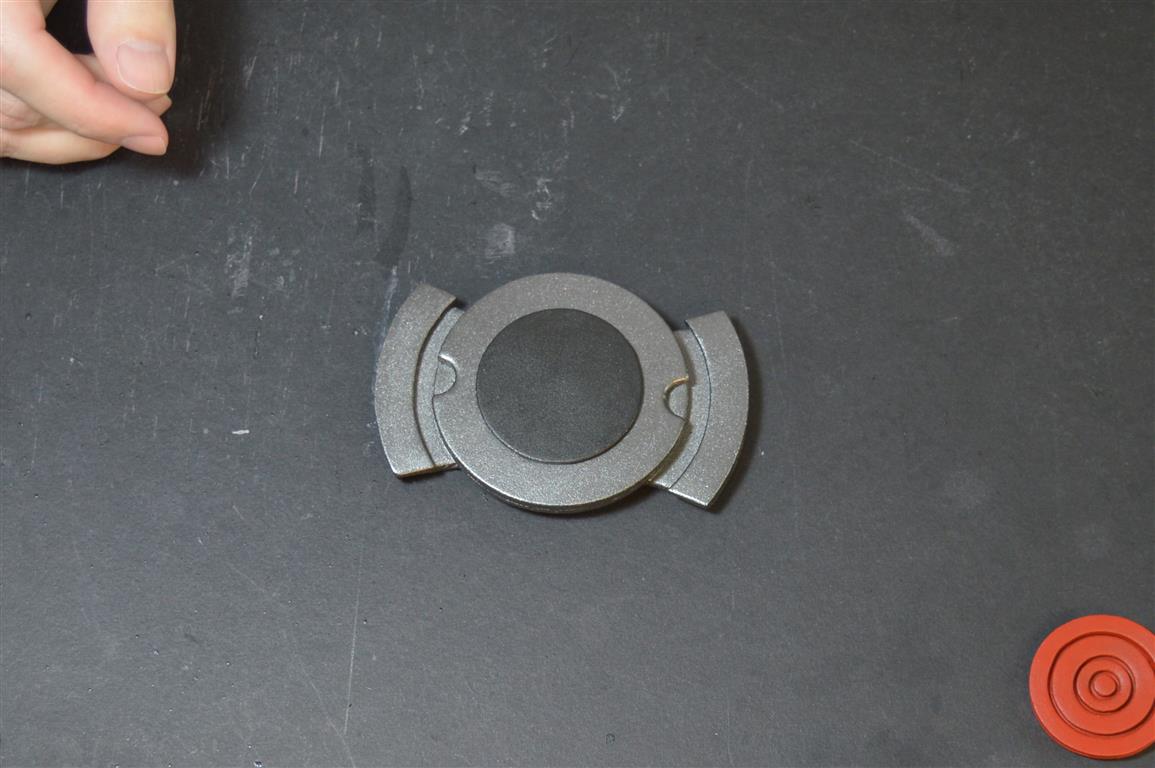
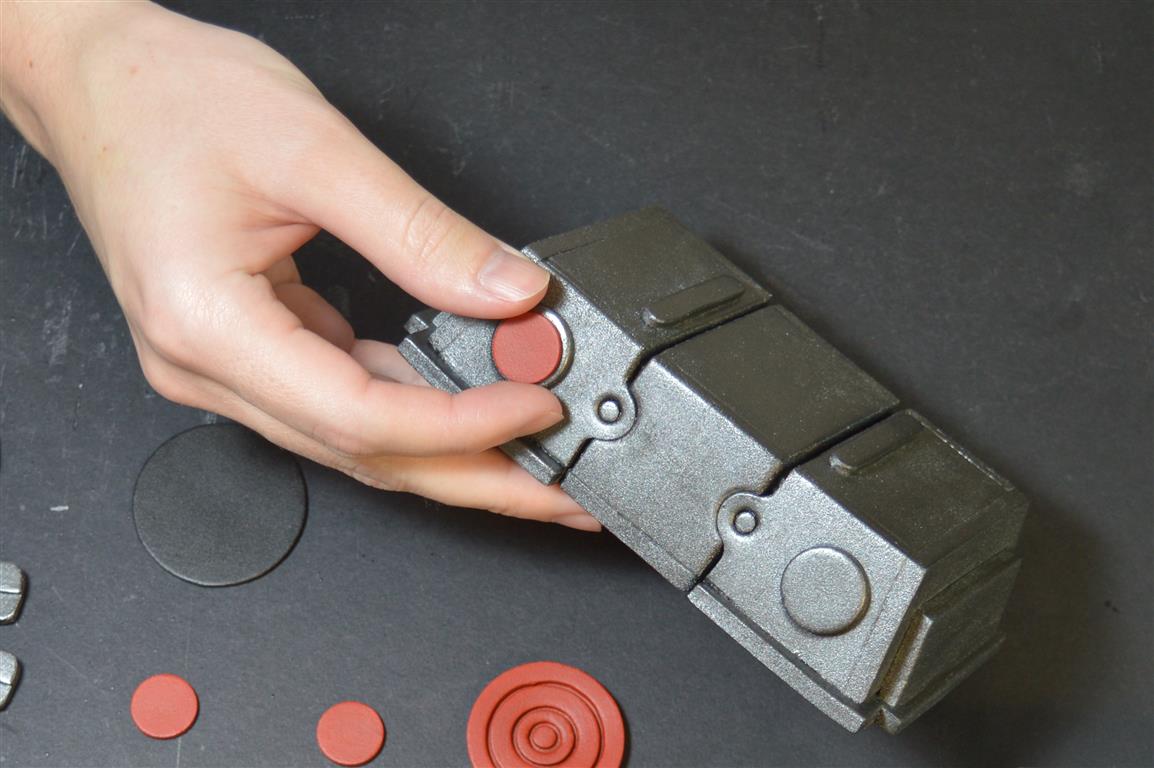
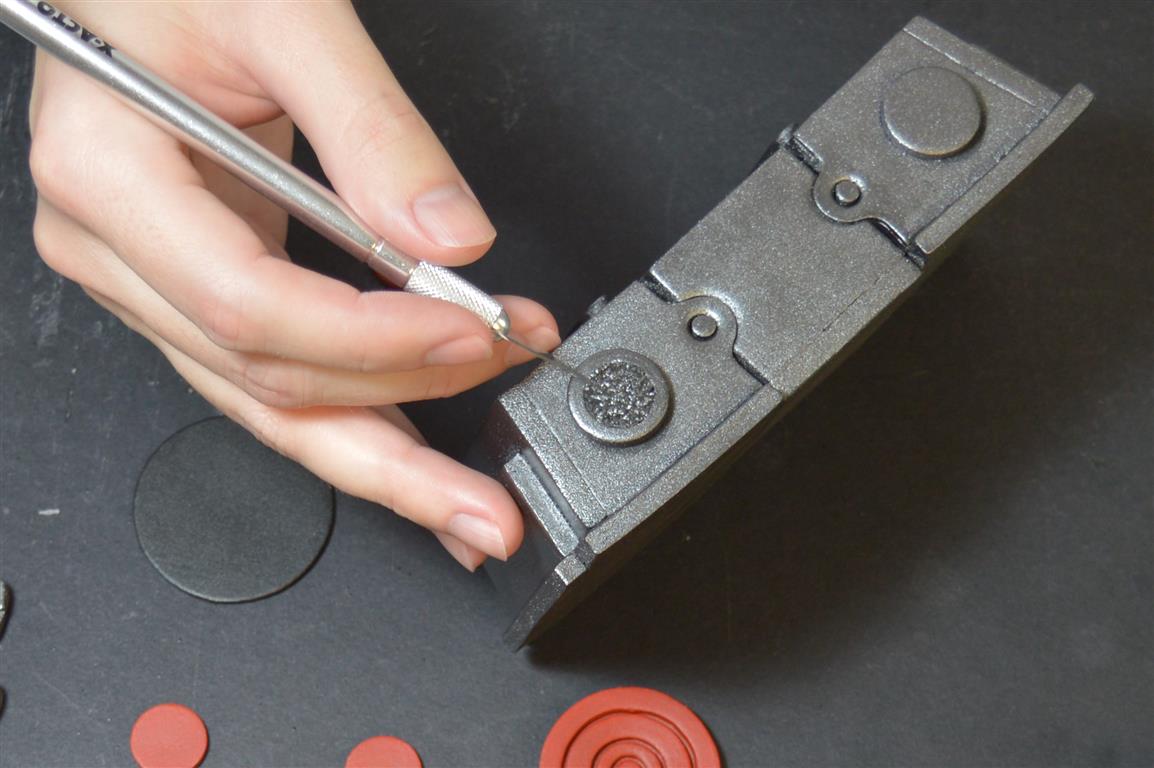
Glue doesn’t stick well to painted surfaces, so I scratch up the painted area under where a glued piece will go to expose the raw foam. Lay the top piece where it will go first and then press it down into the foam below it to create an indentation line you can use as a guide when scratching off the paint.
Do the same for the red W’s, which go on the four V’s.
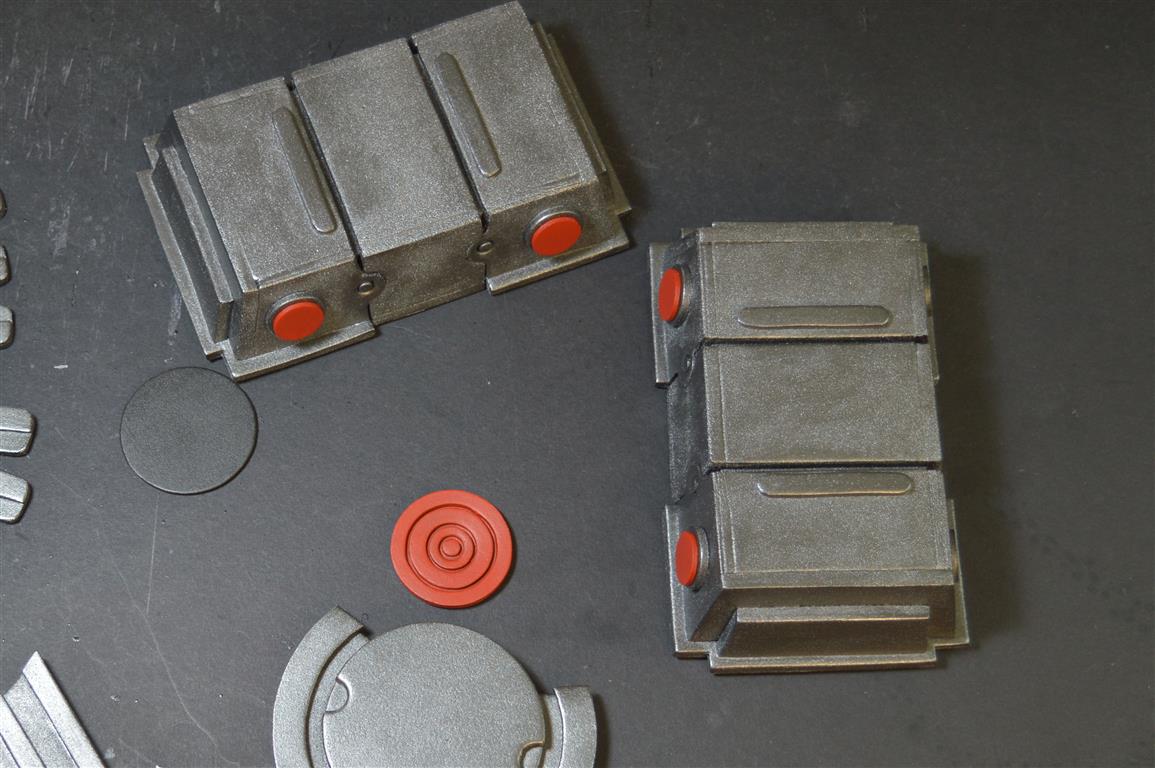
And again the same for the L/K pieces onto the J/I pieces. Note how they are oriented on the final belt.
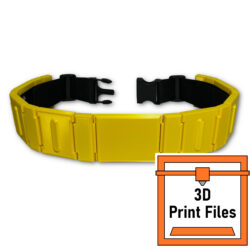
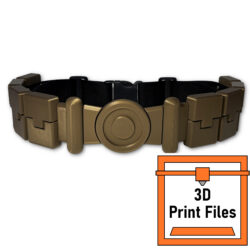
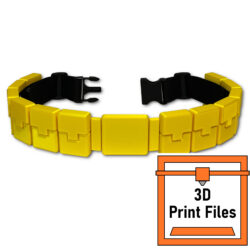
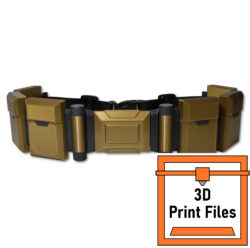
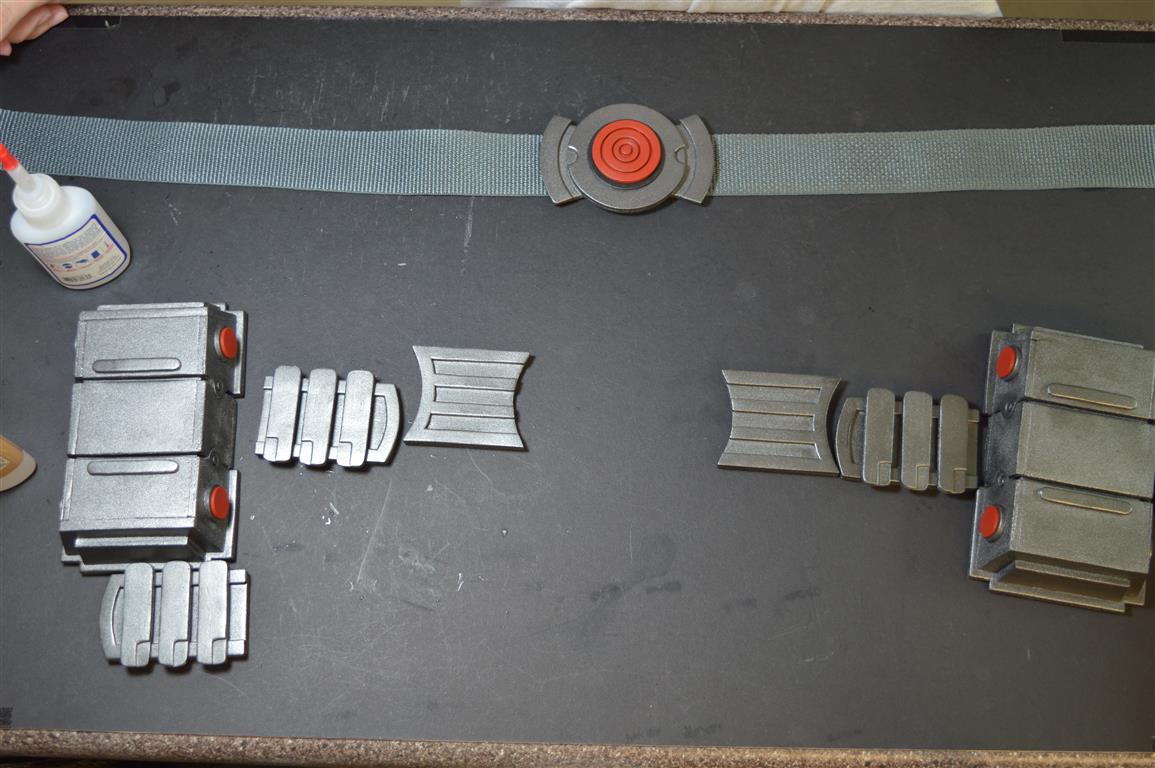
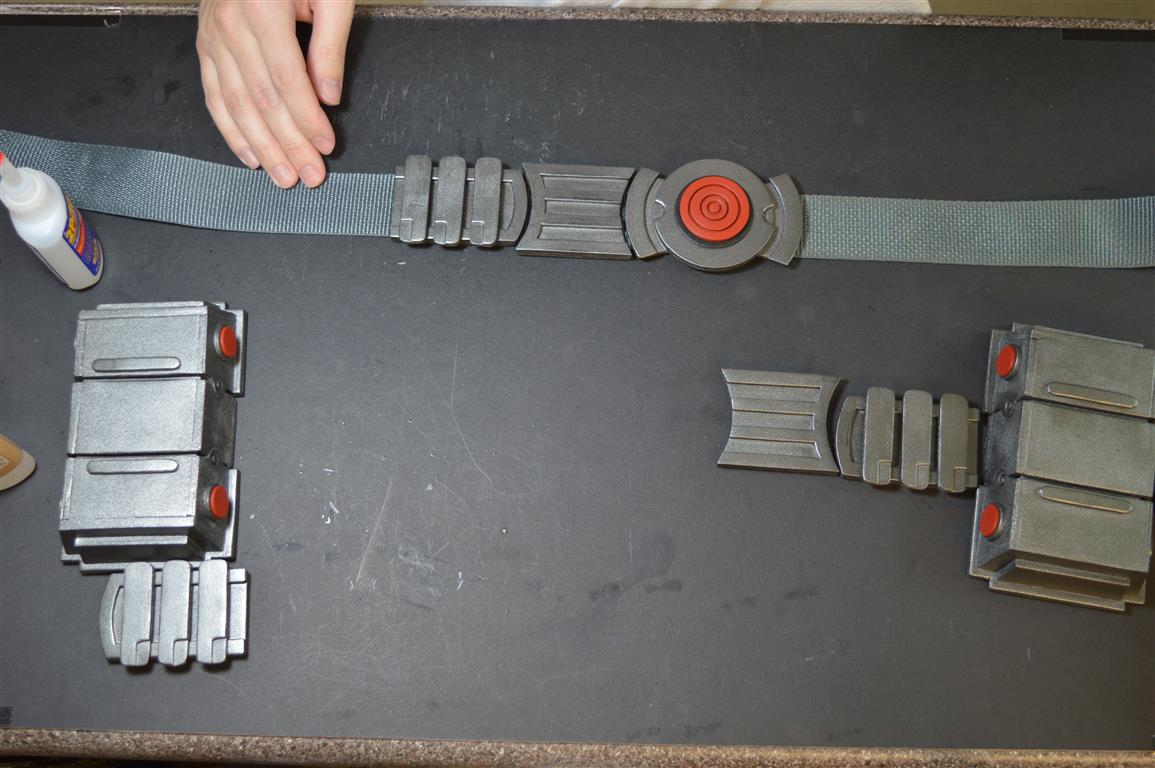
Cut a length of 1.5 inch strap webbing long enough to wrap around your waist and thread back through the buckle hardware, along with some extra length for size adjustment. I used 1.5″ charcoal colored lightweight polypropylene from Strapworks.com. Apply glue to the back of each piece and glue it down to the webbing, starting with the decorative buckle in the middle. Leave a little space between each piece so that the belt can bend around your waist properly. I used a plastic buckle and two tri-glides (all from strapworks as well) to fasten and finish the belt.


I have another, broader tutorial on how to make utility belts here.
Check out the shop and the gallery for more templates and project ideas. Have fun!