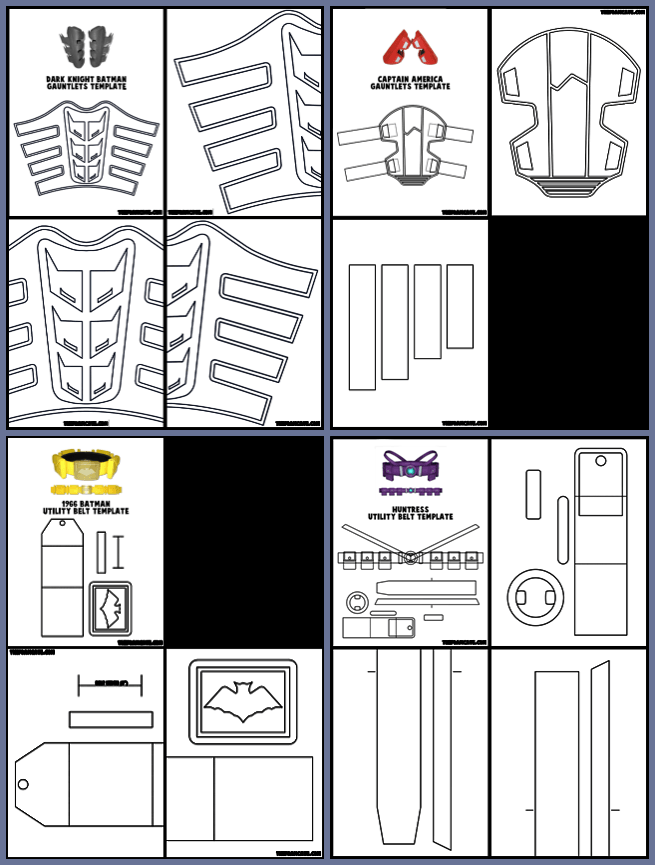
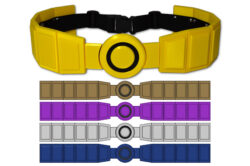
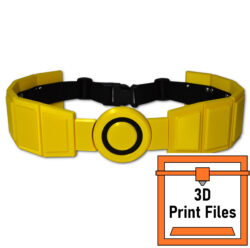
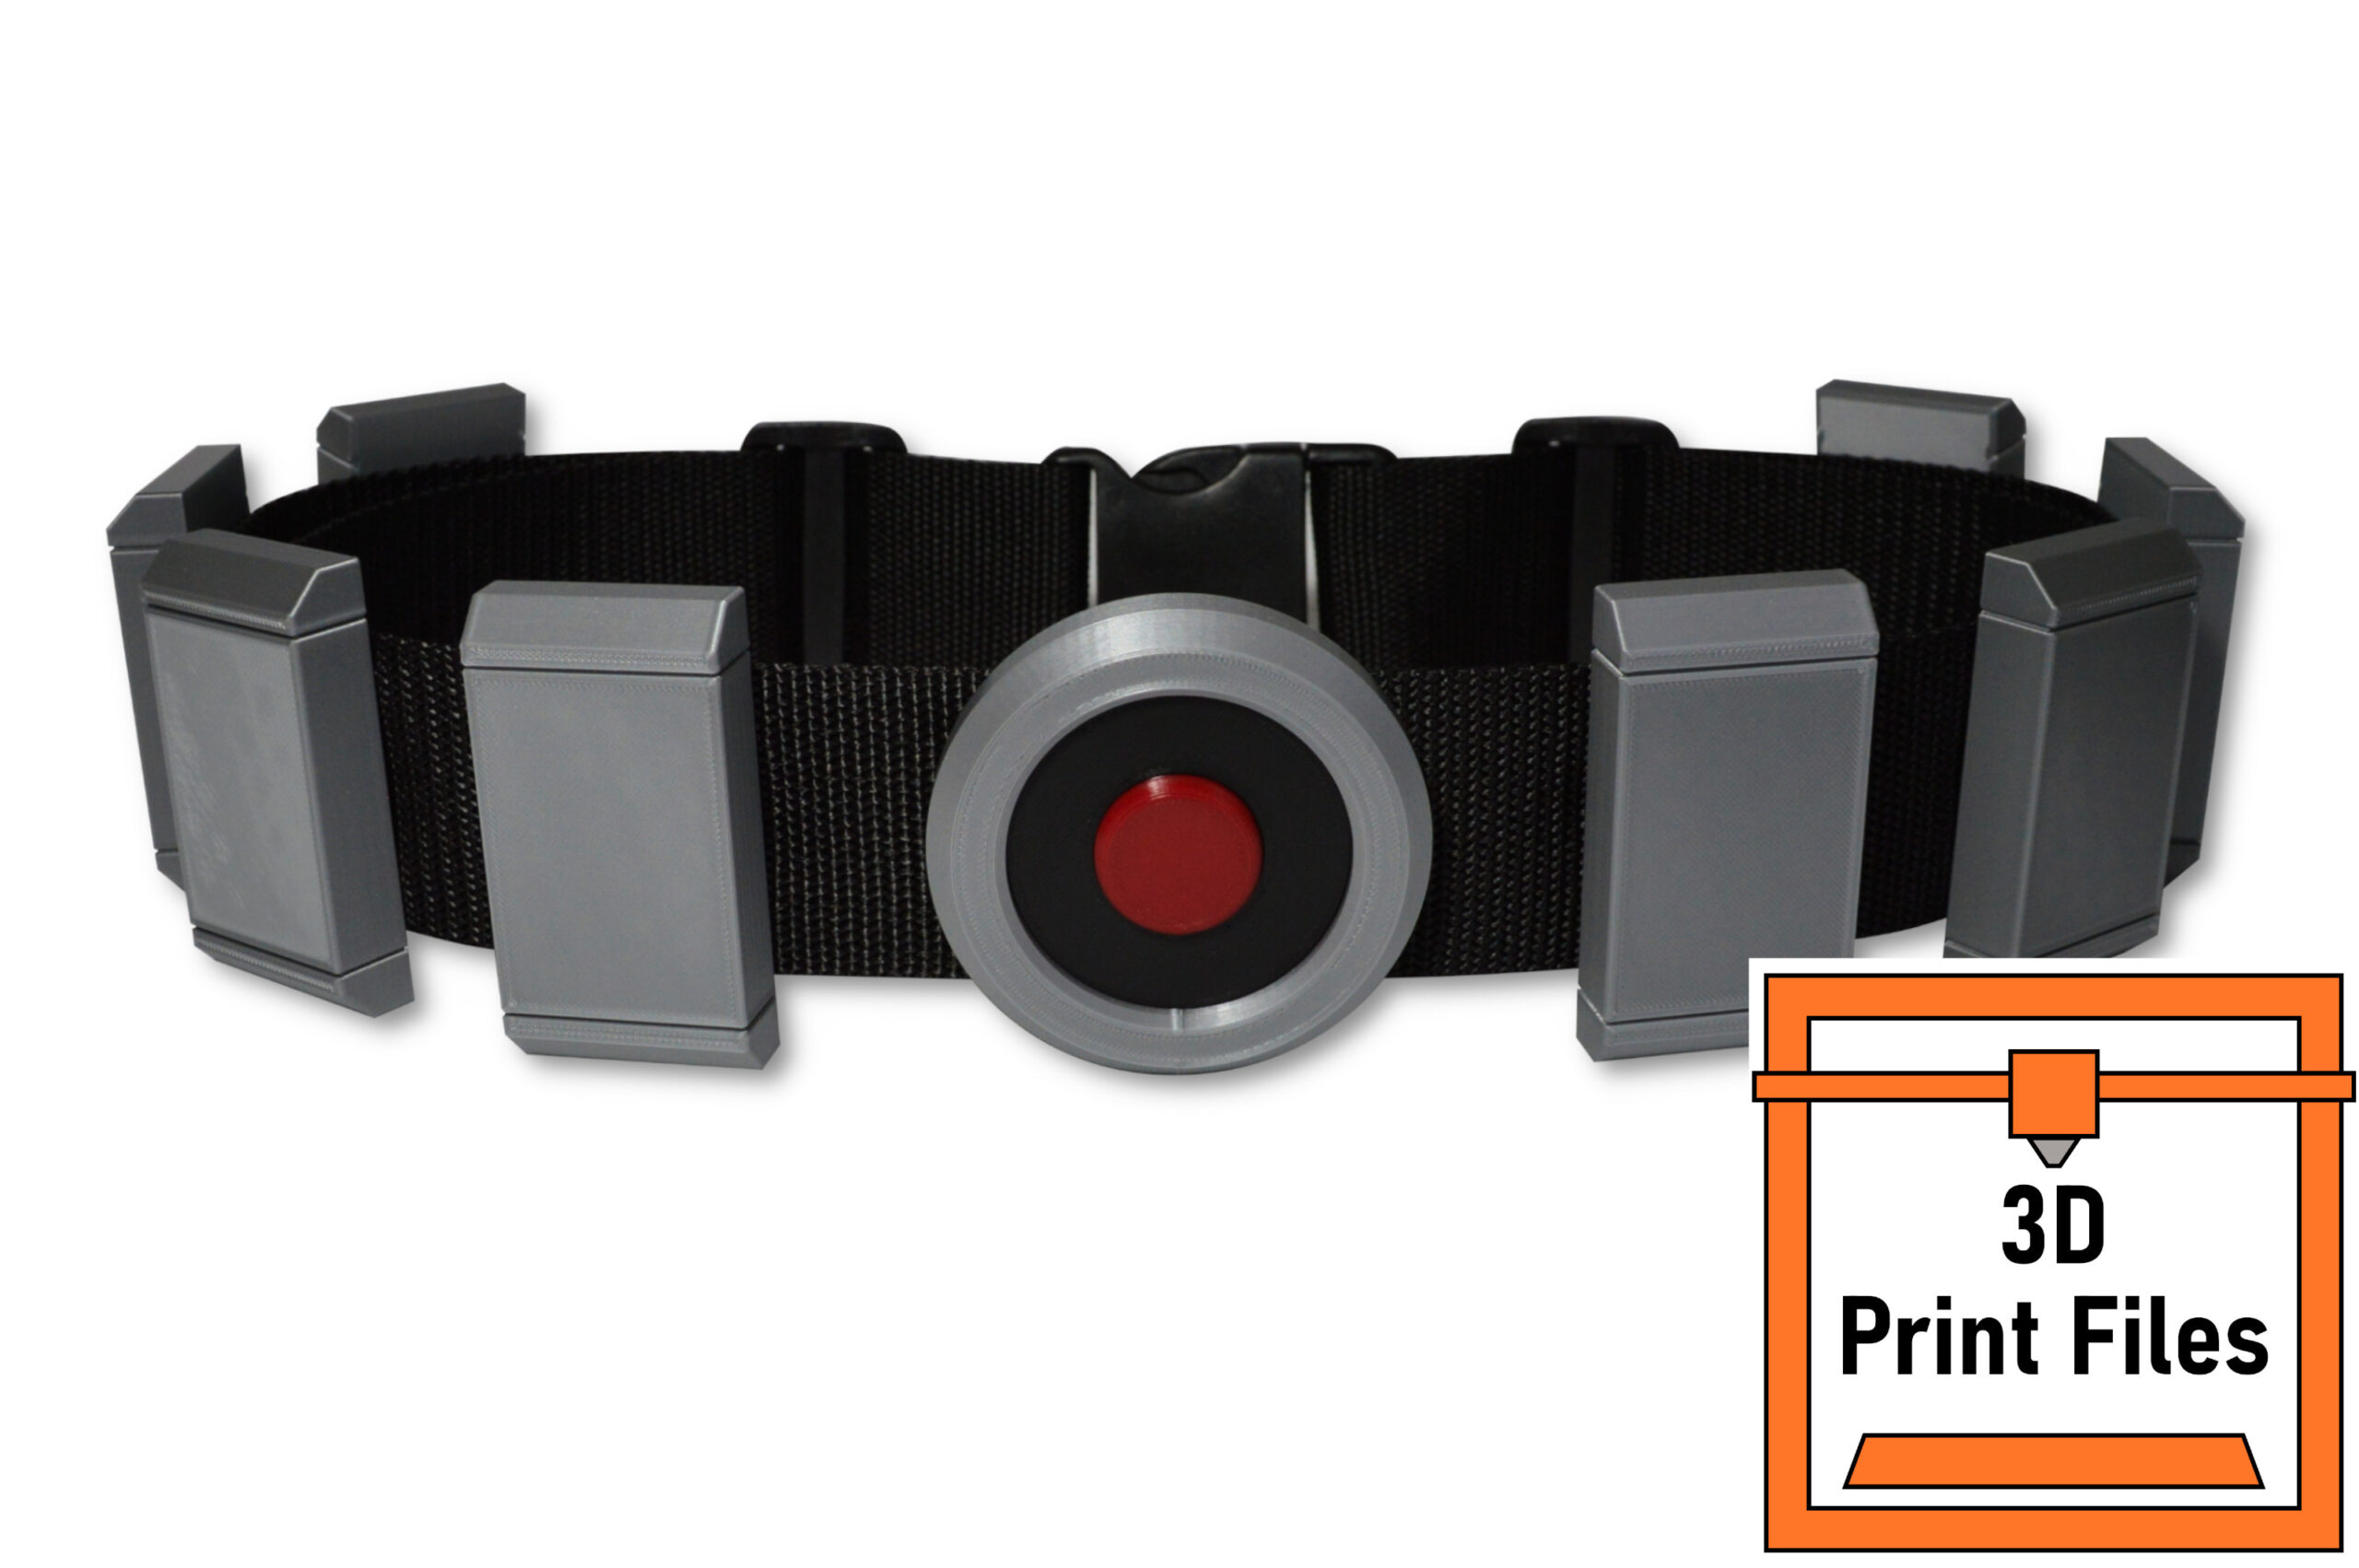
This tutorial will walk you through the construction of the Cap utility belt. The template is available for purchase here:

If this is your first build, check out the Introduction Page first,
as well as the Supply Page for links to the foam, glue, and necessary tools.
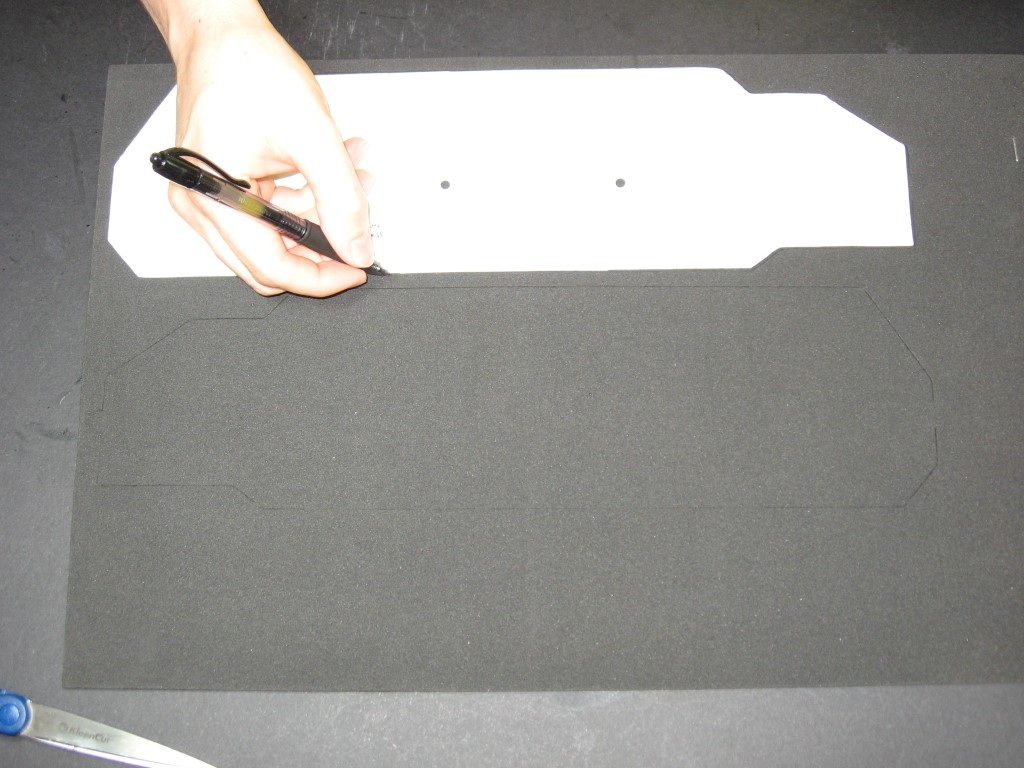
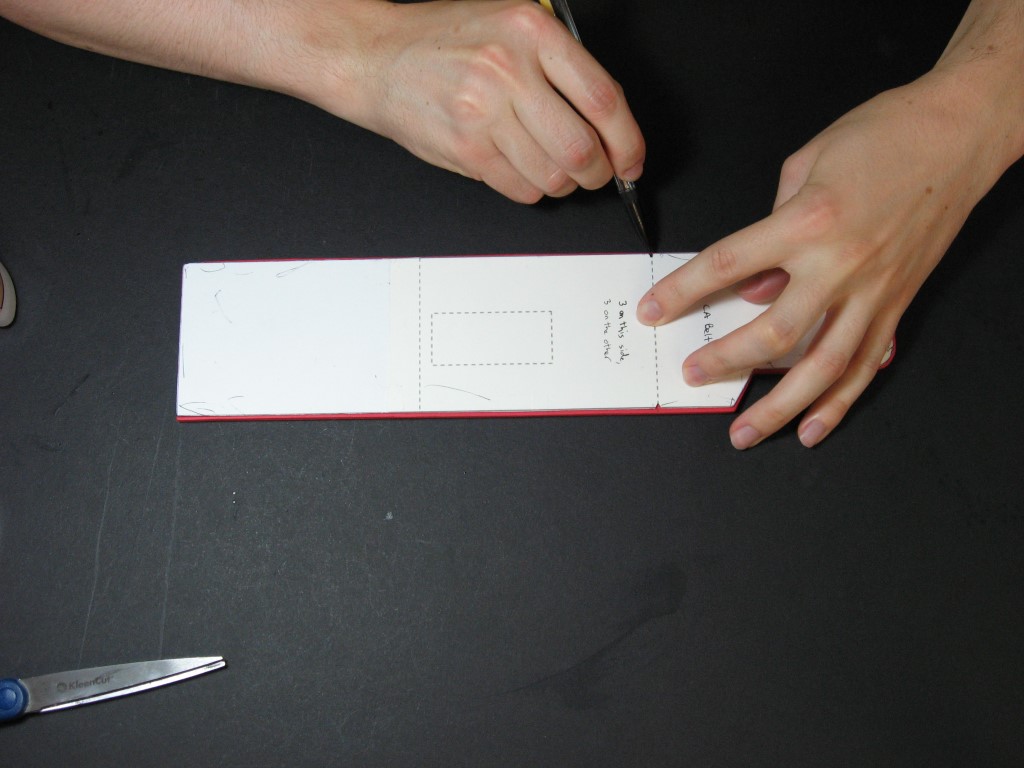
Print out the template onto thick printer paper (ideally a poster board paper) to make it easier to trace. You may have to print it out a couple times to get enough copies to cut out all the layers separately. Tape together the sections that extend onto a second page– hold it up to light or place the printouts on a sun-facing window to see through the paper and correctly align both halves.
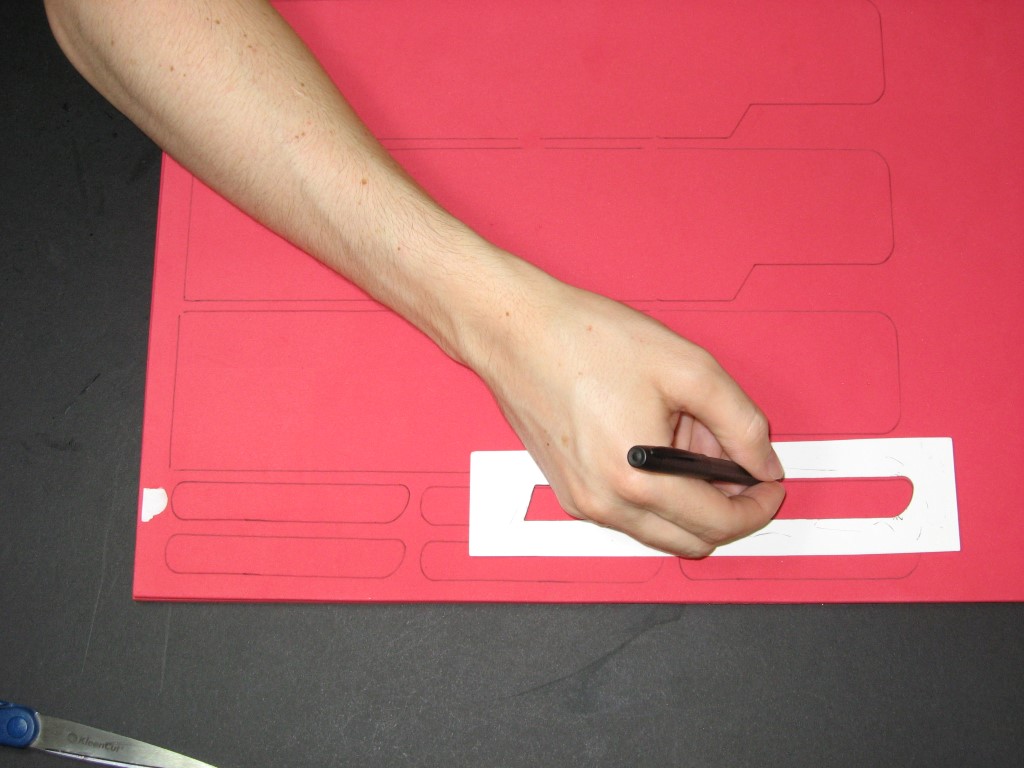
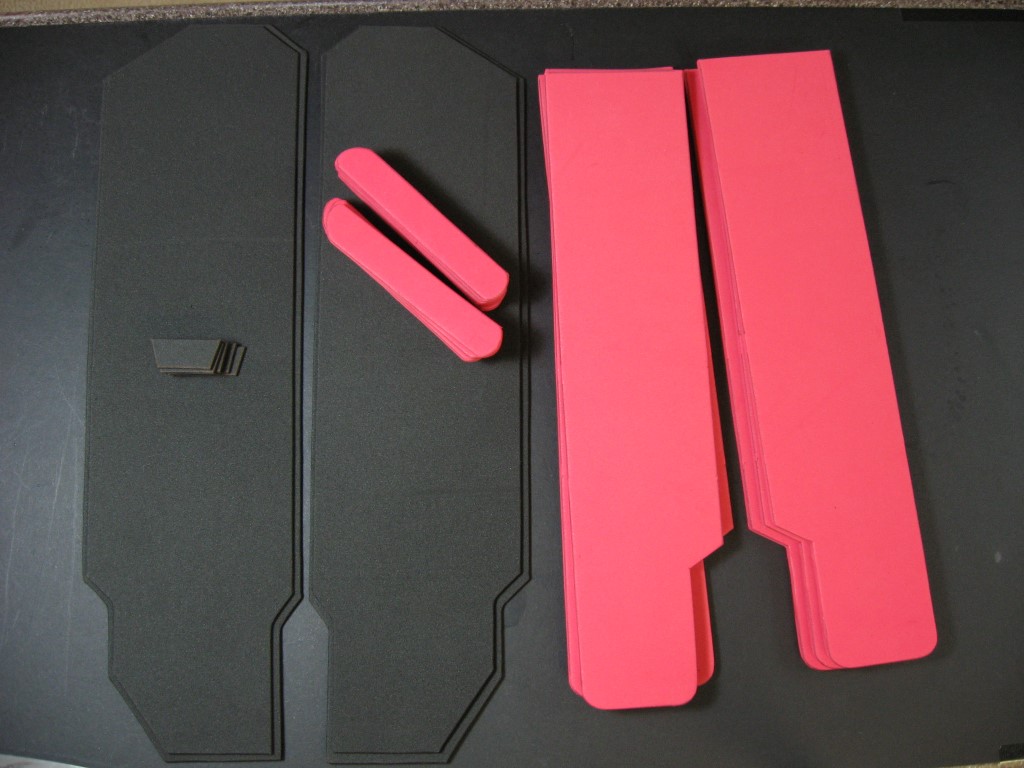
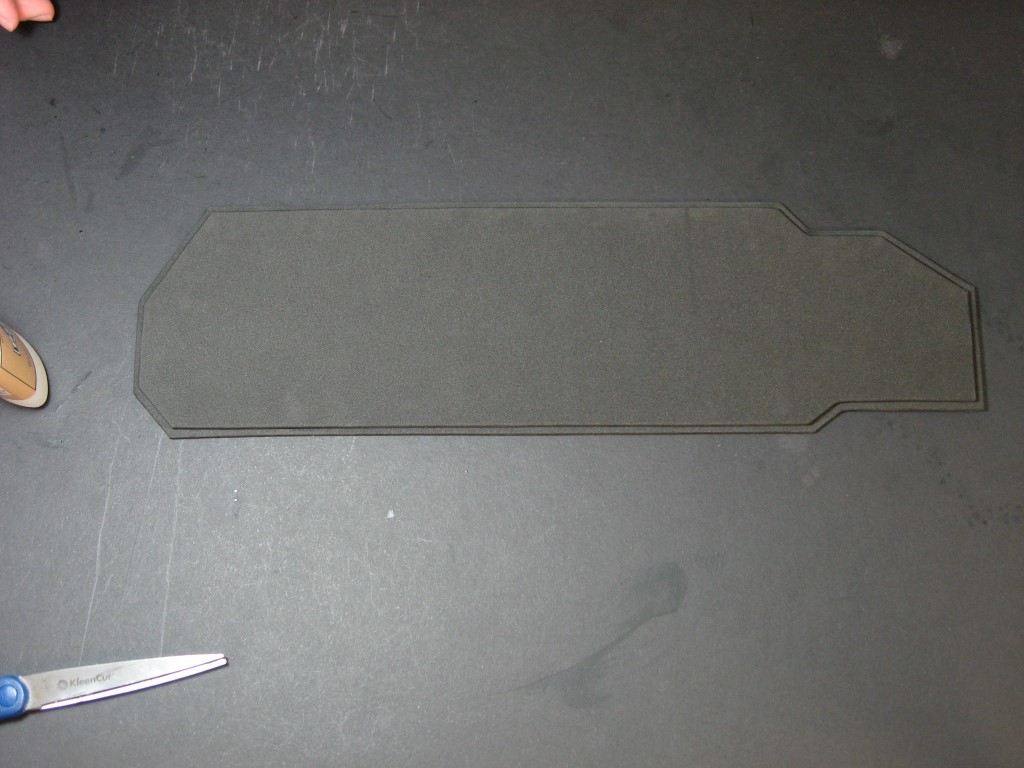
Cut out all the pieces and trace them onto your foam sheets. Use a few pieces of scotch tape to hold the template in place on the foam when tracing. You can use a regular ball point pen; at the moment I like those space pens as they flow smoothly over the foam. I recommend 3mm thick foam for the belt layers and the pouch tabs, and 5mm foam for the pouches and pouch sides. Also, make sure to flip the templates over for half of the pieces, as the right and left sides of the belt are mirrored. (You can just flip the foam over after cutting it out, but I find there to be a noticeable visual difference between the top and bottom of a scissor cut edge.)
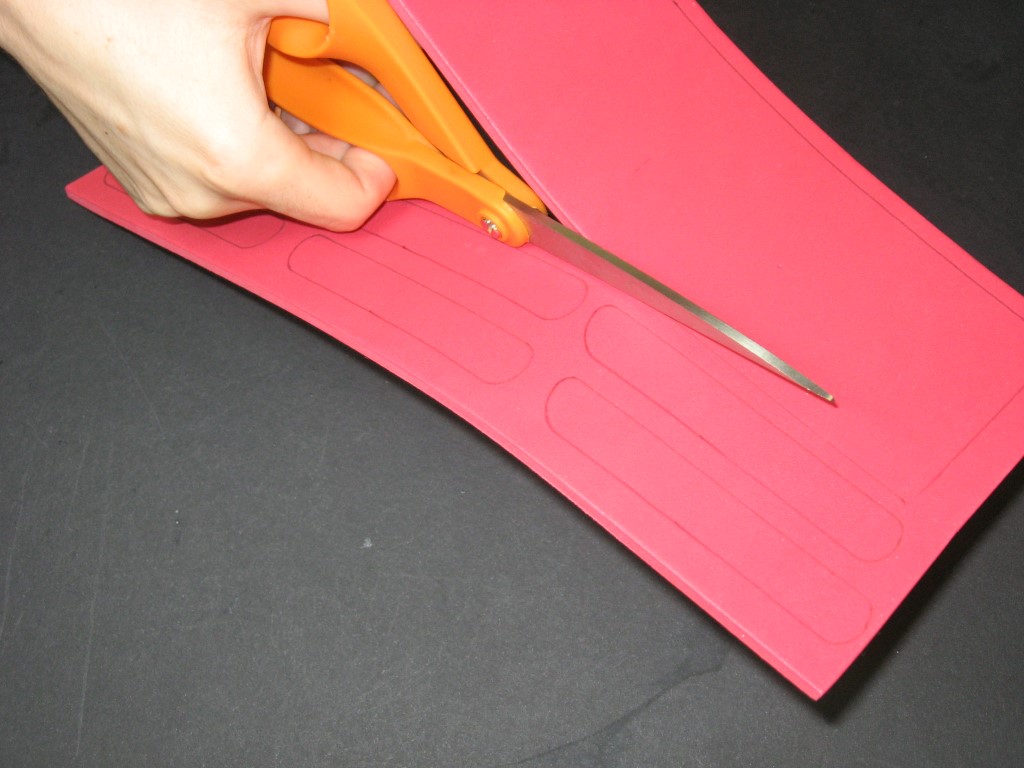
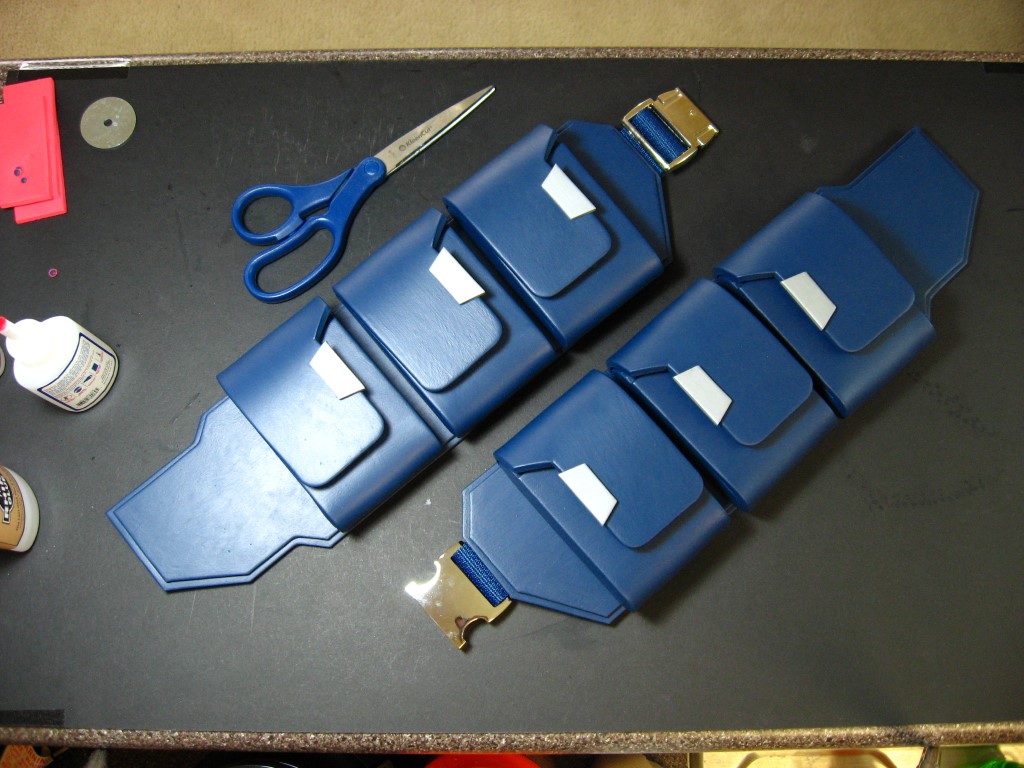
Use a regular pair of office scissors to cut out all of the pieces.
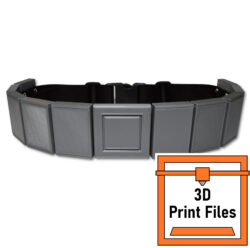
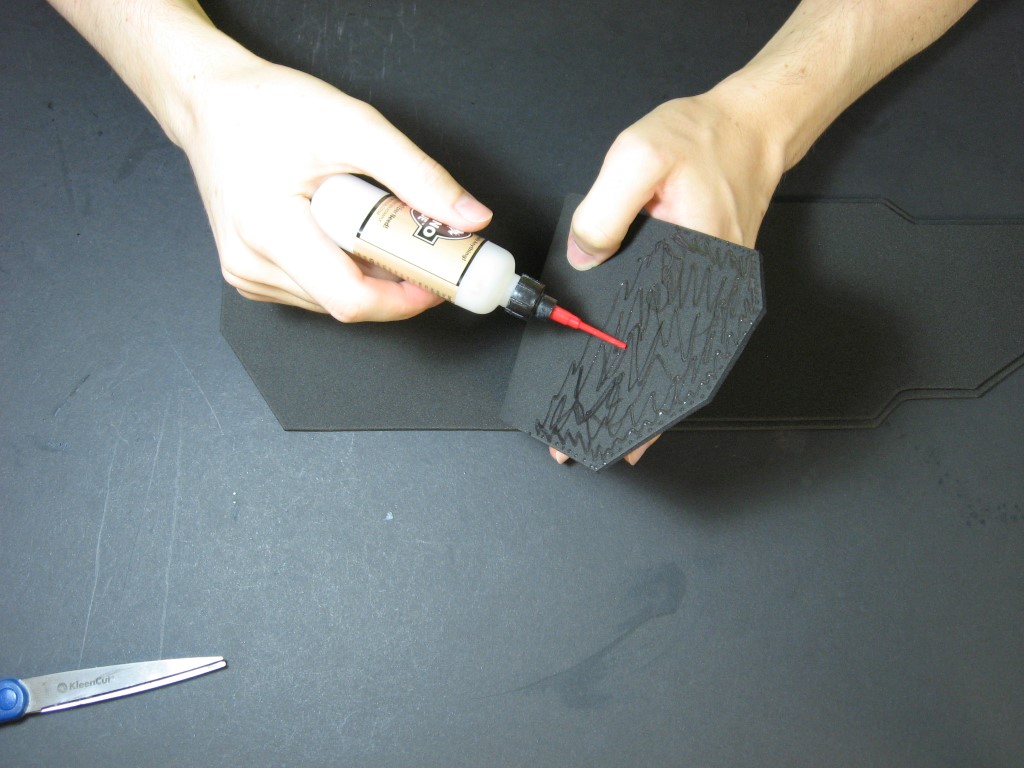
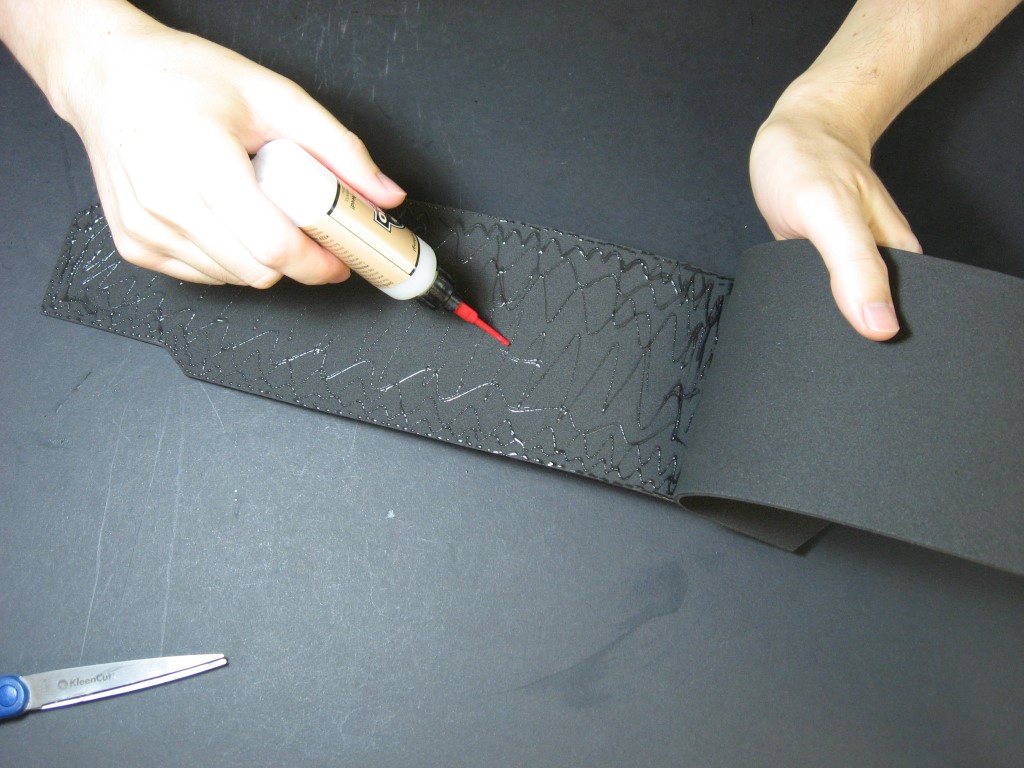
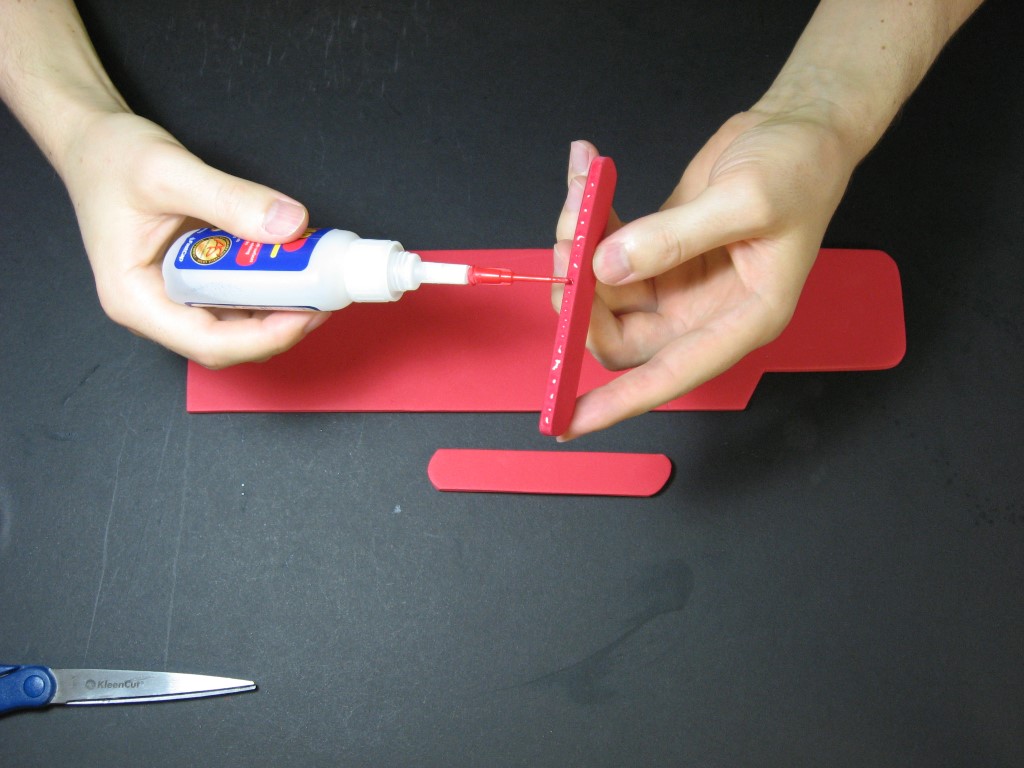
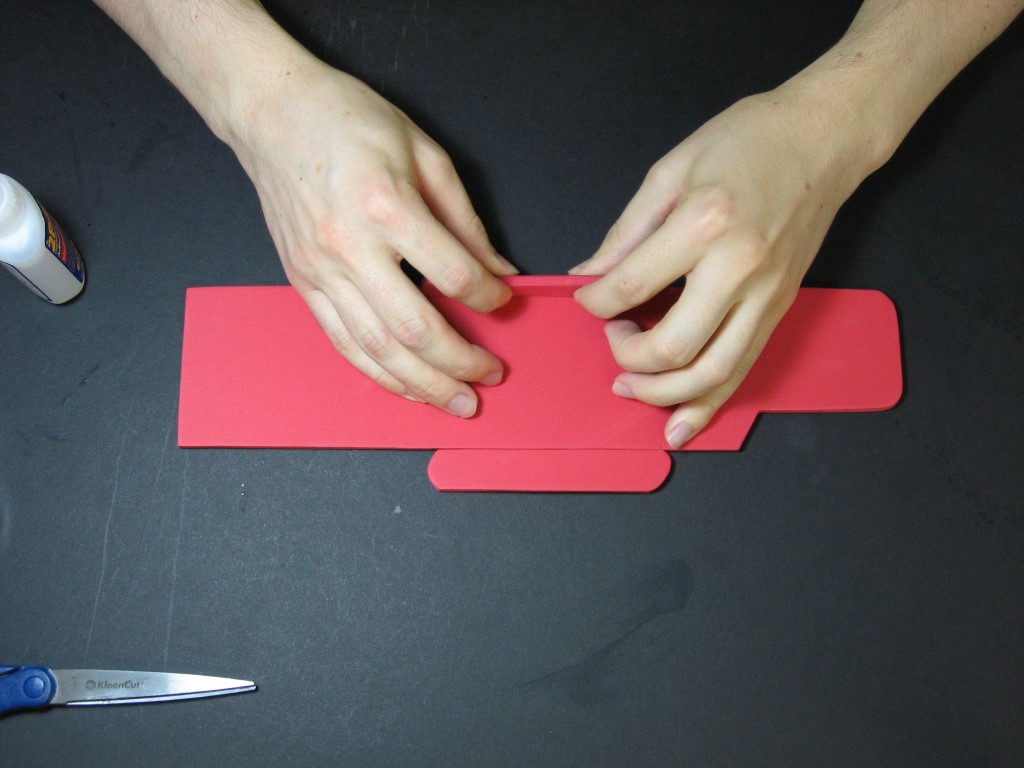
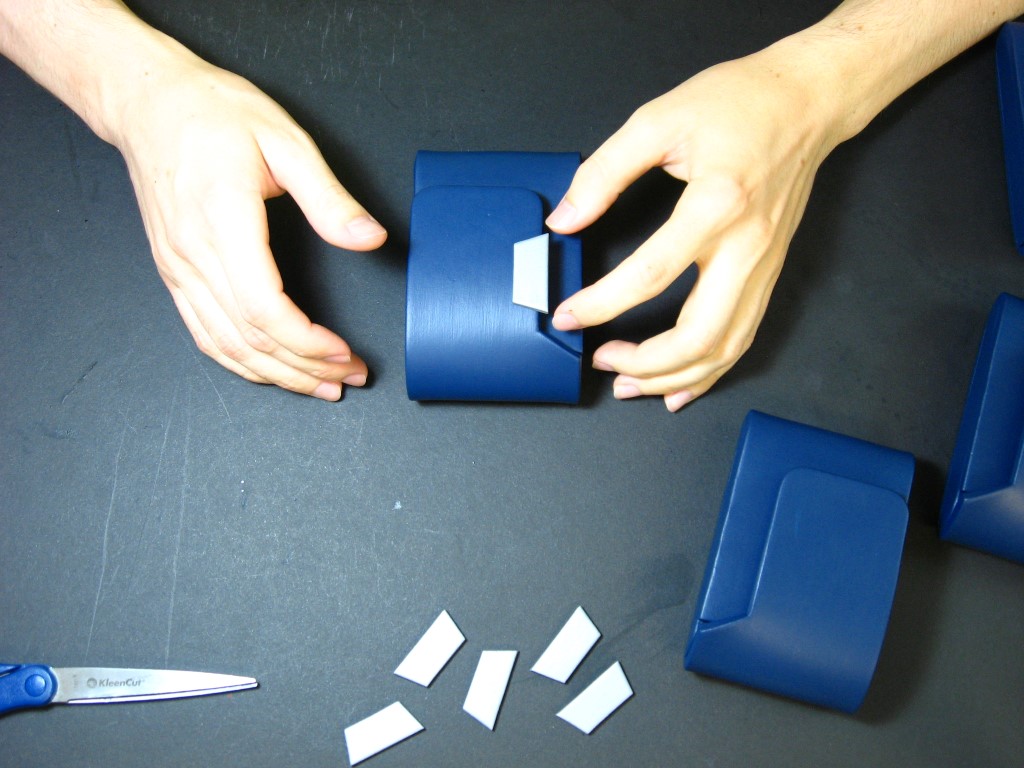
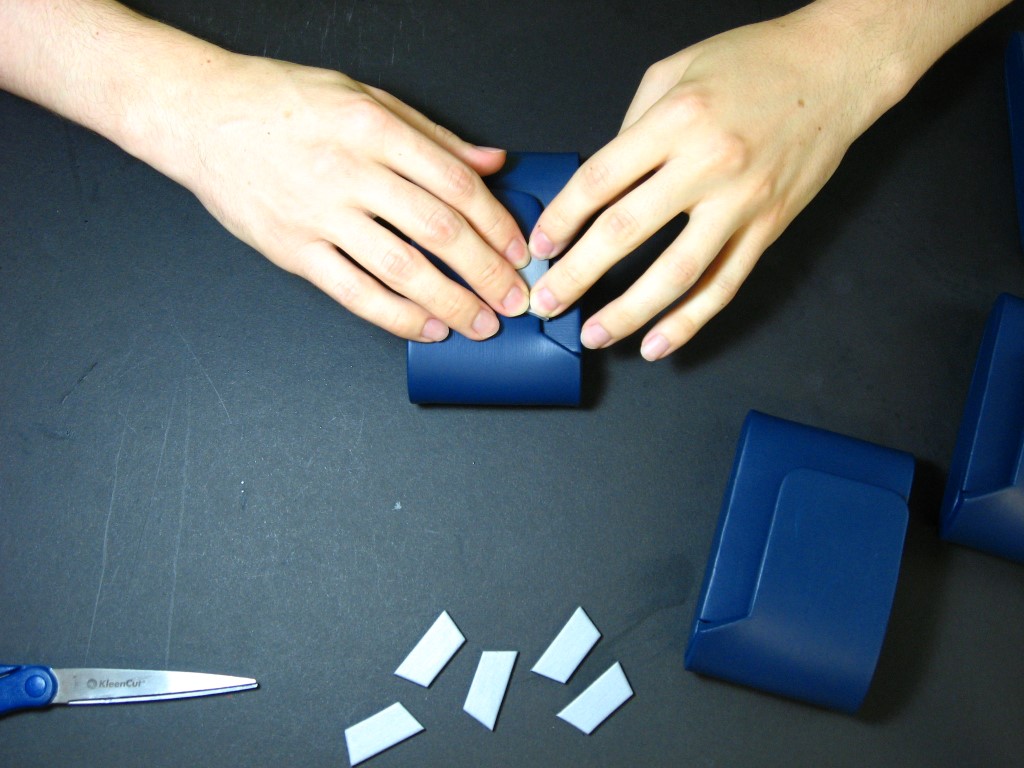
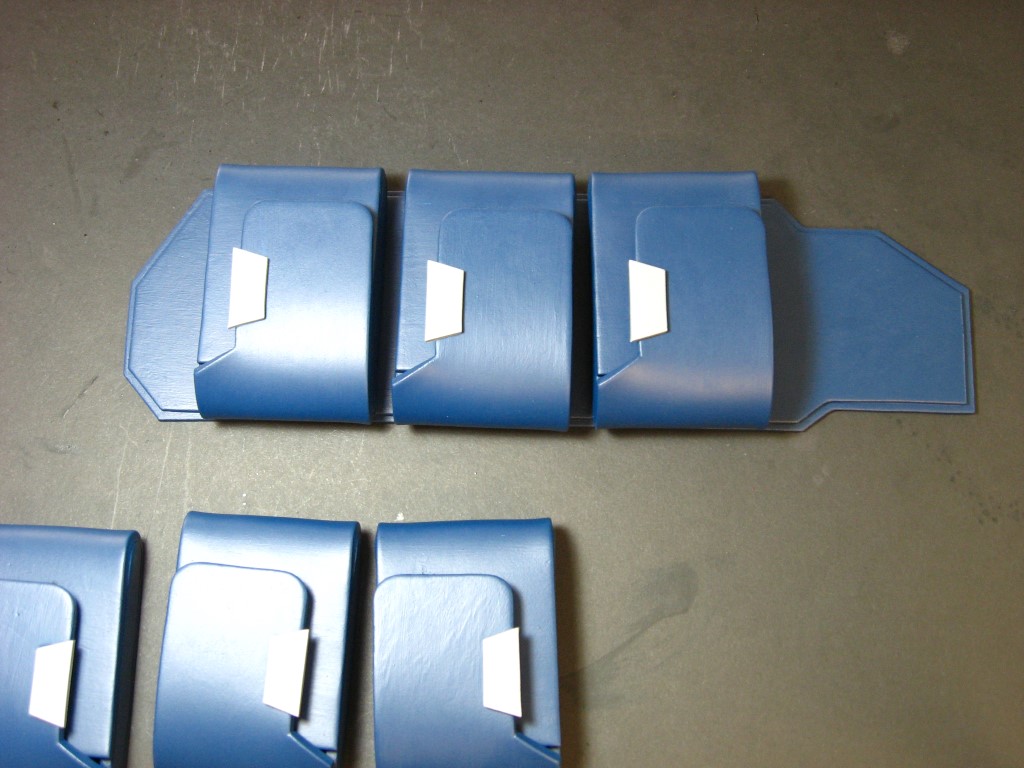
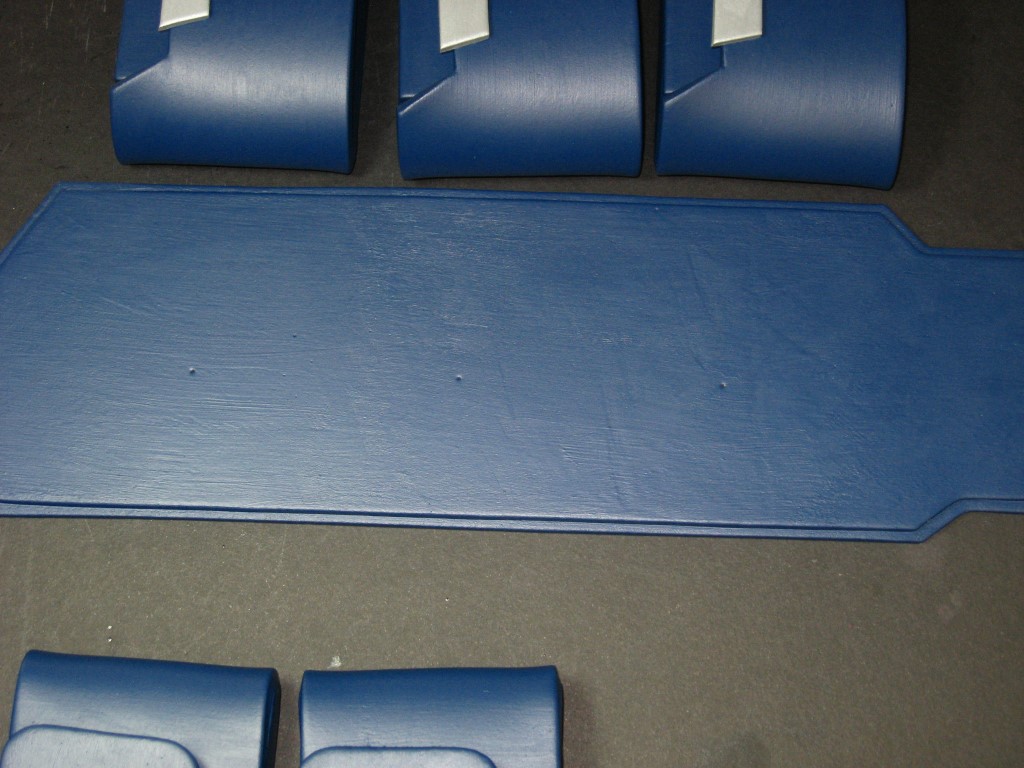
Align the belt layers on top of each other. Hold the top layer down and bend back a corner. Apply a small amount of glue to the underside and place it back down. ( I use a variety of Super Glues, mainly ‘Rhino Glue”) Hold it for 10 or so seconds to dry. Finish gluing the rest of the top layer.
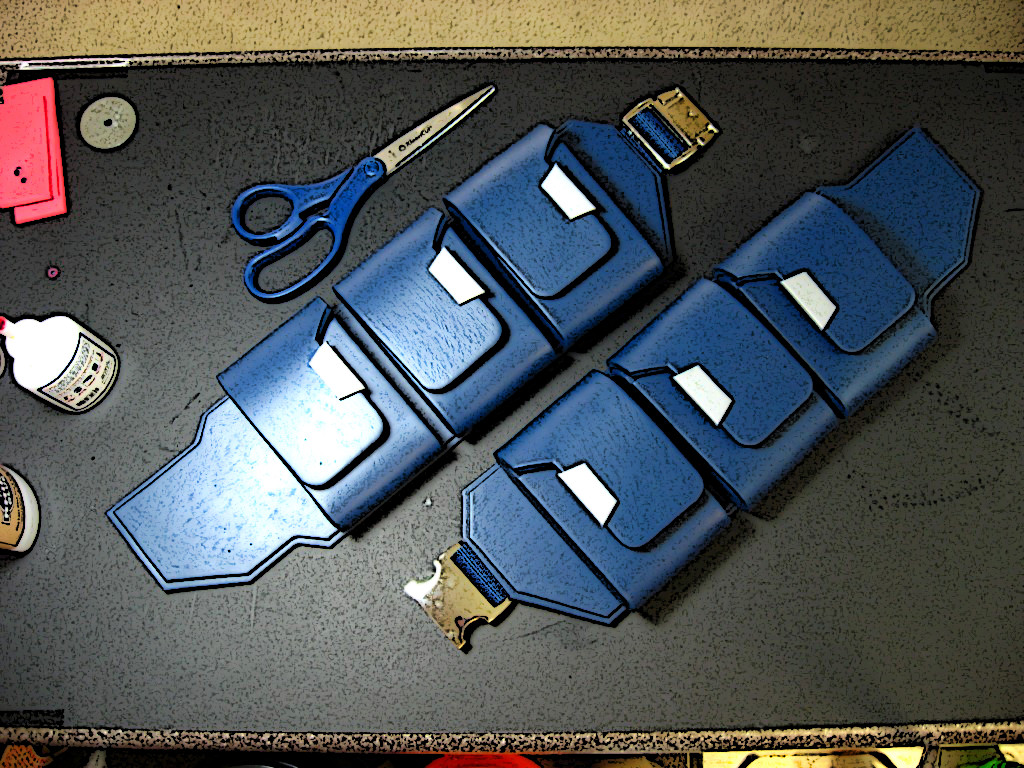
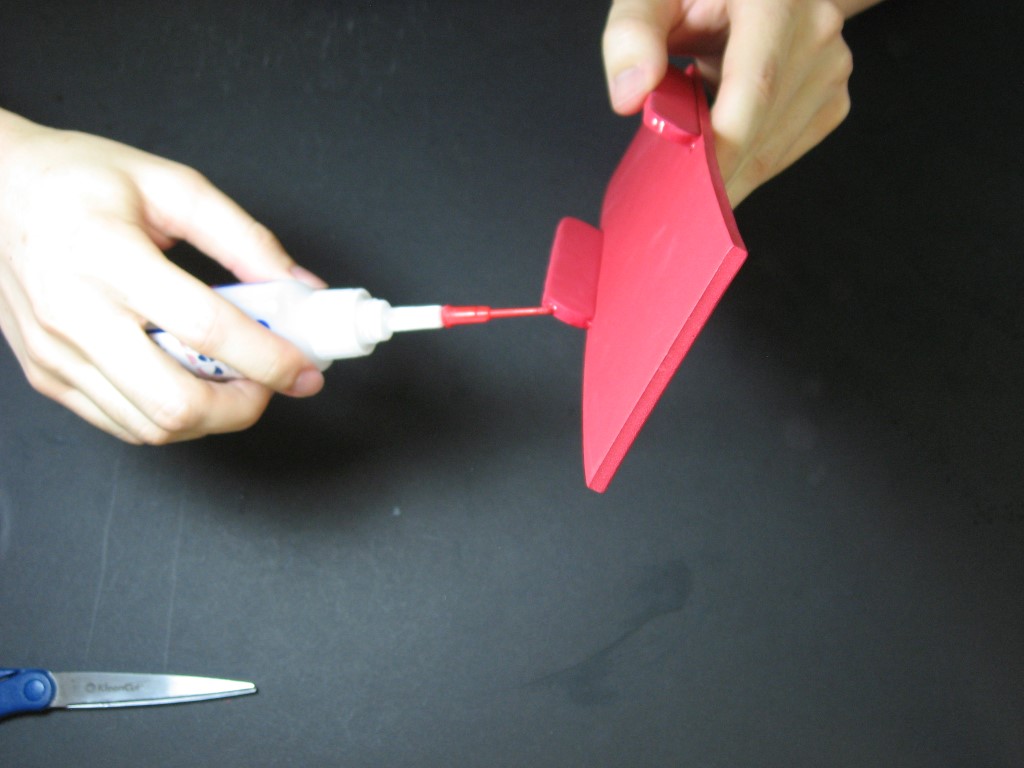
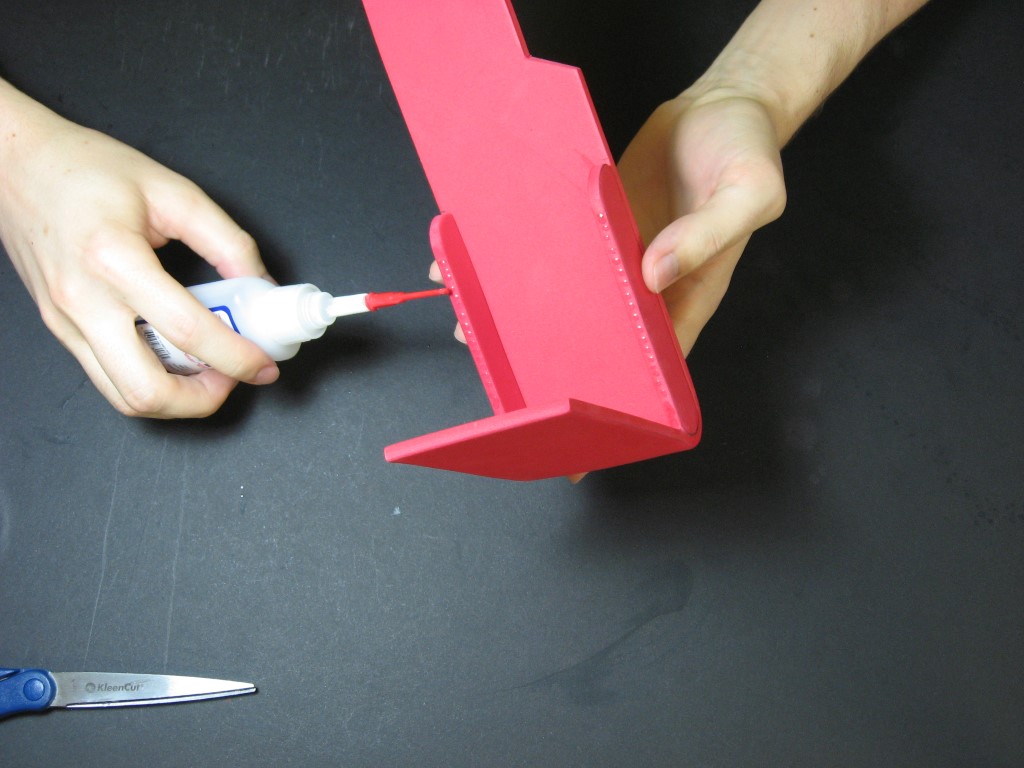
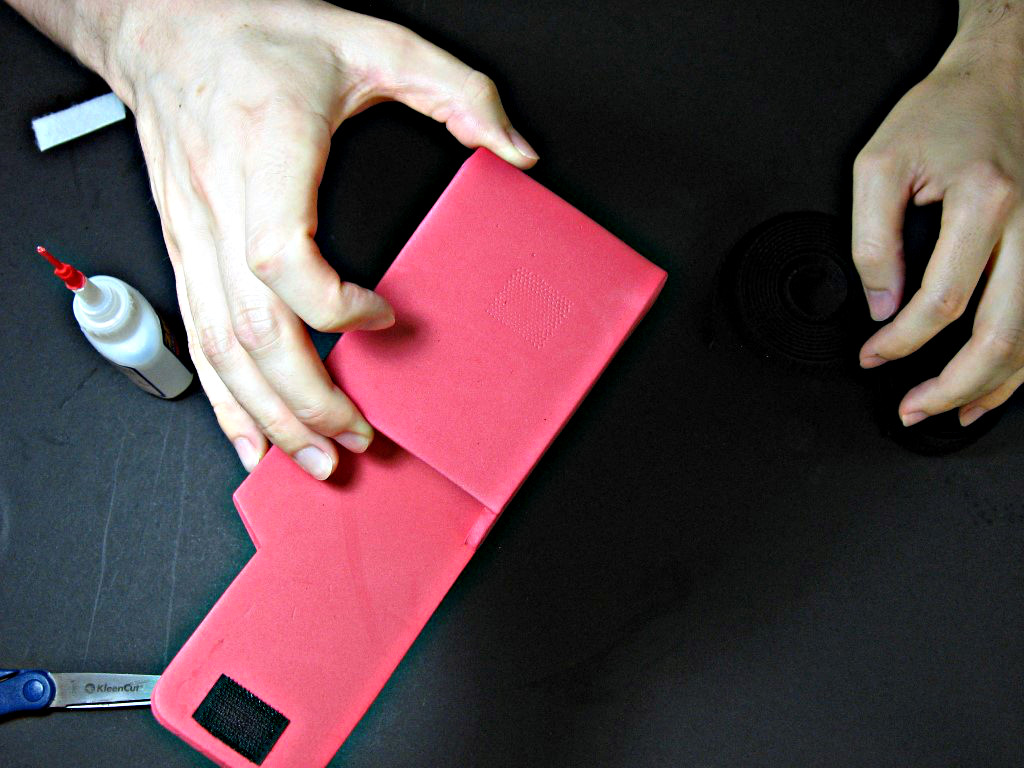
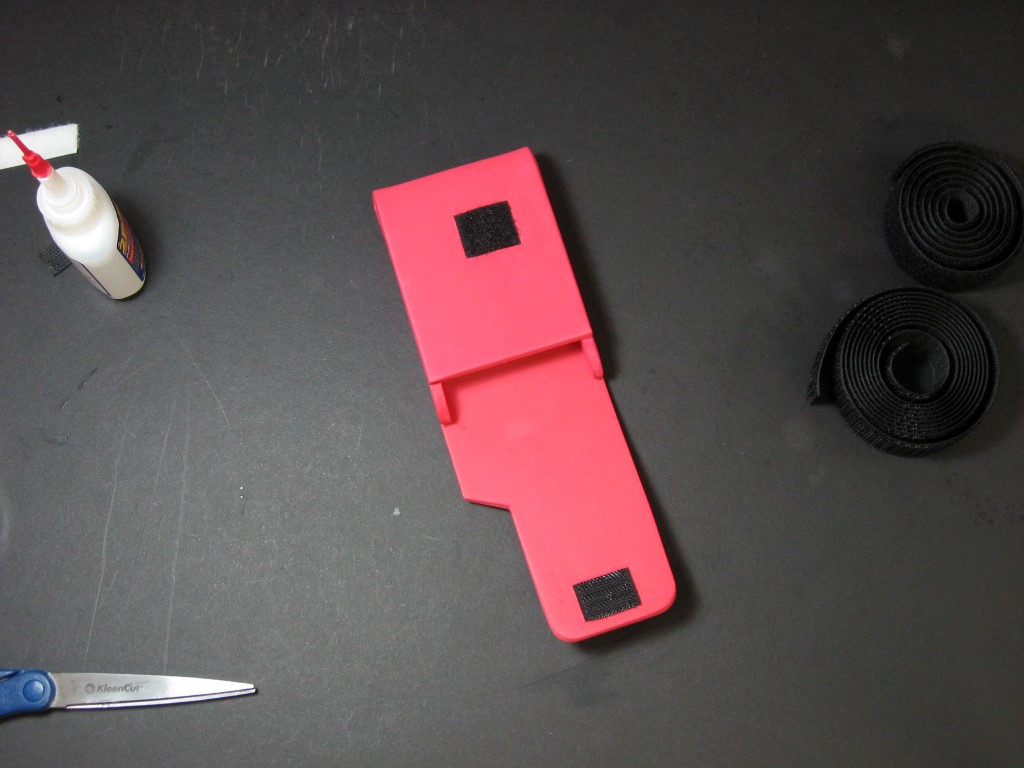
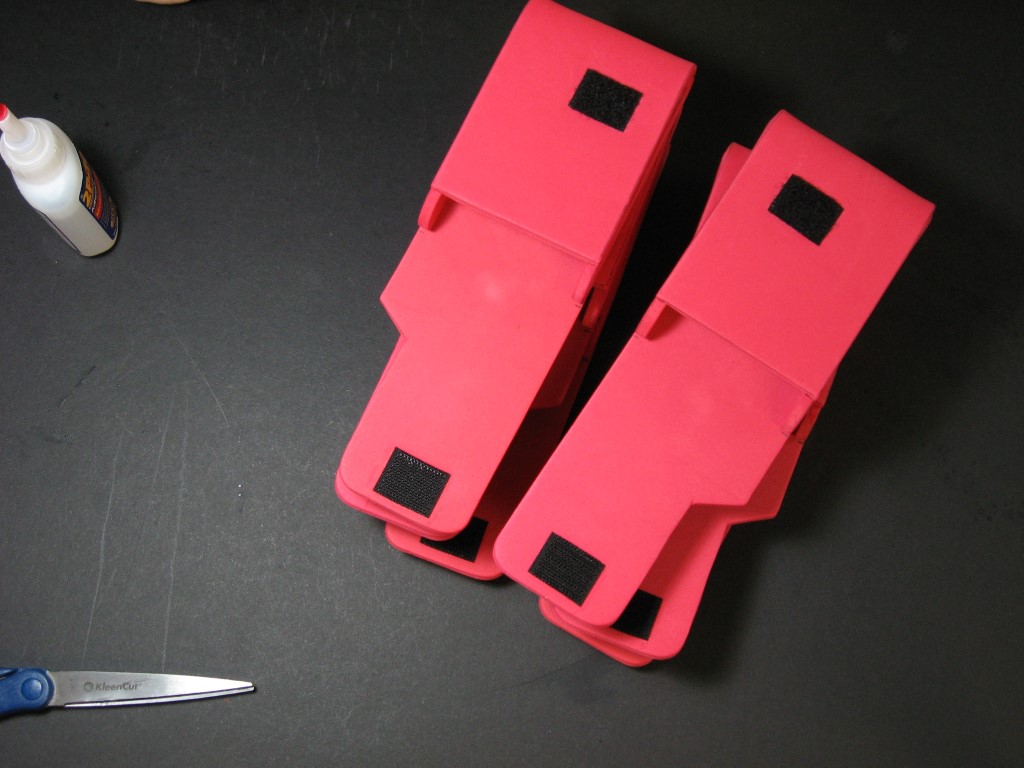
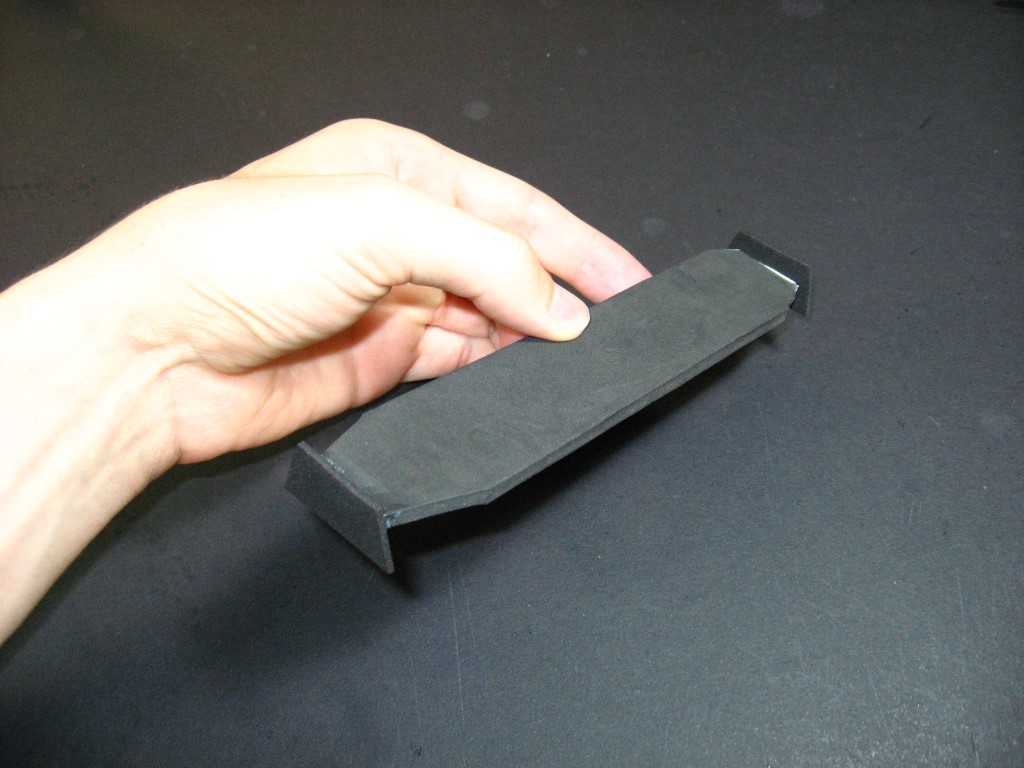
Lay the pouch template on the pouch piece and mark where the top dashed line is. Apply glue to the edge of the pouch side pieces and hold them in place just under the marked line.

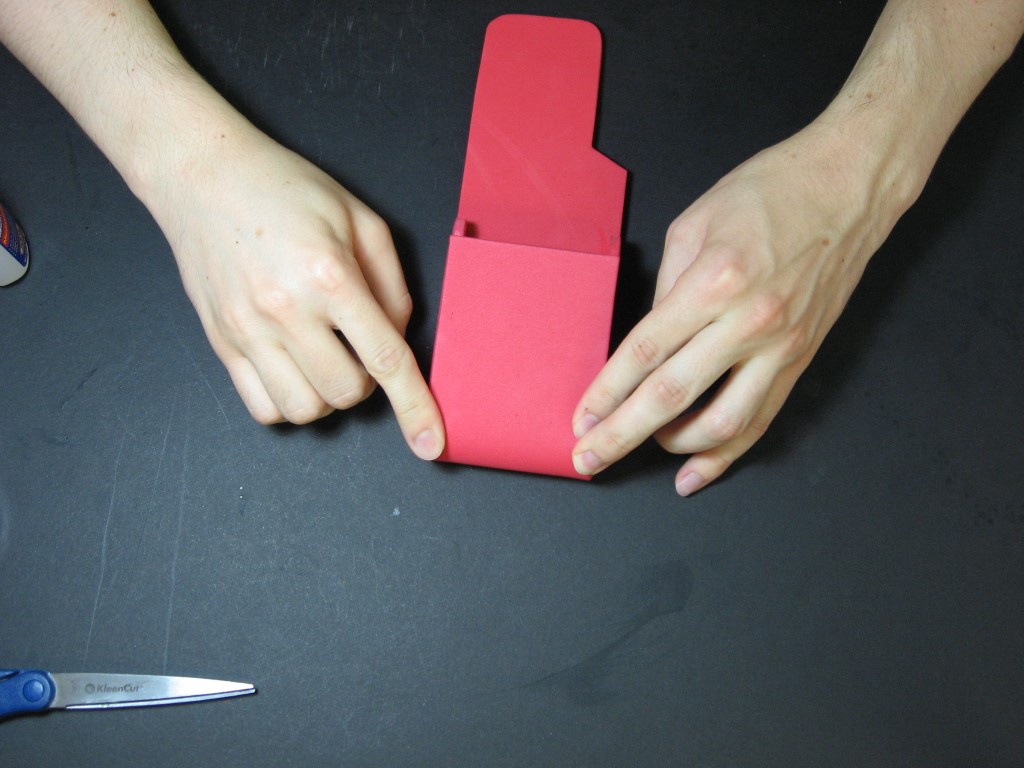
Put a little glue on the bottom edge of the side pieces and fold the pouch over and hold it to dry. Finish gluing the side pieces to the pouch.
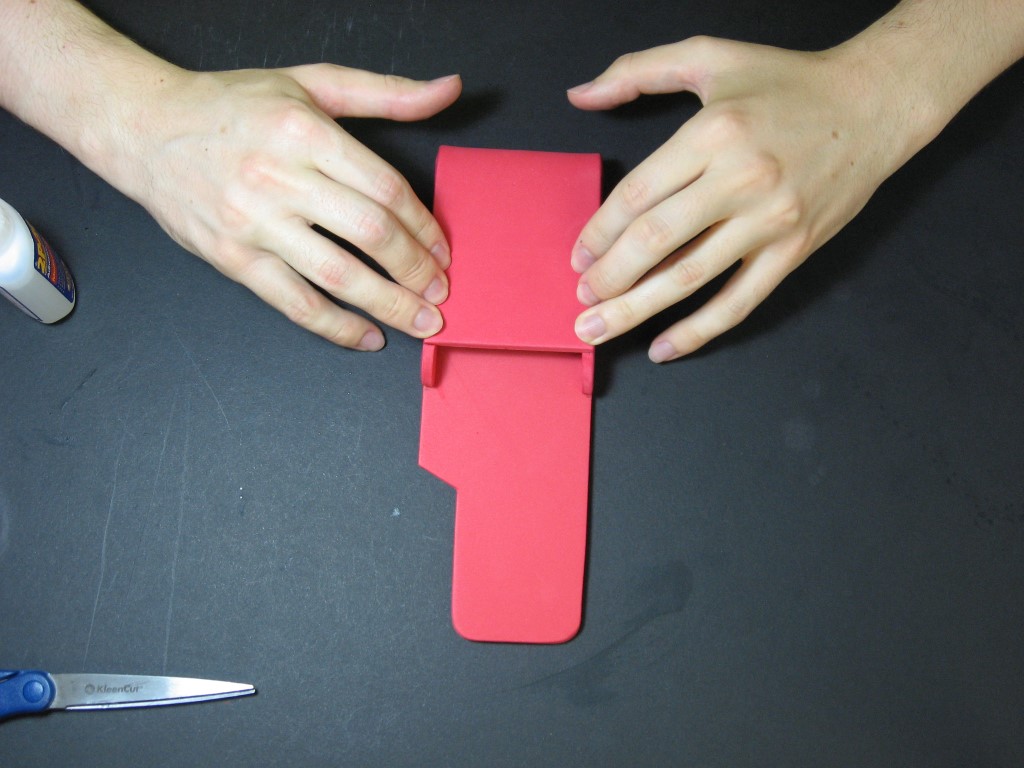
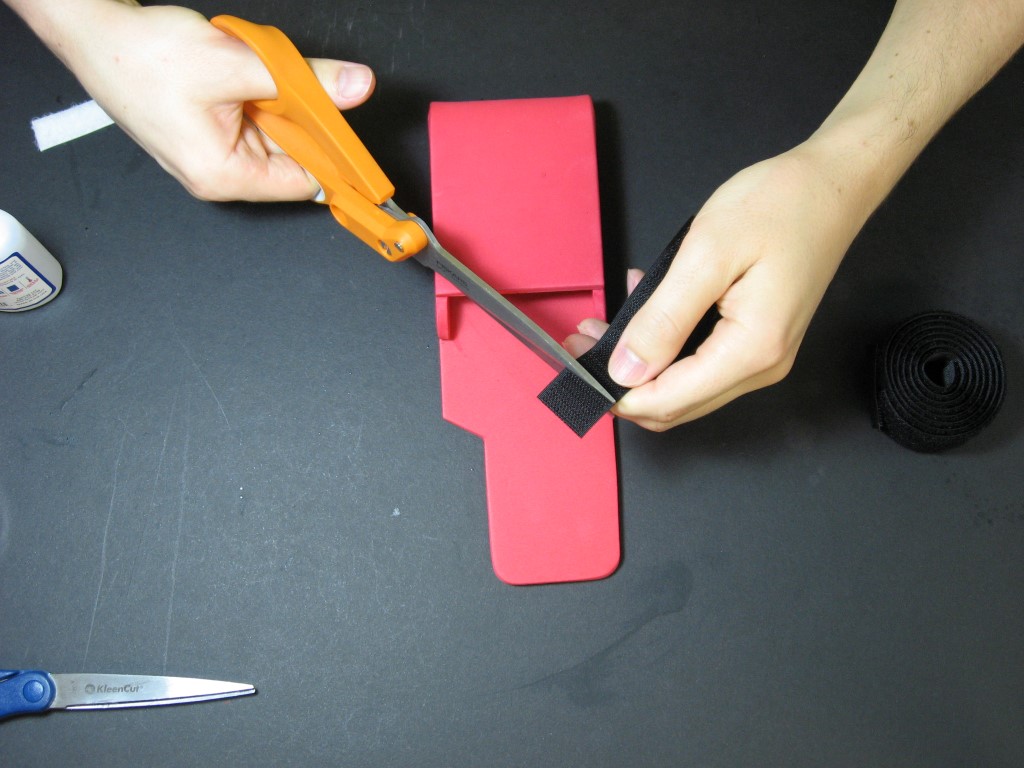
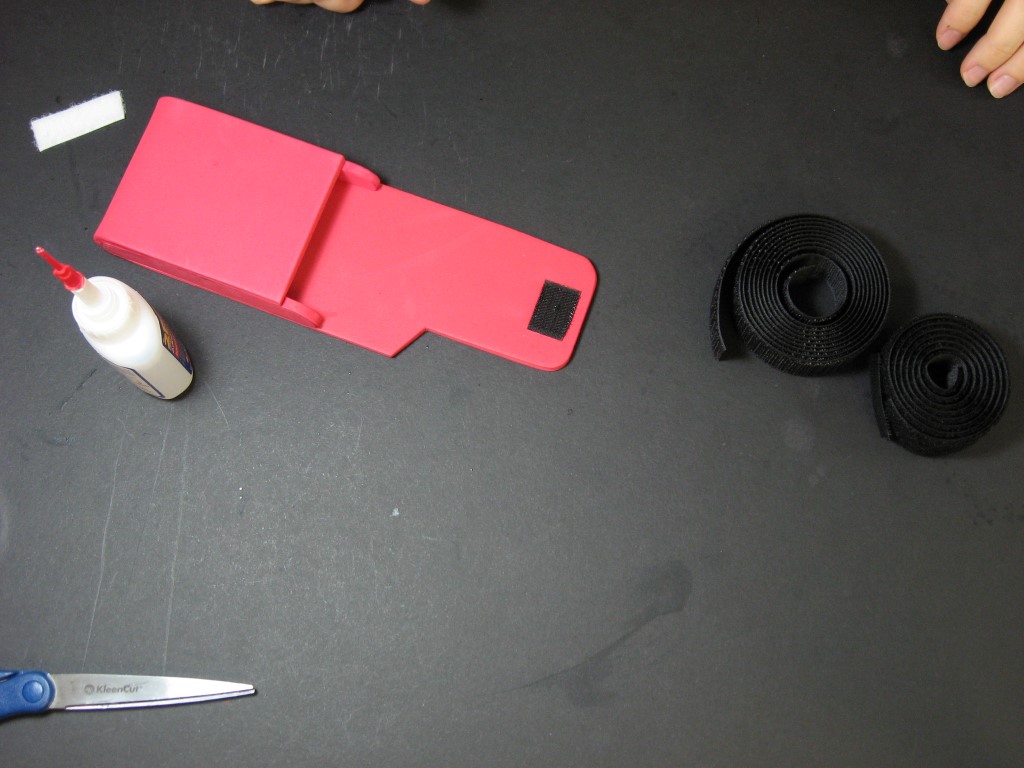
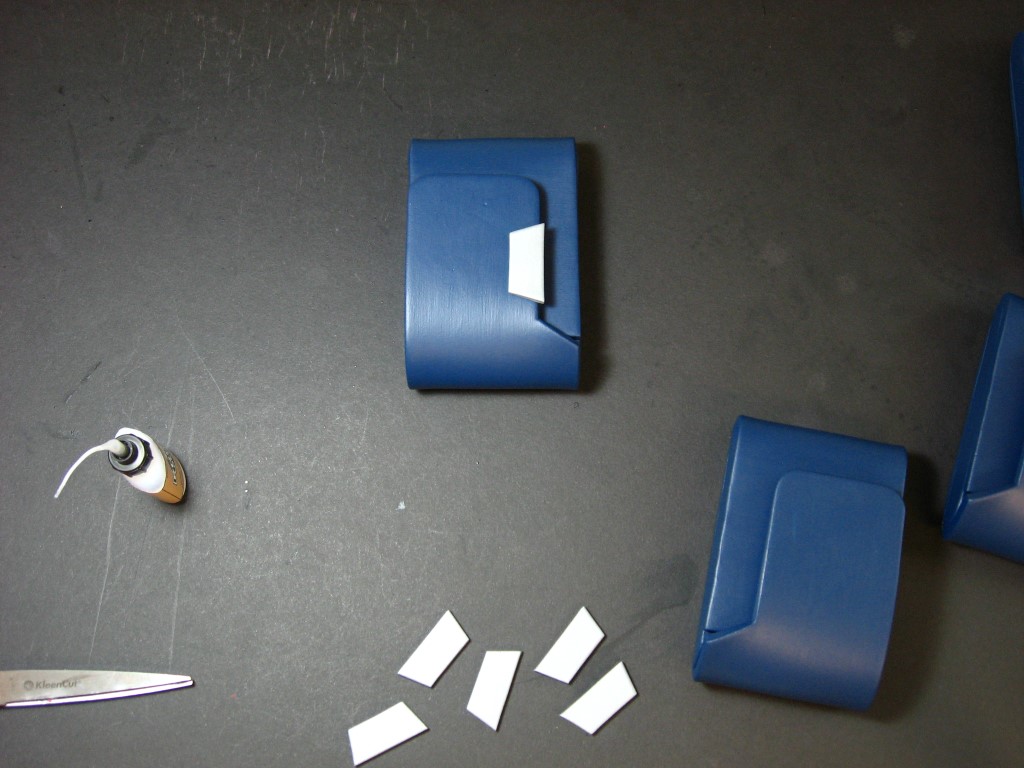
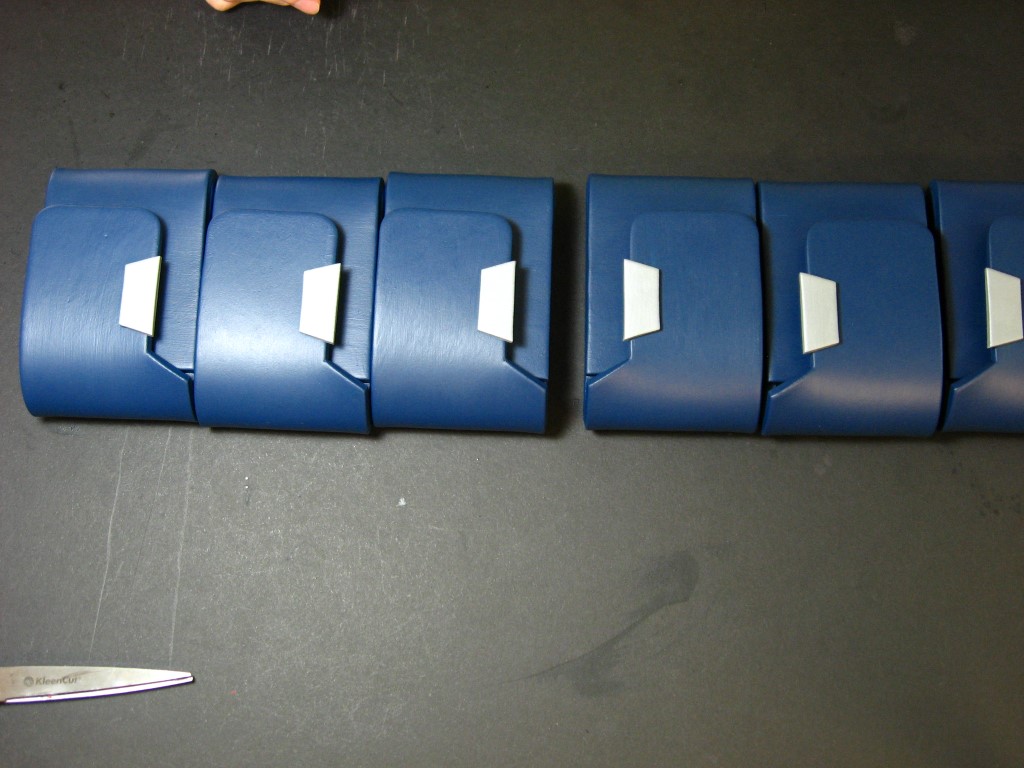
Cut a small piece of hook-side velcro and glue it to the top inside flap of the pouch. Bend the flap over and press it down. This will leave an indentation you can use as a guide for where the loop side velcro will go.

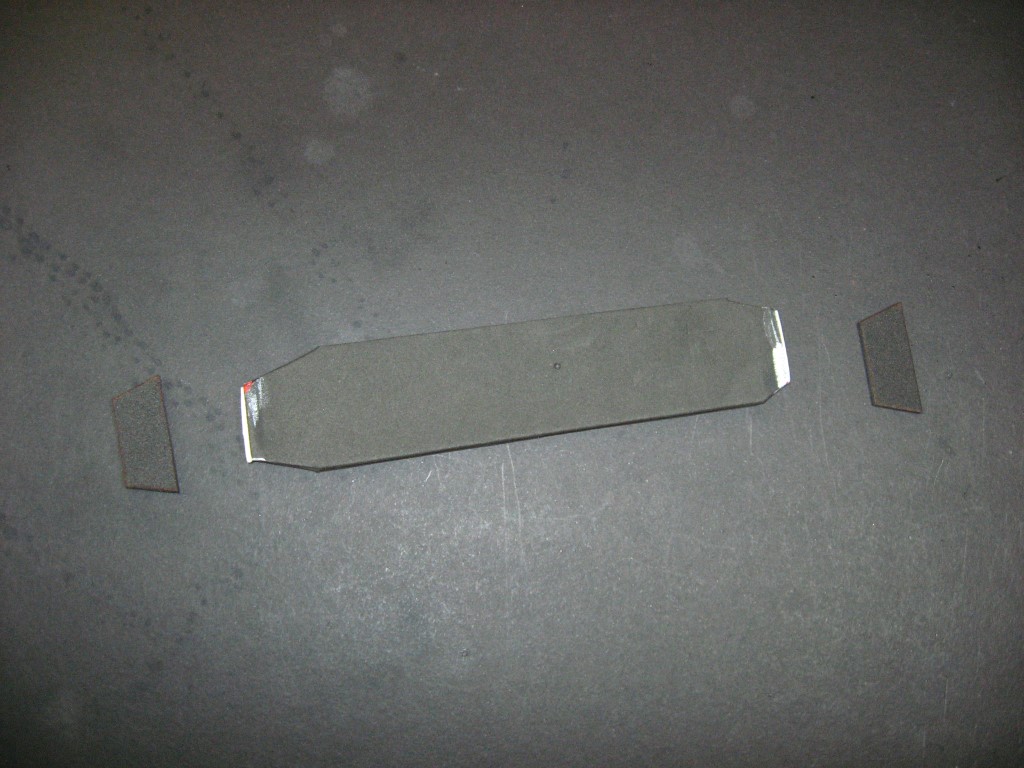
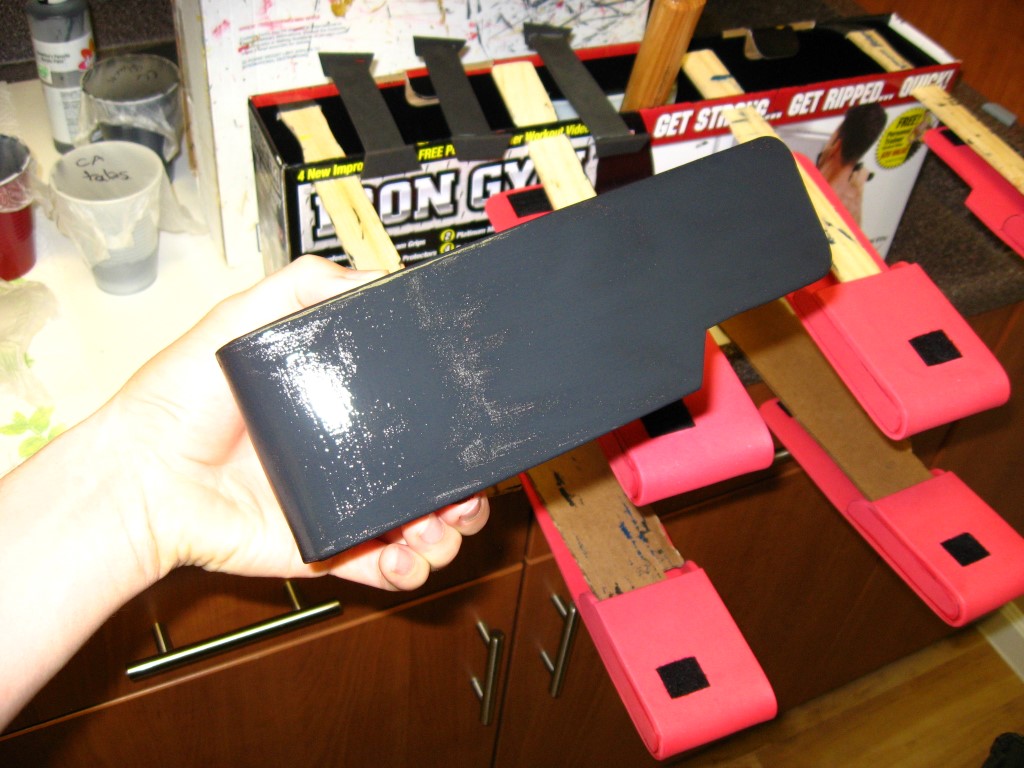
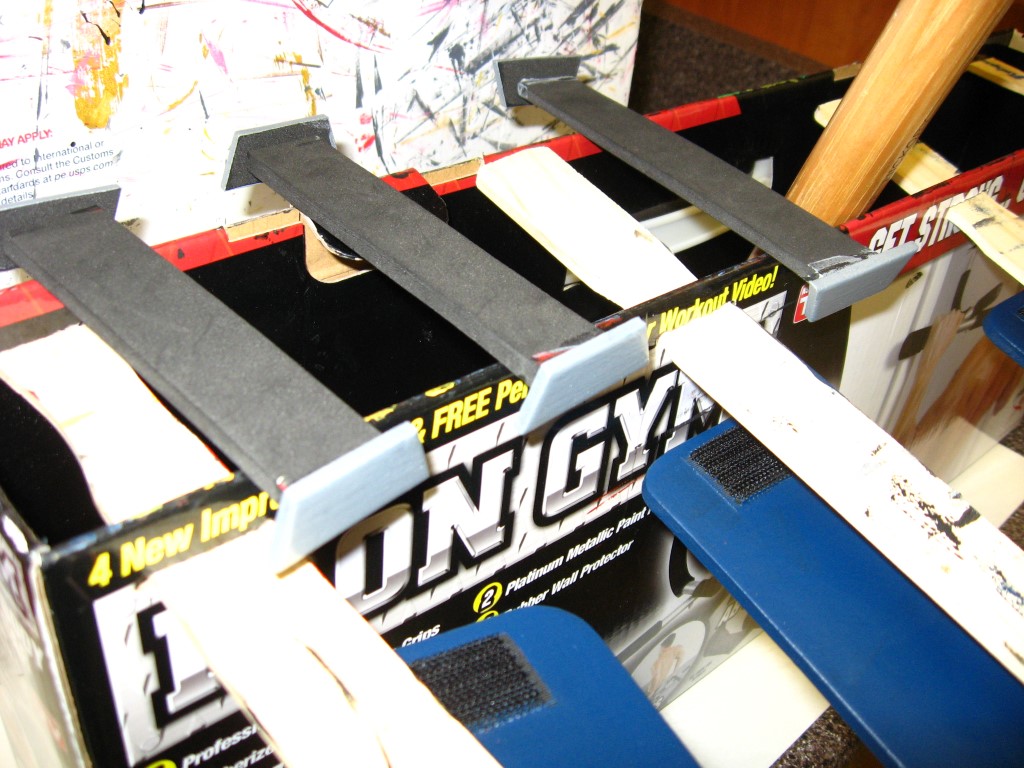
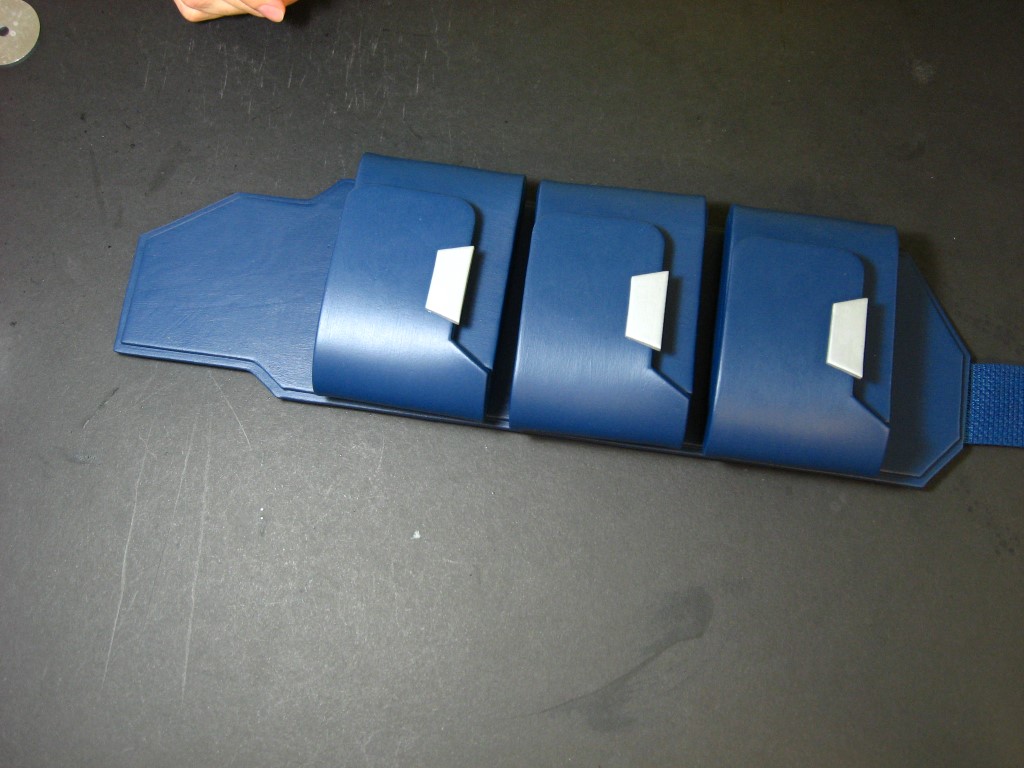
The pieces are now ready for painting. We’ll glue on the grey pouch tabs after painting as it is easier to paint them separately. Those pouch tabs are very small and awkward to paint without a little setting up. I make little holders for them using strips of 5mm foam with rolled up pieces of masking tape on the ends. This way I can paint all the sides at once and let them dry without ever having to touch or hold them.
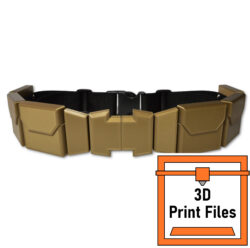
I made a stand to hold the pouches as well while they are drying using paint sticks stuck into the side of a cardboard box [This tutorial apparently brought to you by ‘The Iron Gym'(TM) Get Stong- Get Ripped- Quick!]. Set a hammer or weight in the box to keep it upright. For more information on painting, see the Painting tutorial here. I use brush-on acrylic paint from the local hobby store. The blue is a mix of ‘System 3’ process cyan and prussian blue, and the silver is ceramcoat metallic silver, americana zinc, and white. I first apply a thick coat of Benjamin Moore Aura as a primer, and then 2 to 3 coats of color. I would also recommend spraying on a couple coats of clear Plasti Dip before final assembly of all the pieces to help protect the finish. Just make sure to practice spraying several coats onto something else first, as it can become cloudy and speckled if applied incorrectly.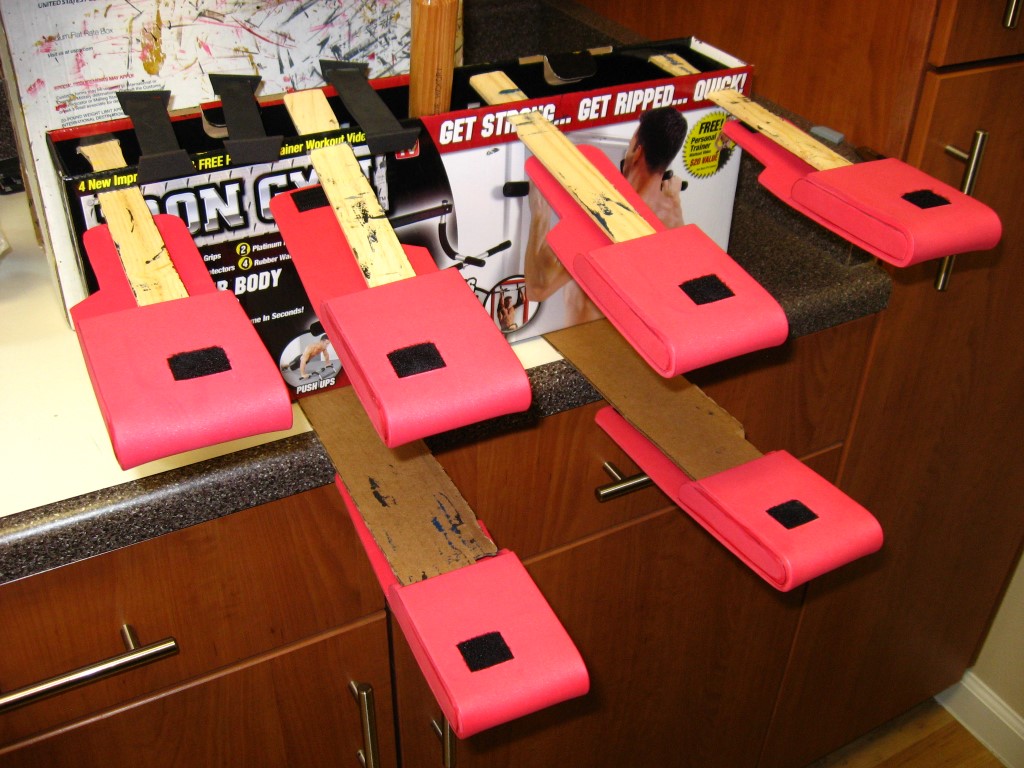


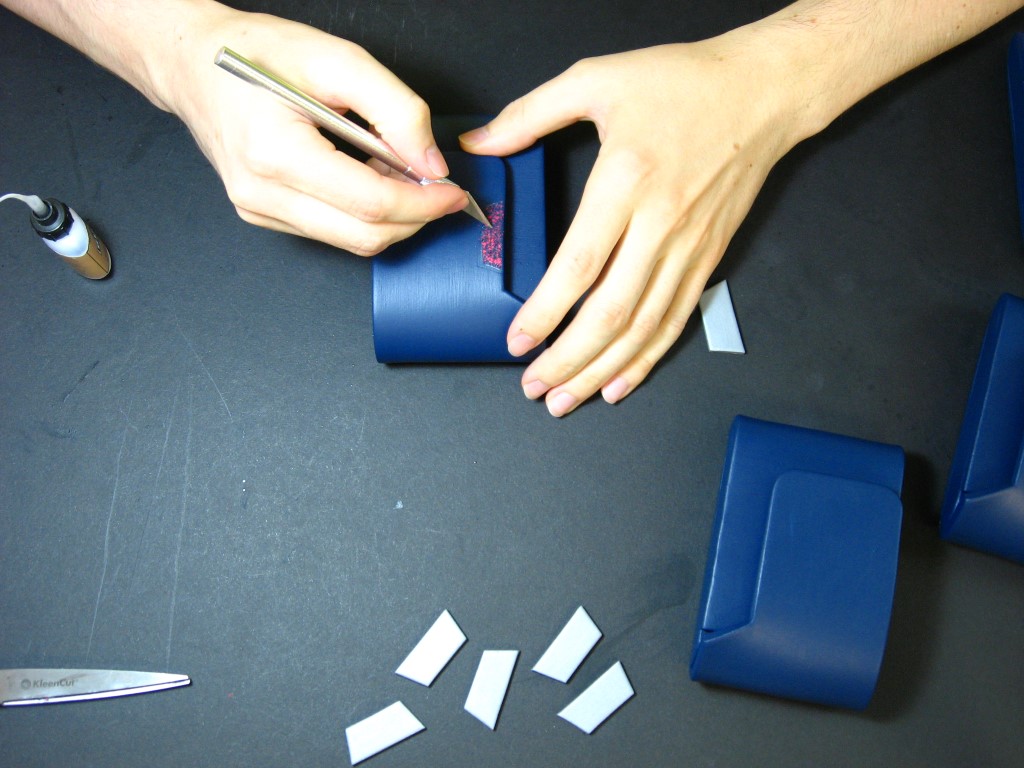
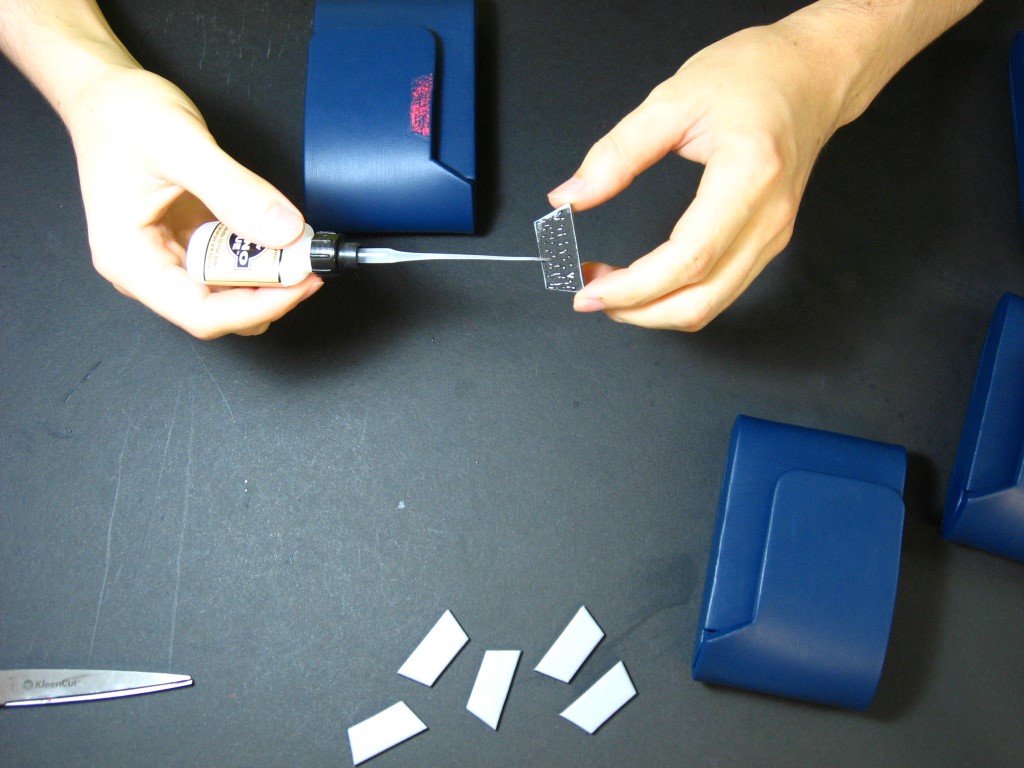
After everything dries, align the pouch tabs where you want them and press down on them to create an indentation on the pouch. Use the indentation as a guide and scratch off some of the paint where it will be with a hobby knife (The glue will not hold securely over several layers of paint, and needs contact with raw foam). Glue the tabs down.
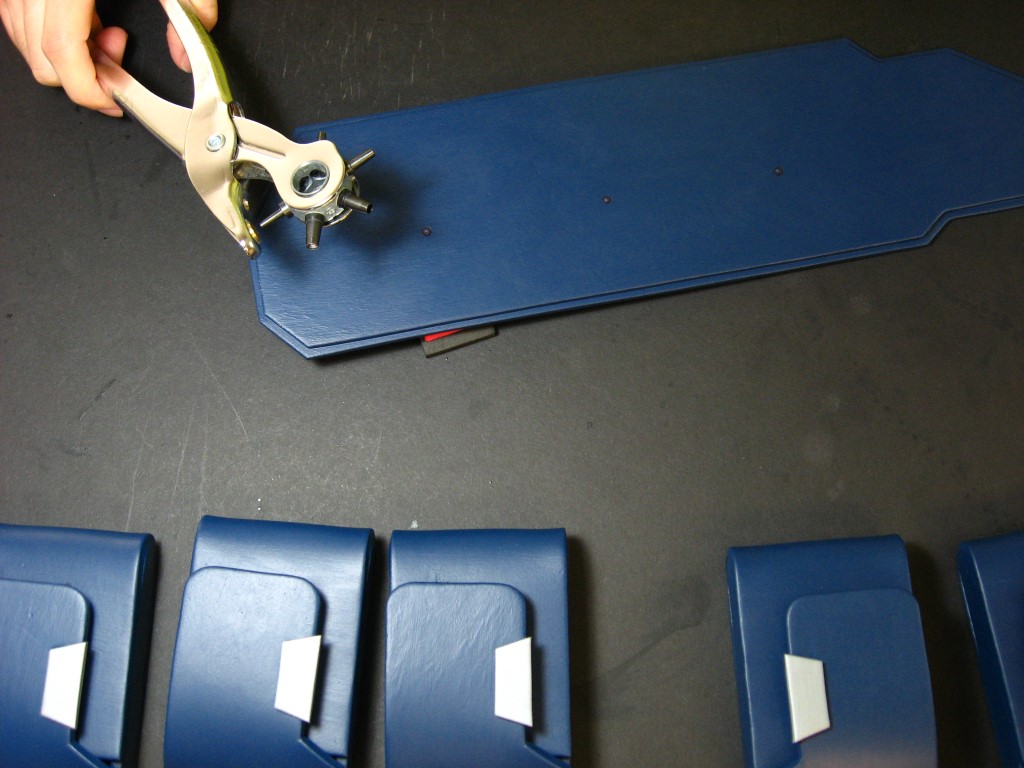
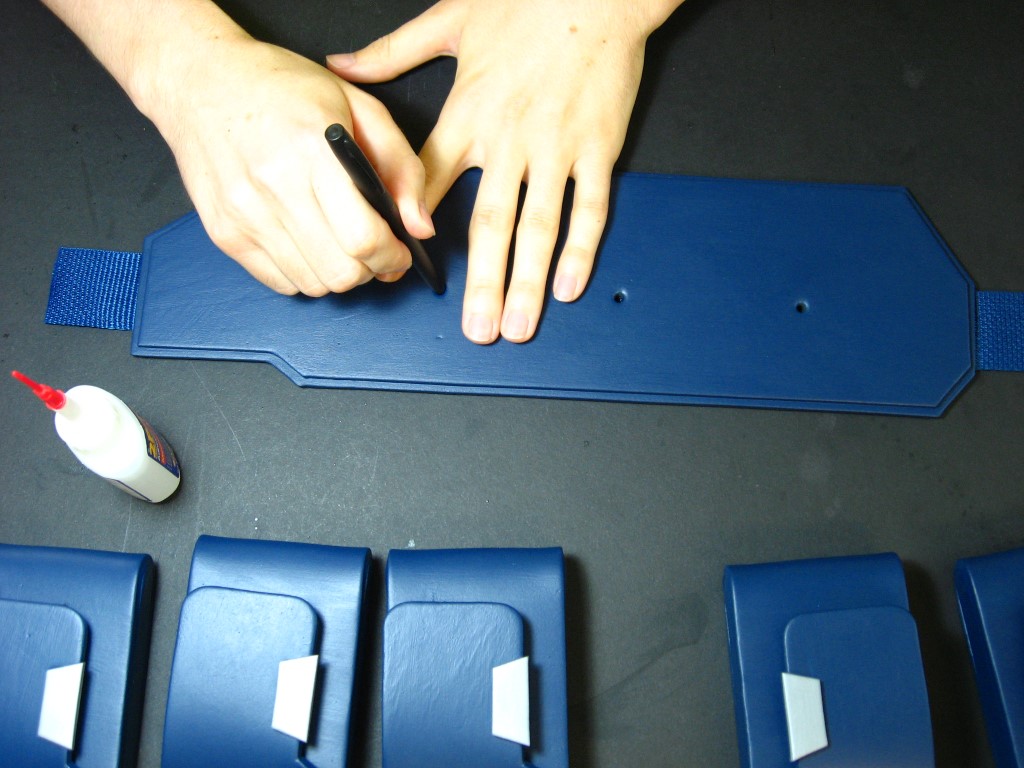
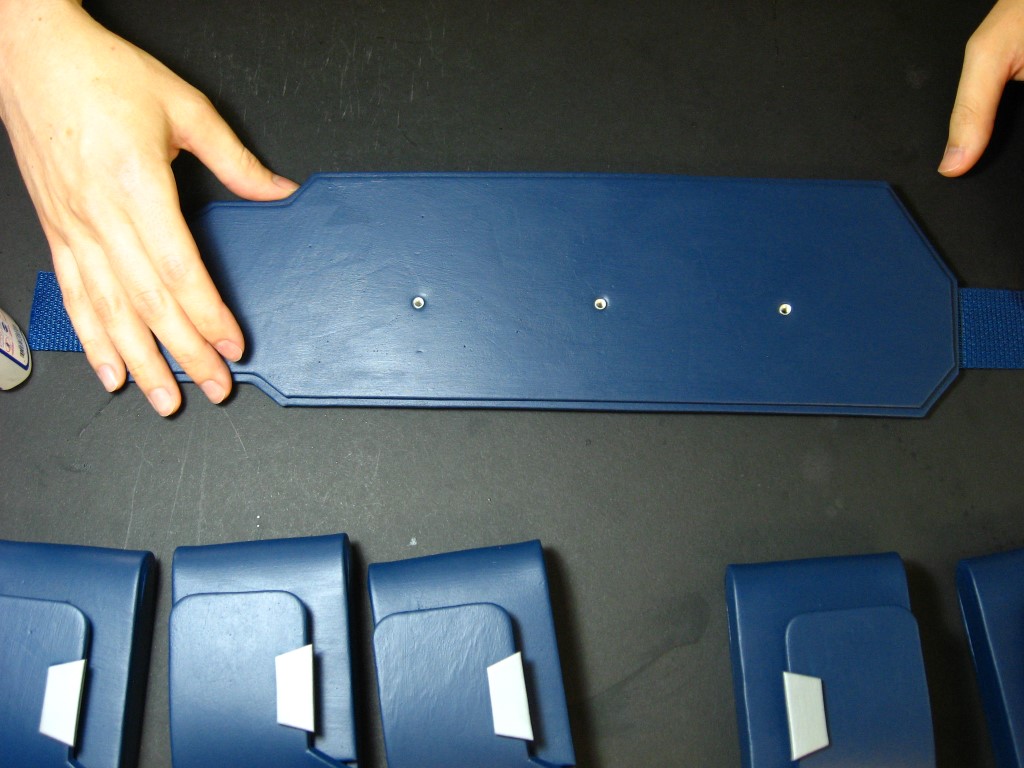
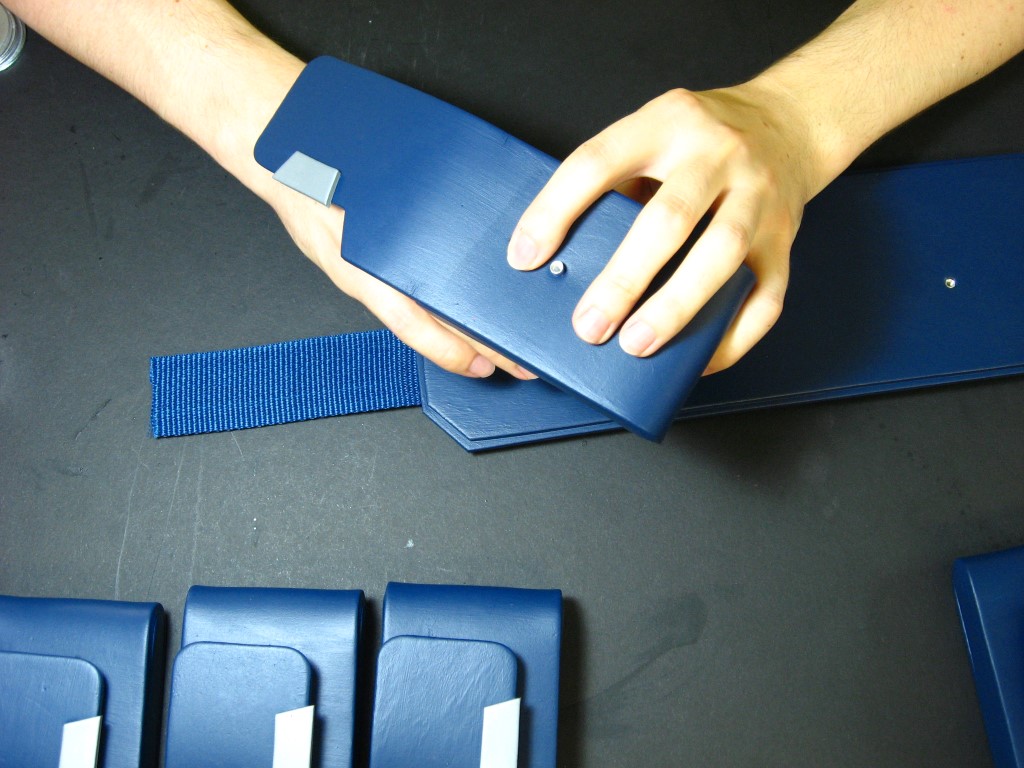
Space out the pouches where you want them to go, and then mark the approximate center of these locations onto the belt base.
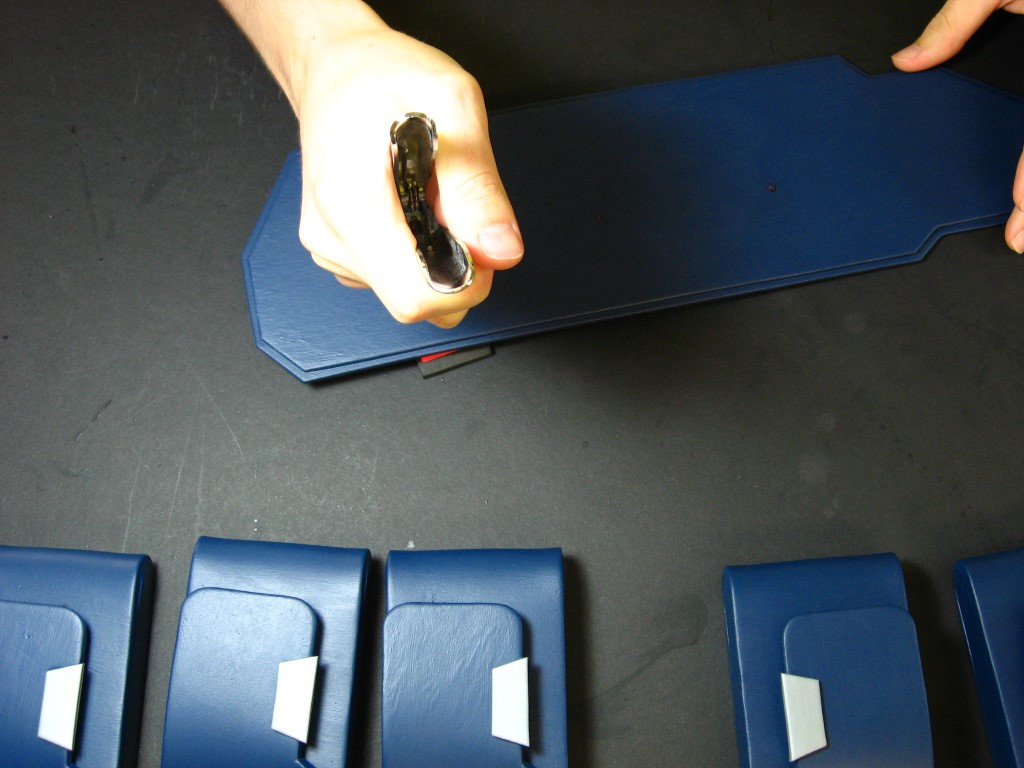
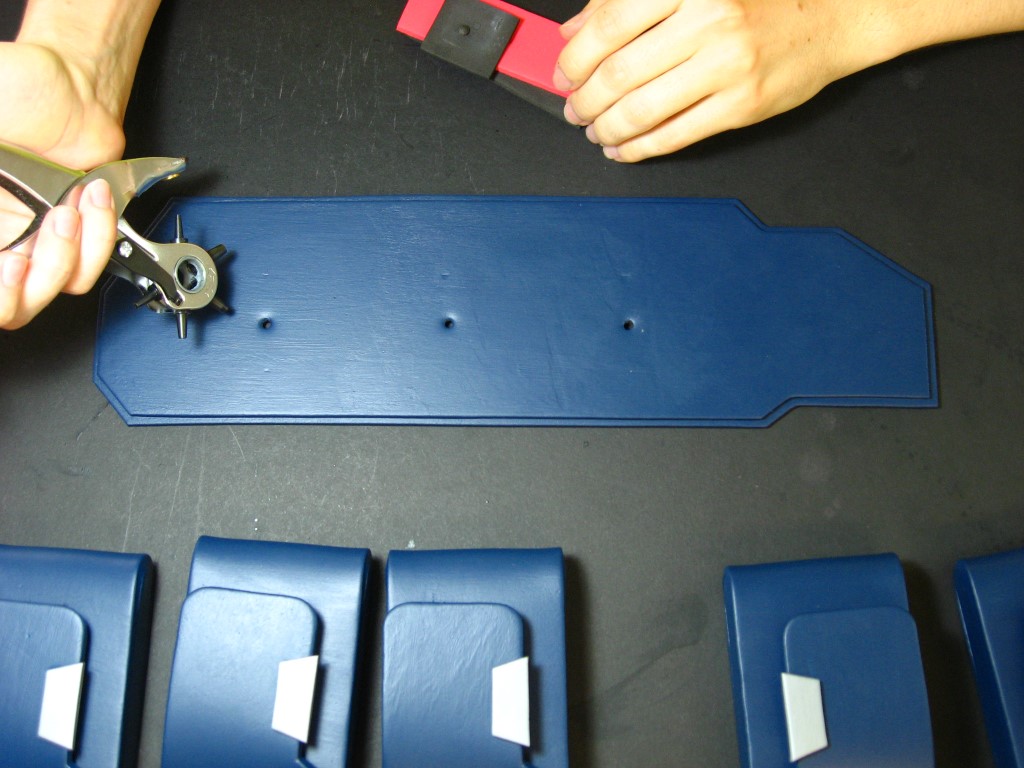
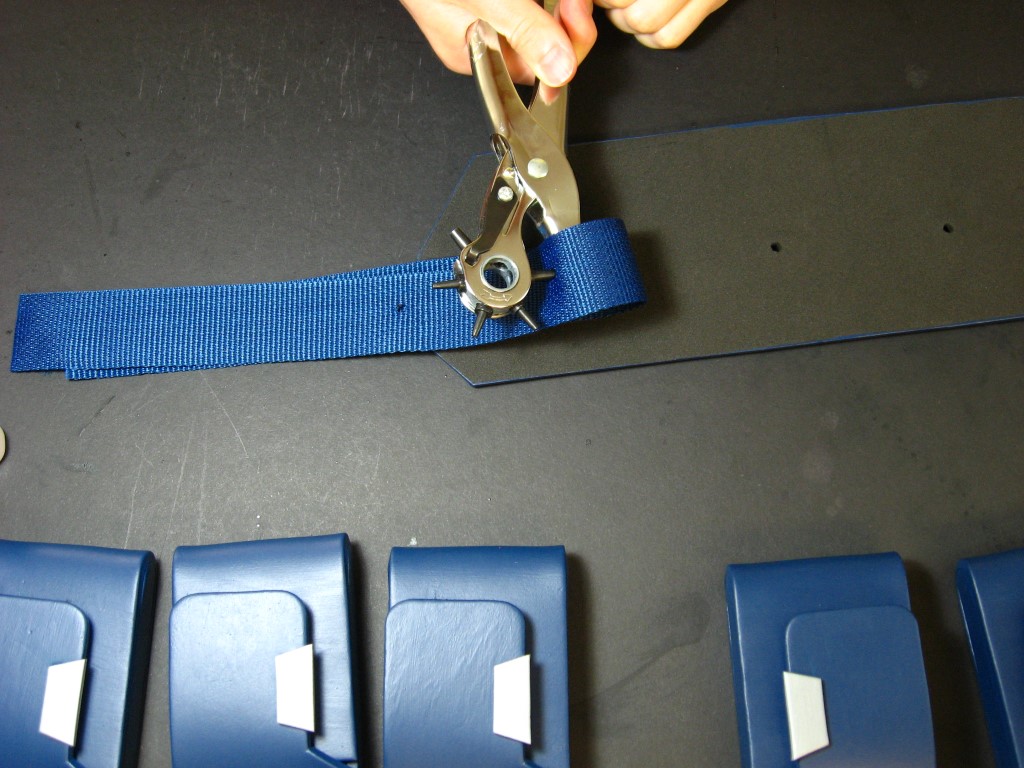
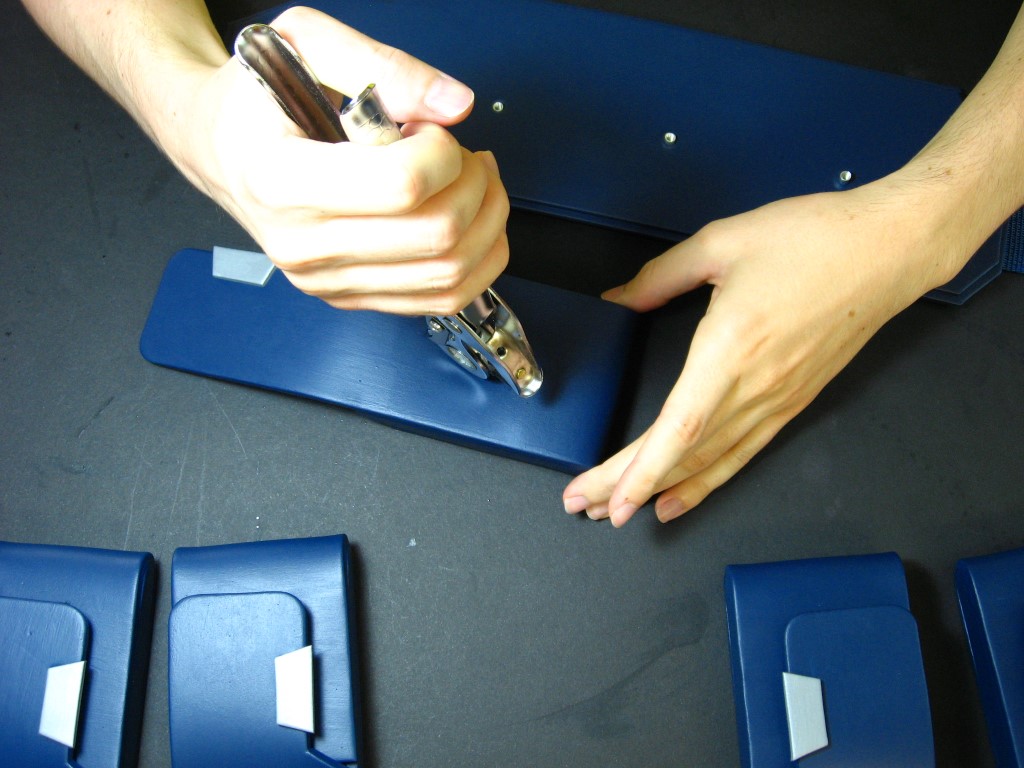
Use a leather hole punch to punch holes on the marks. Rotate the punch wheel so the tip you want is pointing up, and place some scrap foam under the belt base and then push the punch down through the foam.
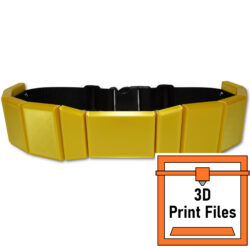
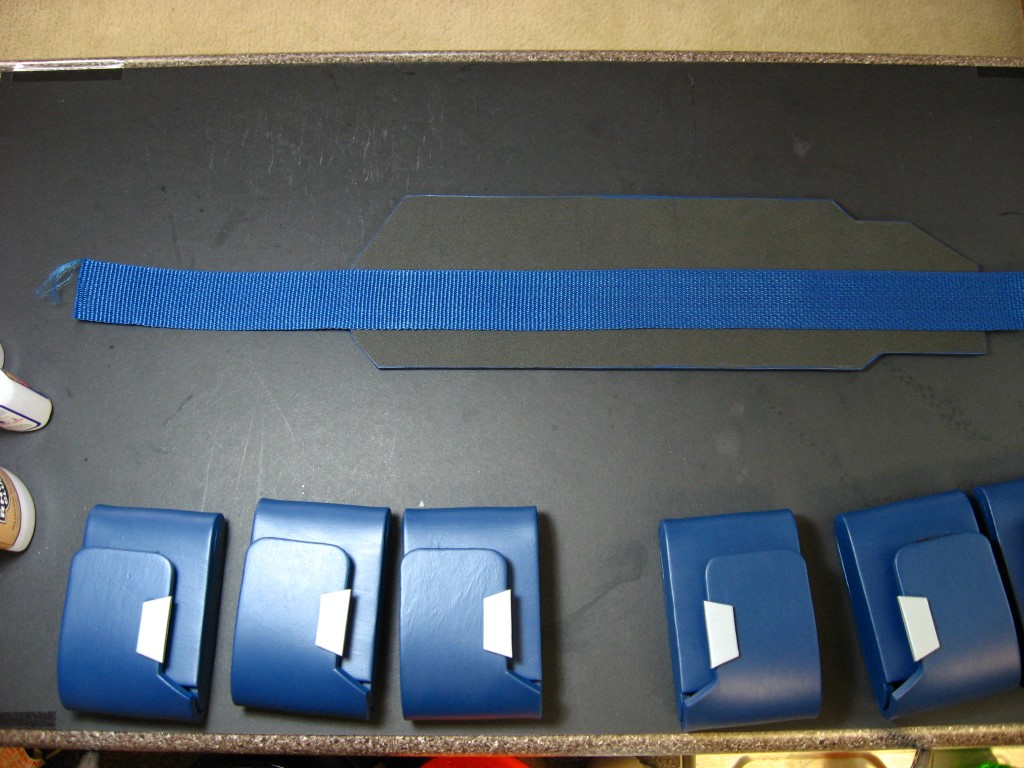
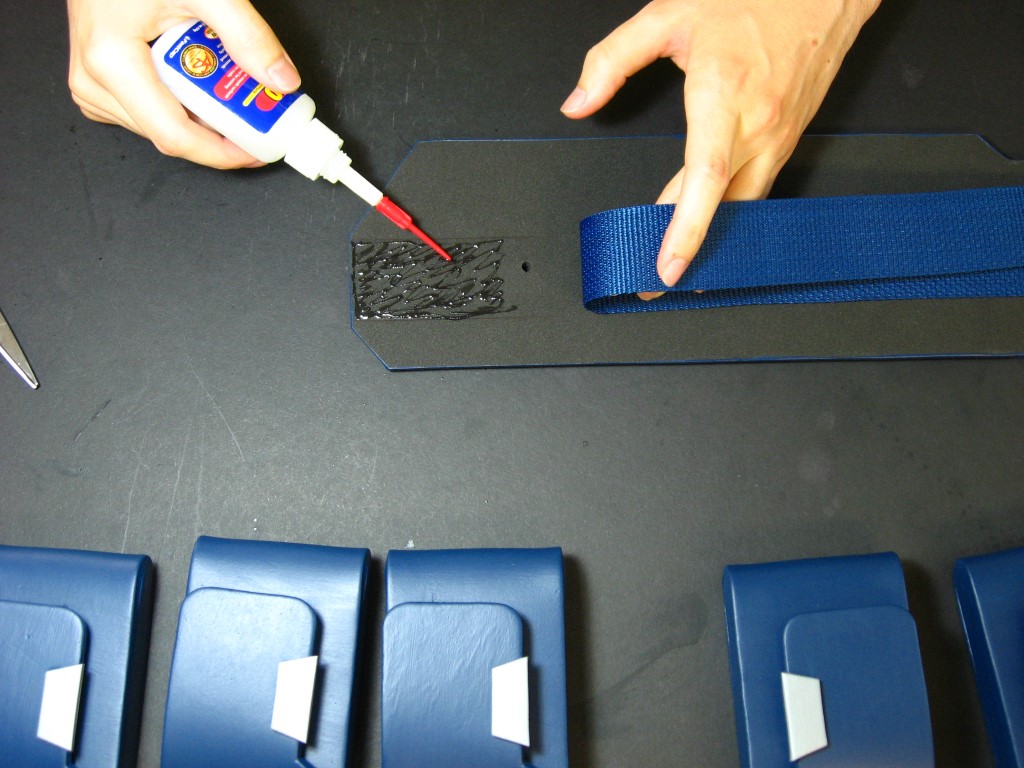
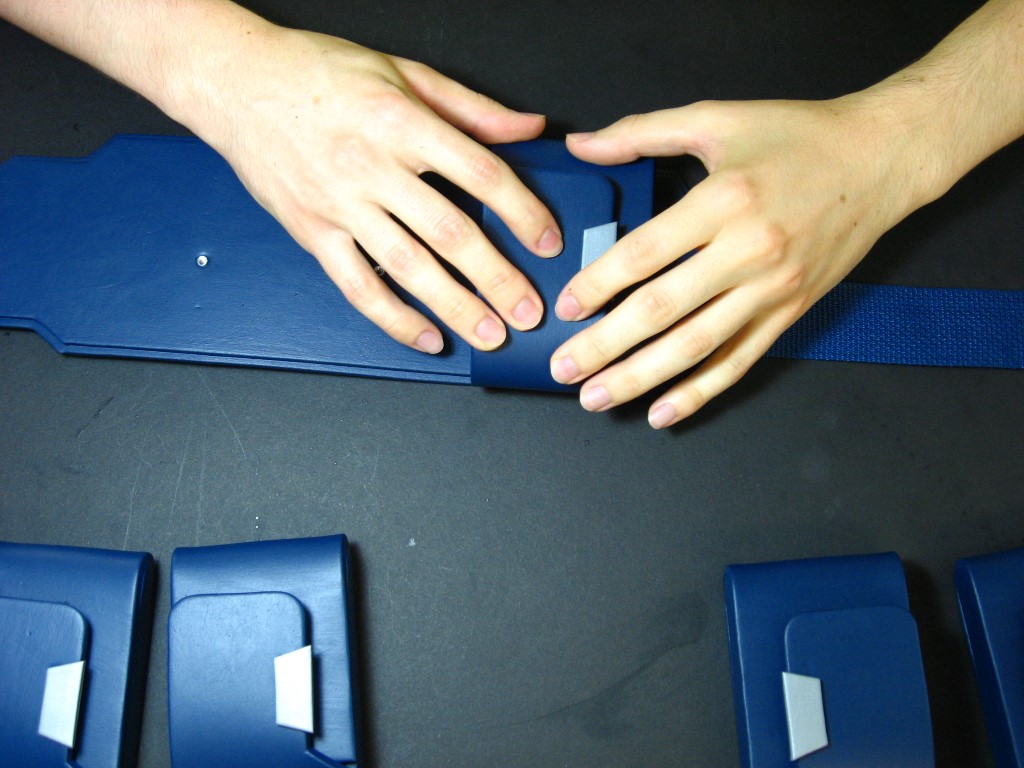
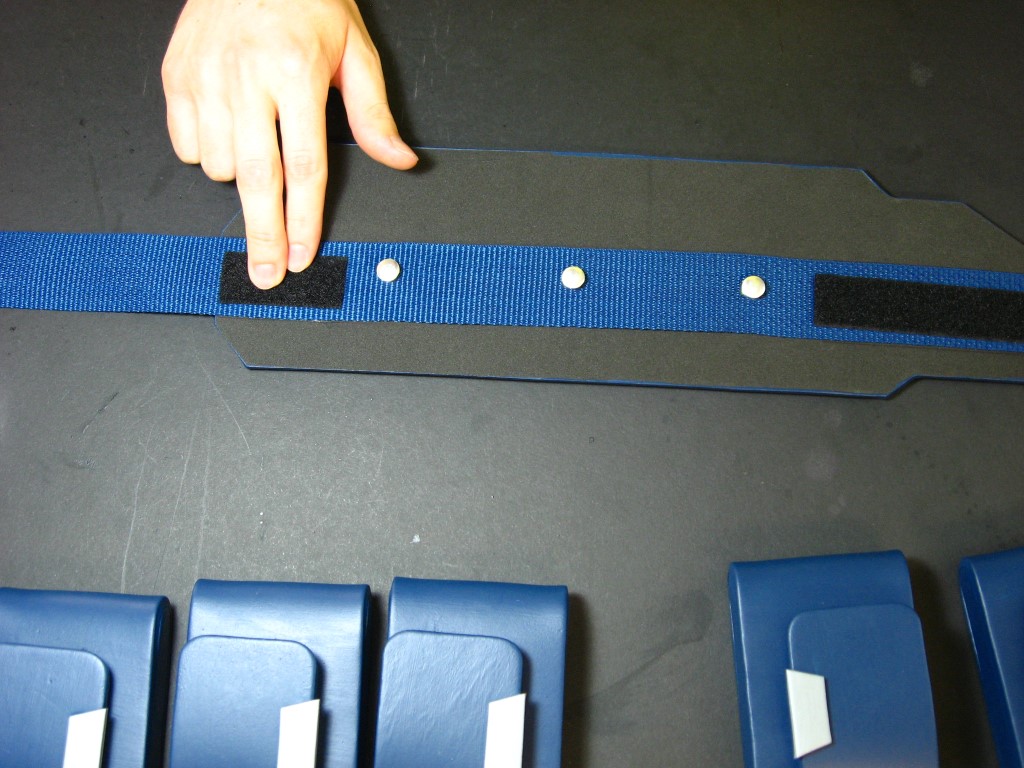
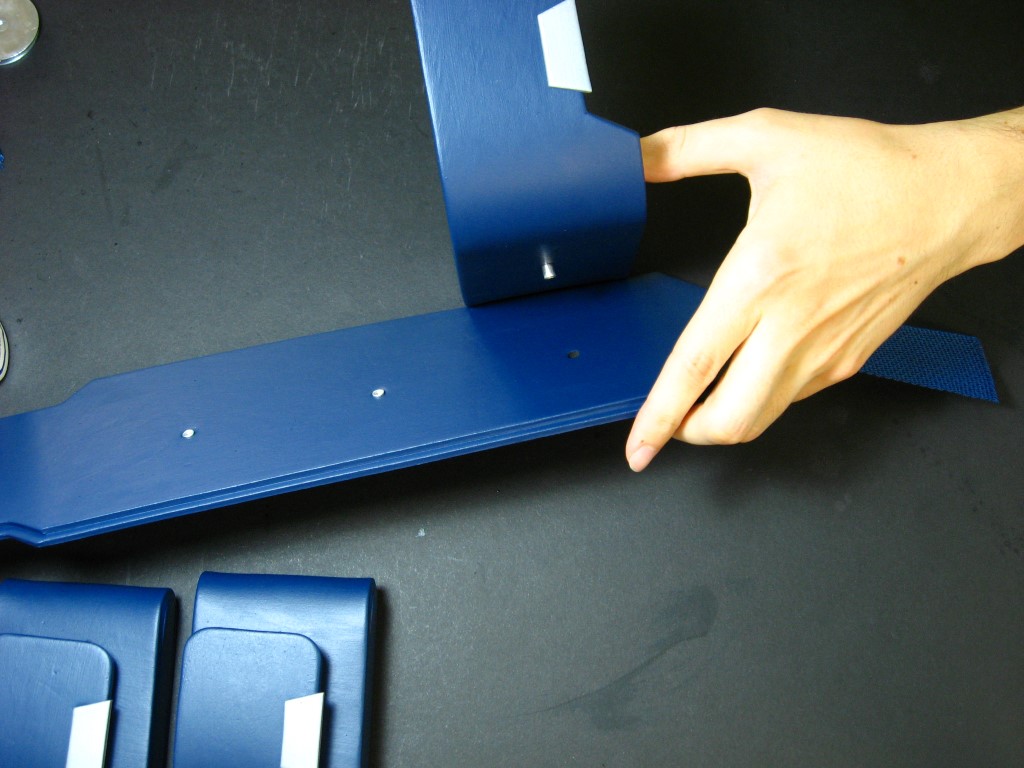
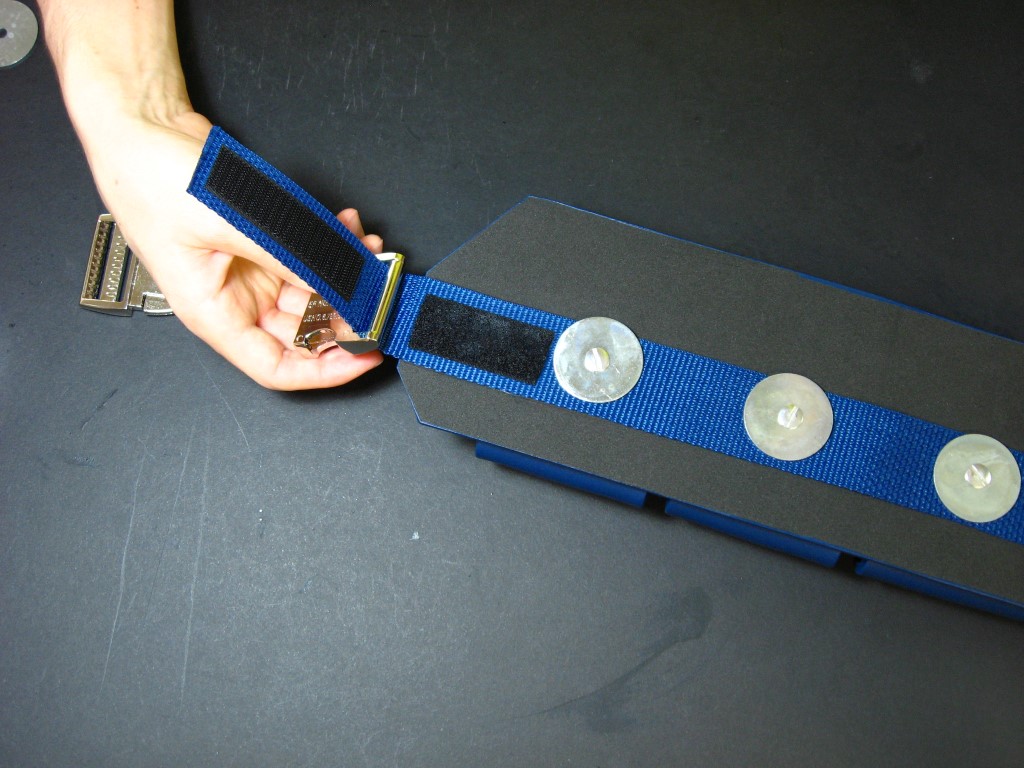
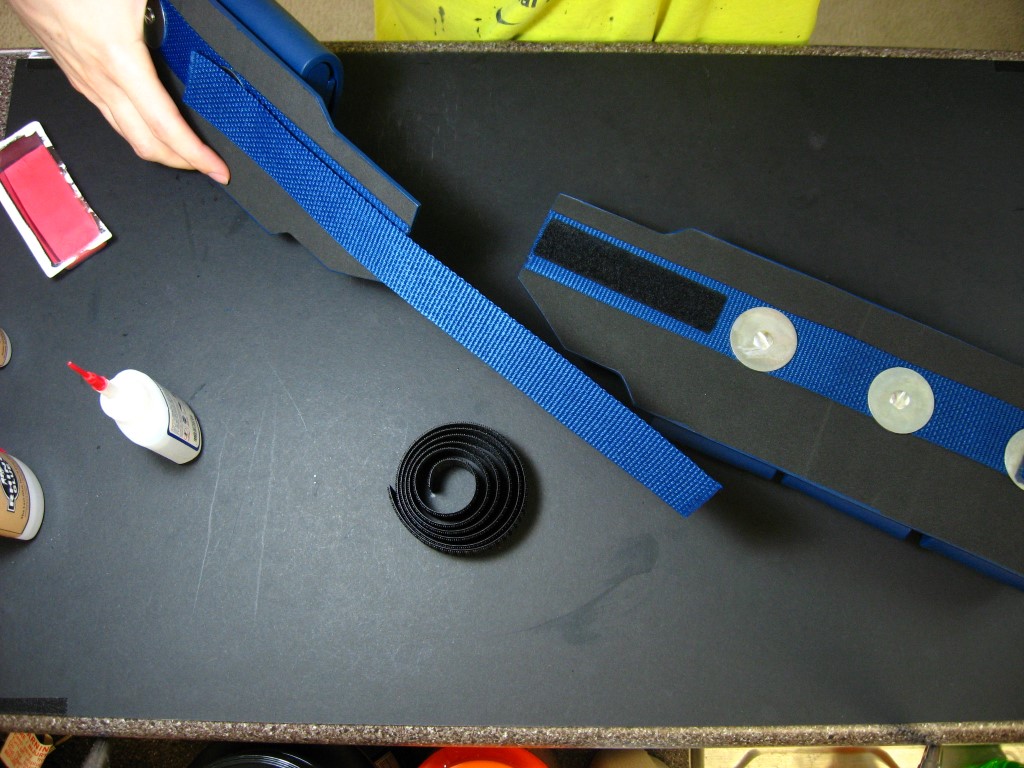
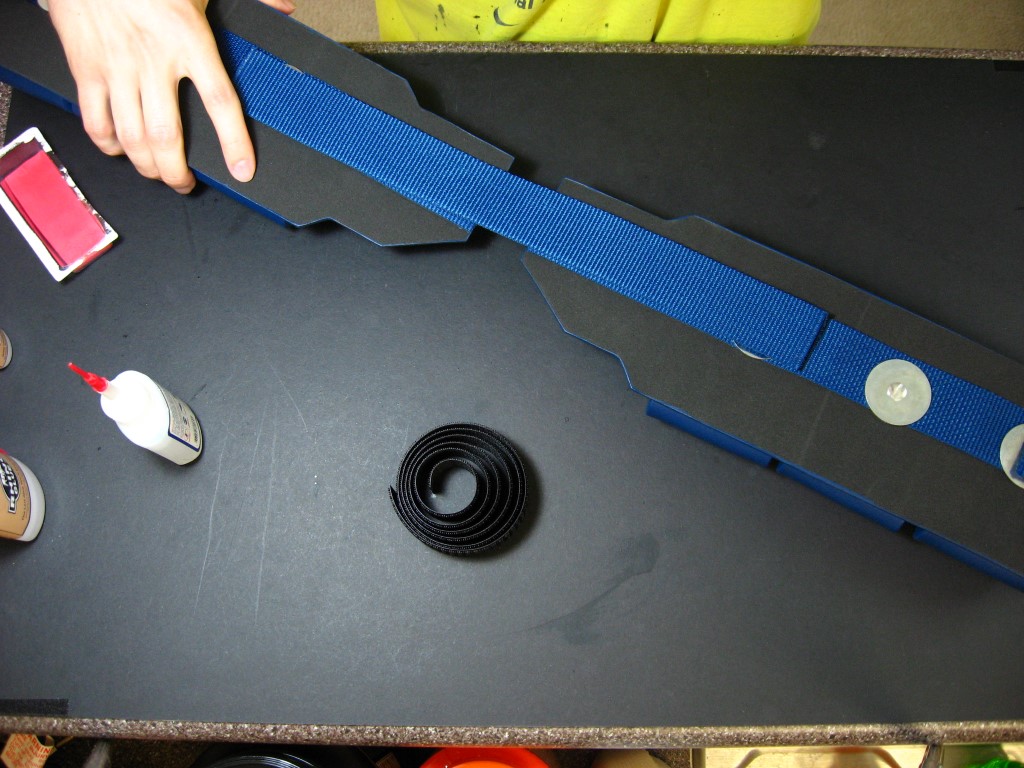
Cut a length of webbing (I use 1.5 inch navy blue lightweight polypropylene from strapworks.com) long enough to run the whole length of each belt base, plus enough length extending past the front edge to be able to attach the buckle. Glue down the front section of the webbing up till the first hole, and then flip the belt over and use a pen to mark where each hole will be on the belt. Use the hole punch to punch each hole, and then glue down the other end of the webbing up till the last hole (you don’t need to glue down the whole length of webbing, in fact it’s probably best for the flexibility of the belt if you don’t).
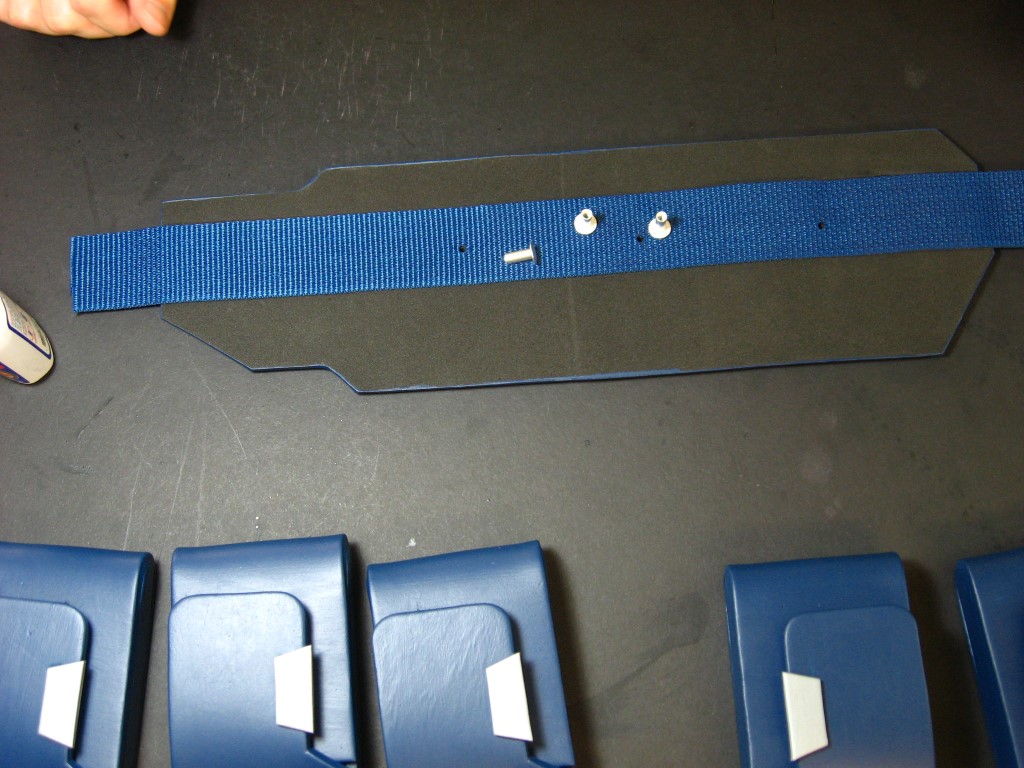
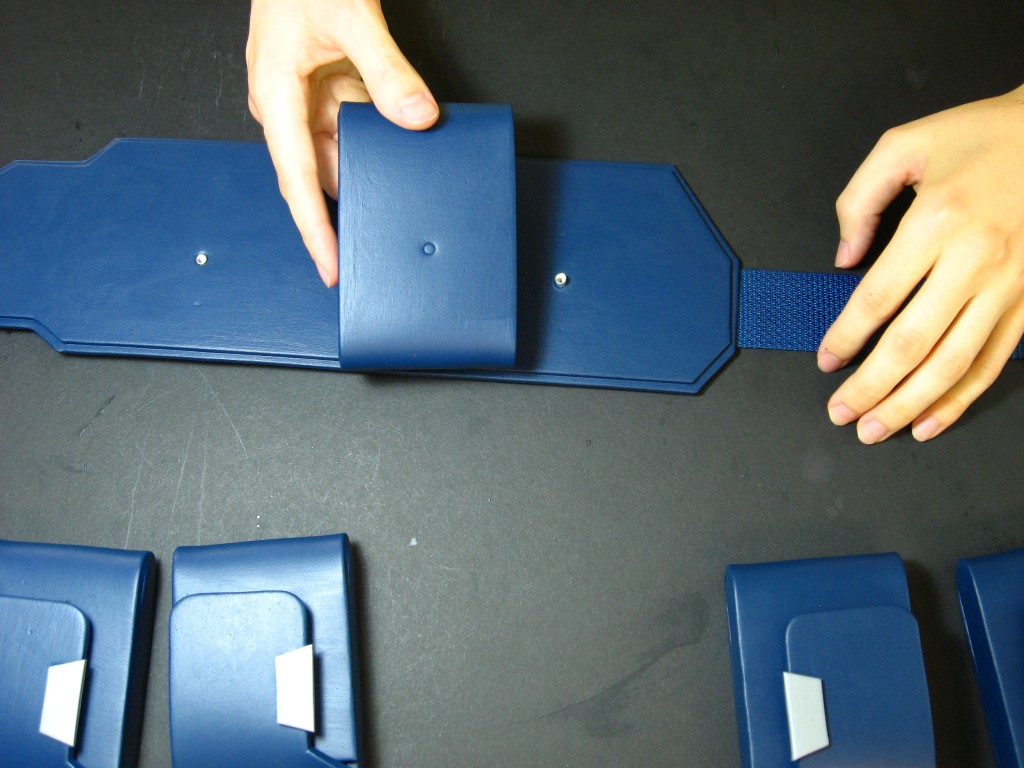
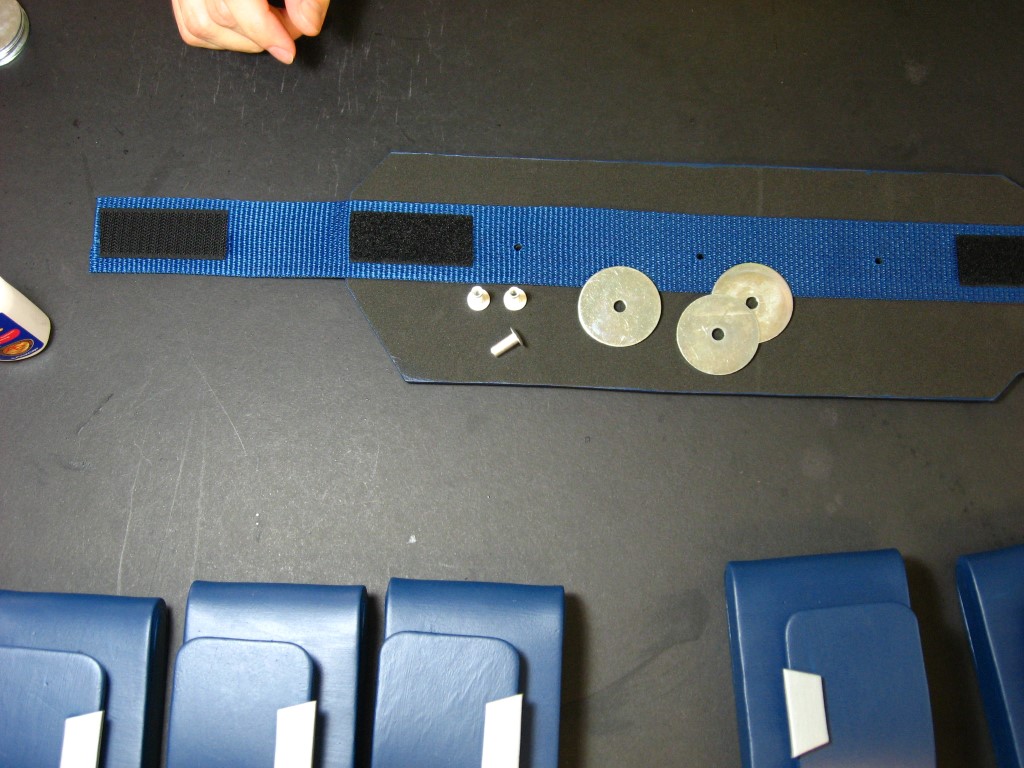
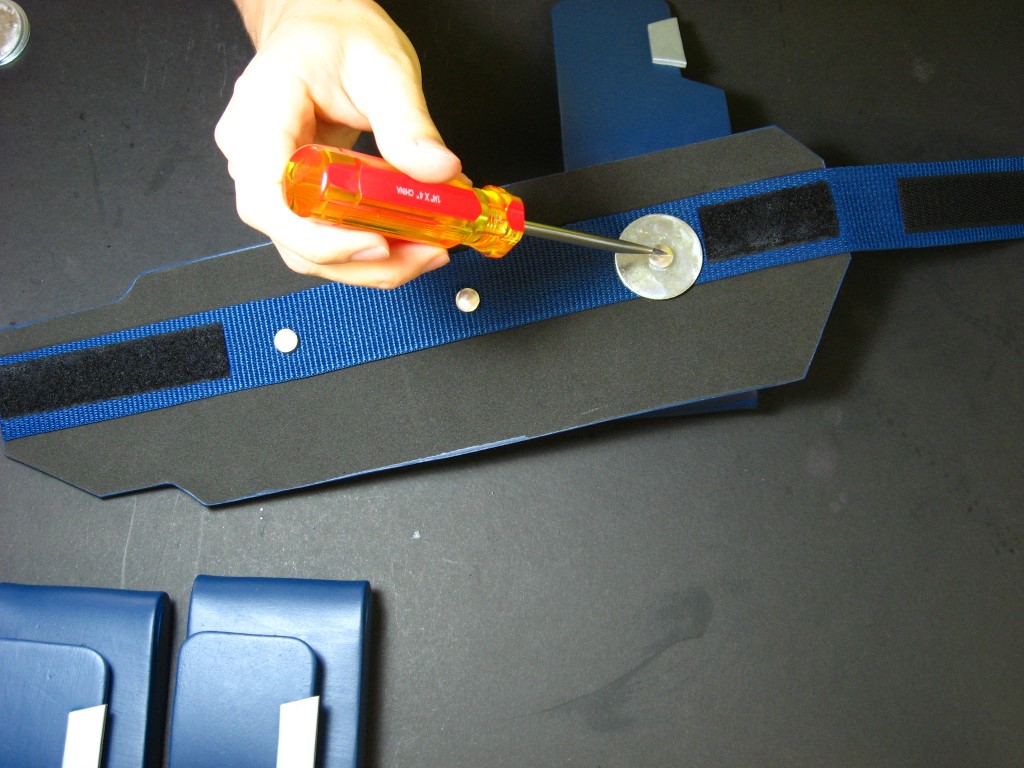
To secure the pouches to the belt I recommend using chicago screws (also called screw posts, barrel bolts, and sex bolts) and washers. I use 1/2″ chicago screws and 3/16 x 1-1/2″ washers, and purchase both from various ebay sellers but can they can also be found at home improvement and hobby stores). Place the female half of the screws into the belt holes from the underside so the tops are flush with the top of the belt but don’t extend all the way through. Align the first pouch centered over the hole and push down on it to leave an indentation of the screw on the back of the pouch. Slide a few strips of foam into the pouch and flip it over and punch a hole on the indentation mark. Once the first pouch is in place, use it as a guide to align the rest of the pouches.


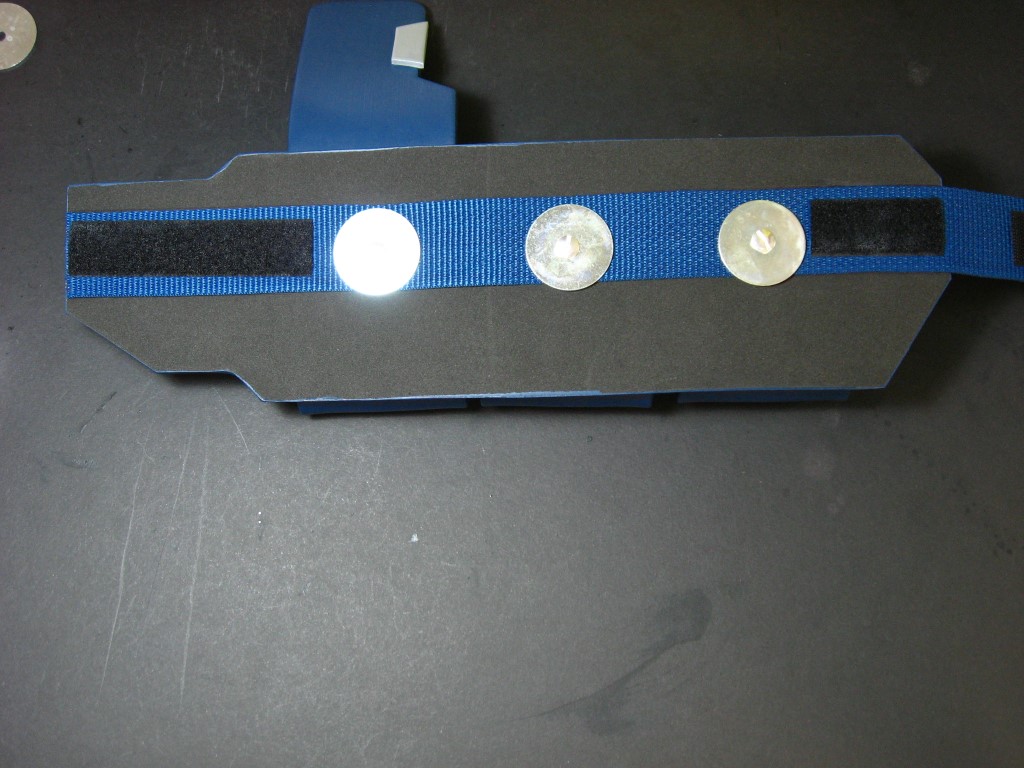
Glue some loop-side velcro to the ends of the webbing up to the bolts. Glue hook-side velcro to the front end of the webbing that extends past the belt, making sure to leave enough blank space for the bends in the buckle loops.
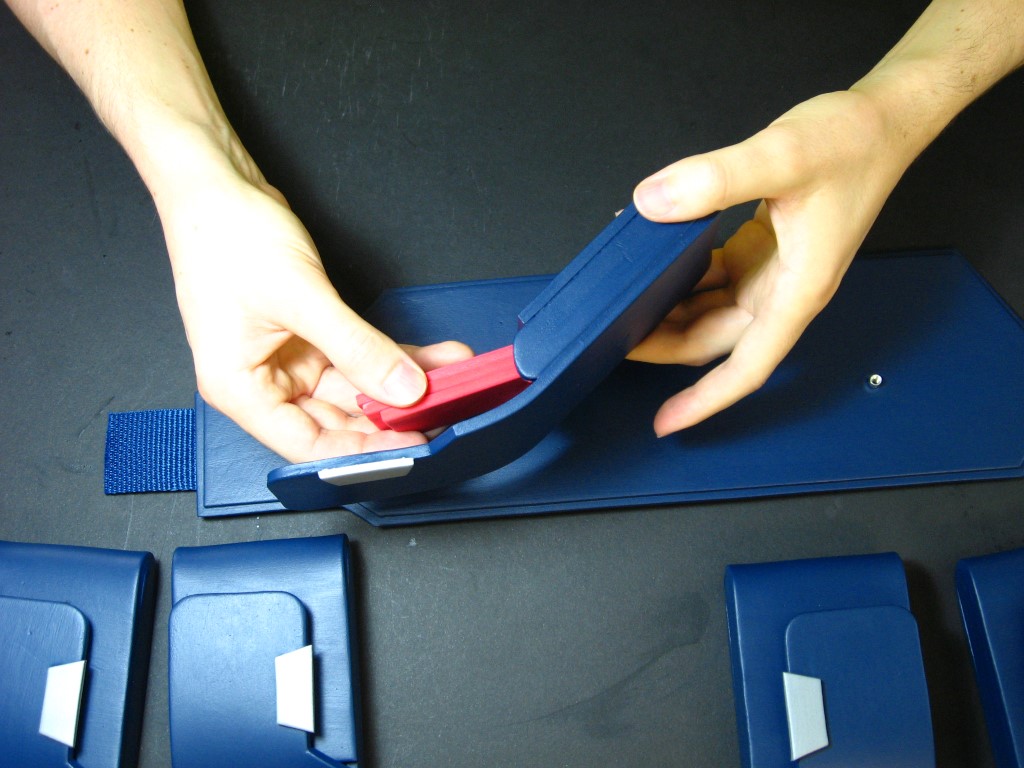
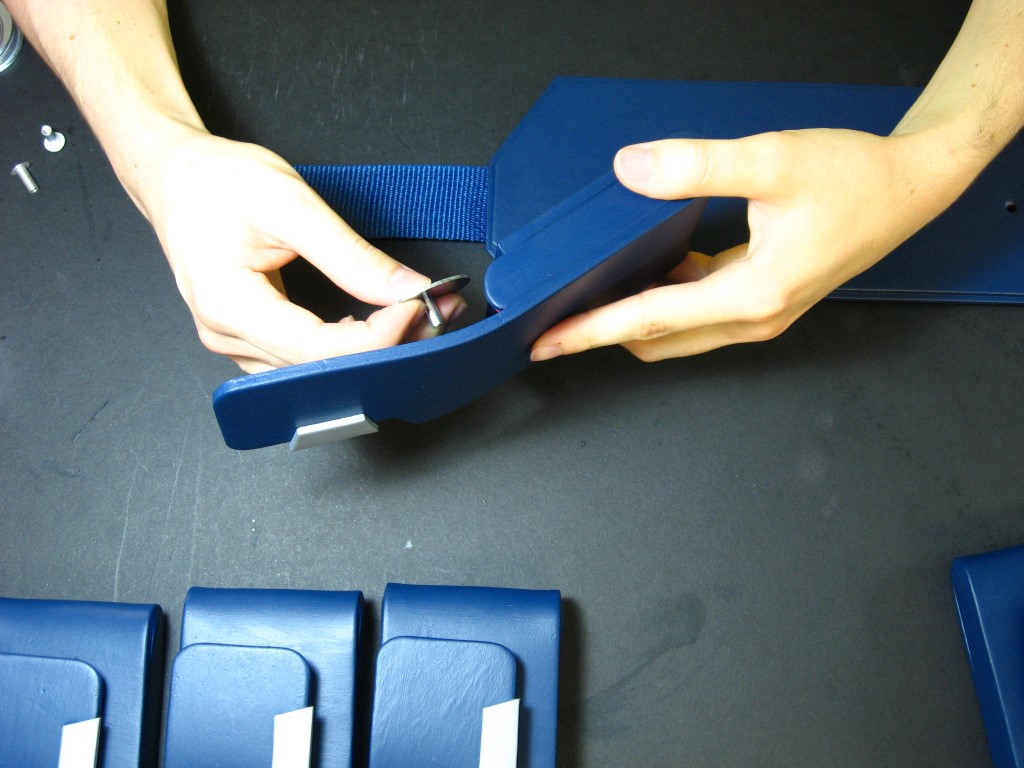
Stick a female half of a bolt along with a washer into the pouch and guide it to the hole. Squeeze the pouch to push the bolt through. Use a screwdriver to screw in the male half of the bolt along with another washer from the back of the belt.
Slide on the buckle. I use a 1.5 inch uncolored aluminum buckle also from strapworks.com. Cut a piece of webbing long enough to provide any extra length you need for your waist size, and glue hook-side velcro to it so it can secure the back of the belt.

I made another, broader tutorial on how to make utility belts here.
Check out the shop and the gallery for more templates and project ideas. Have fun!