If this is your first build, check out the Introduction Page first,
as well as the Supply Page for links to the foam, glue, and necessary tools.
Start by taking your arm measurements. Generally when measuring yourself for costuming you would use a cloth tape measure, but as foam items are significantly thicker than clothing, you need to take that thickness into consideration when measuring. So instead, use the foam itself as a tape measure. (Big thanks to WMArmory for this fantastic tip!) Cut a long strip of foam that is as thick as your final product will be (for example an average gauntlet of mine is made of two layers of 3mm thick foam, so when I measure my arm for it I would use a 6mm thick strip of foam.) Wrap the foam all the way around your arm and mark on the foam where the end is, then unwrap the foam and lay it flat on a table next to a straight ruler and measure how long it is. This measurement will be the horizontal width of the template when it is flat and opened up. Take at least two measurements- at the wrist and at the forearm however many inches away from the wrist the height of the gauntlets will be. If you will be wearing a thick and bulky costume underneath the gauntlets, you will need to account for that as well in the measurement and add that thickness to the foam ruler (the simplest way may be to just wear the costume, or something of similar thickness, while measuring.)

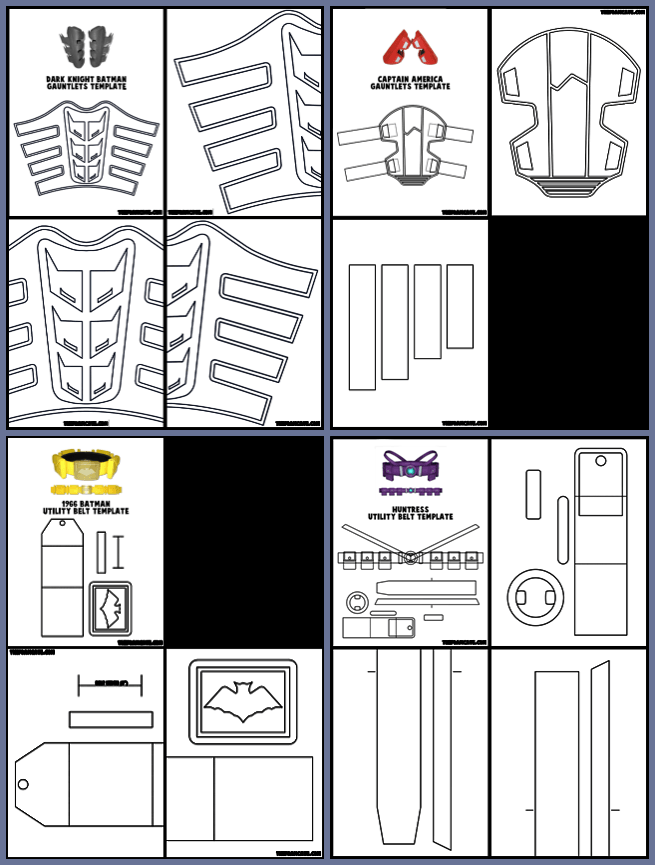
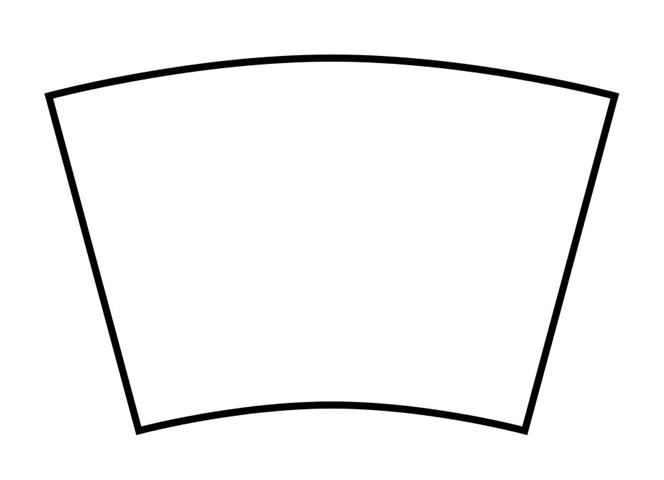
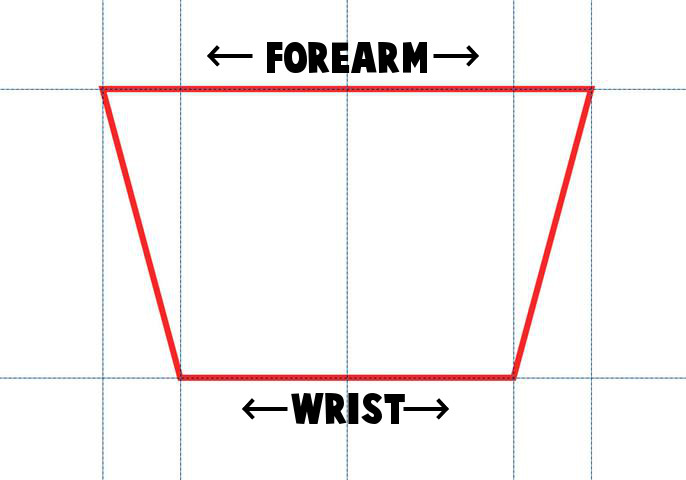
I would recommend designing a template before you begin construction. A great, free image editing program I use for this is Gimp. A basic gauntlet template looks something like this:
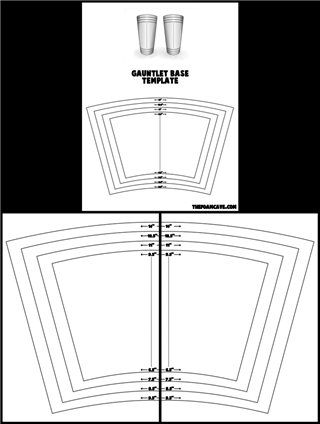
I made a generic gauntlet base template that prints out full size in several different sizes that you can download here:
If you would prefer to make a template to your exact measurements, here’s the process I used to make the one above:
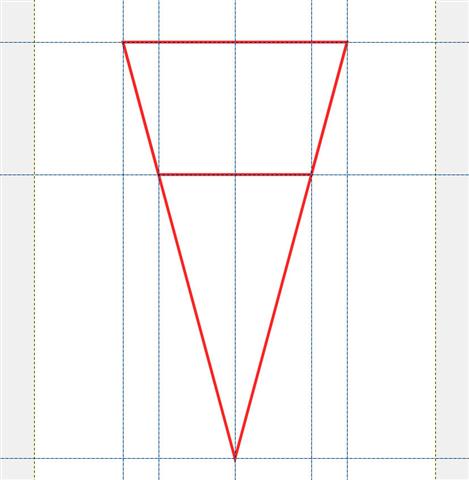
In Gimp, use the path tool to create a trapezoid shape using your wrist measurement as the bottom width and your forearm measurement as the top width. Create guidelines down the middle and on the edge points, and then create a second path that extends the side lines of the first path all the way down until they meet in the middle.
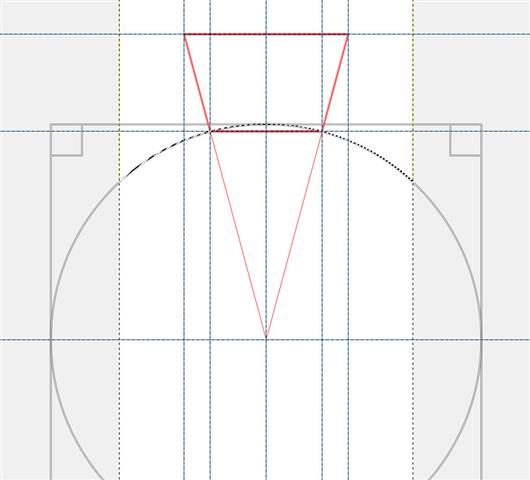
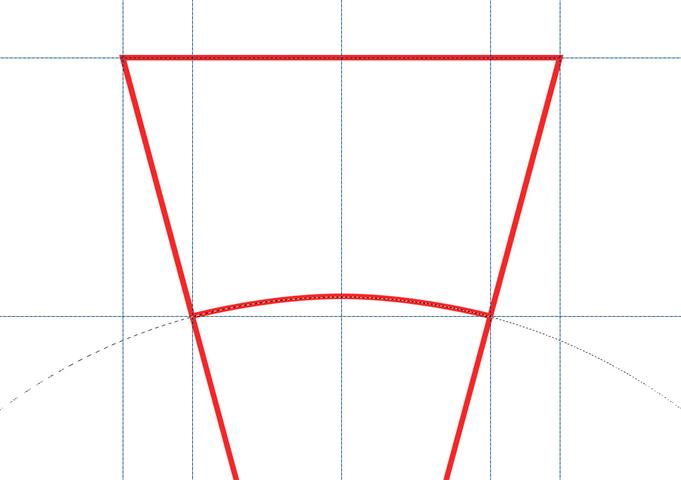
Next, use the circle select tool (set it to ‘expand from center’ at a fixed aspect ratio) to create a circle that is centered around that point where the side lines meet, and whose top edge intersects with the left and right bottom points of the original trapezoid shape. Adjust the trapezoid path so it’s bottom line conforms to this curve, and then repeat the process for the top line. Stroke the path to get a line that will show when printing.
Once you have the base shape, you can start to add in detail lines, additional layers and shapes, and fins. I will go into more detail on how to make a template in a later tutorial.
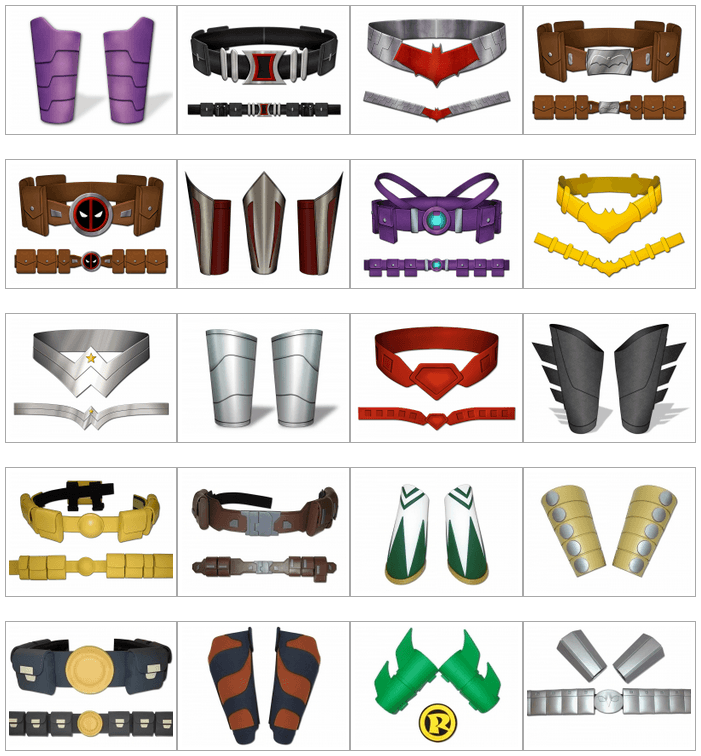
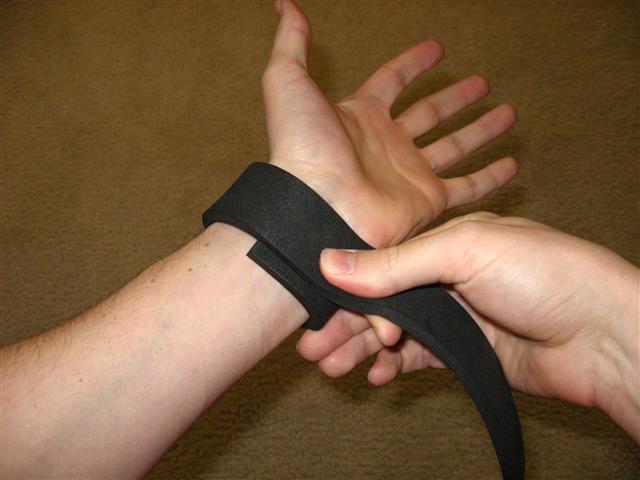
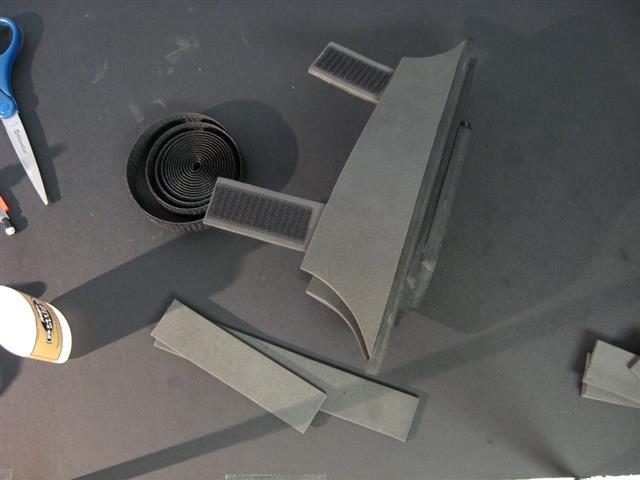
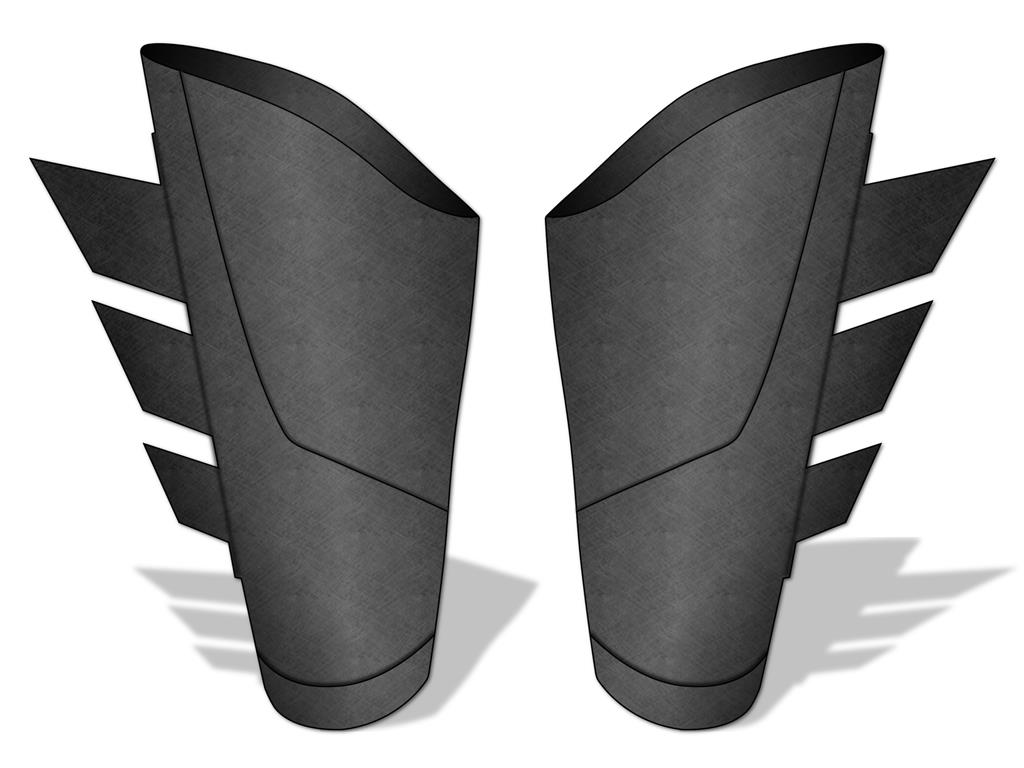
There are several ways to fasten gauntlets on your arms. If you make them wide enough, you can permanently glue the ends together and just slip them on and off. You can also use velcro, buckles, or a zipper to secure the ends when wearing them. If the design of your gauntlets allows the option, I would recommend that you make them so the ends don’t go all the way around your arm, and instead you make straps that extend from the edges and overlap each other when around your arm. A strap system is much more flexible and will be easier to adjust while wearing to get a perfect fit.
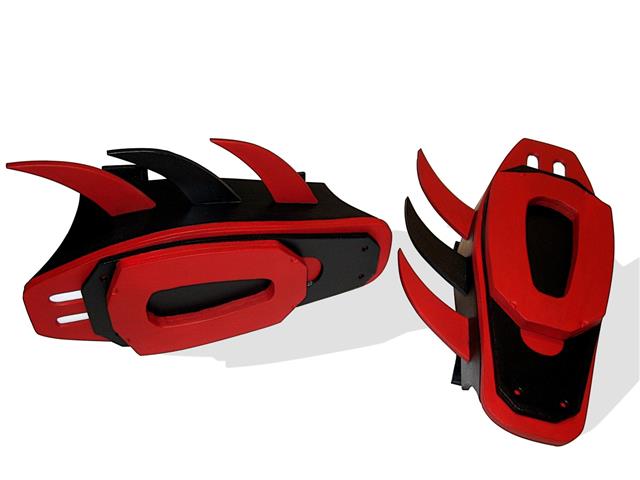
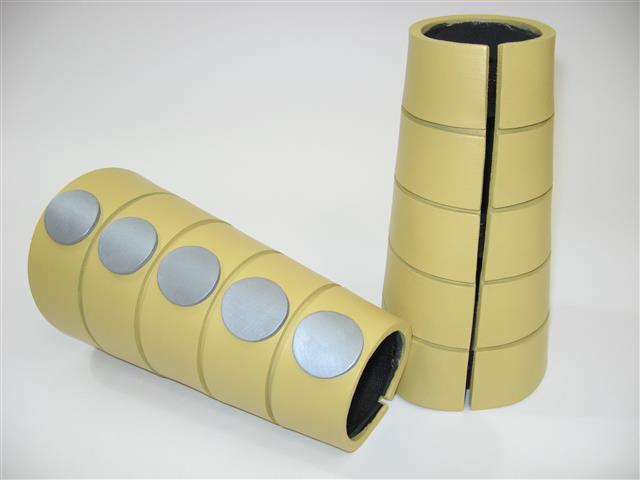
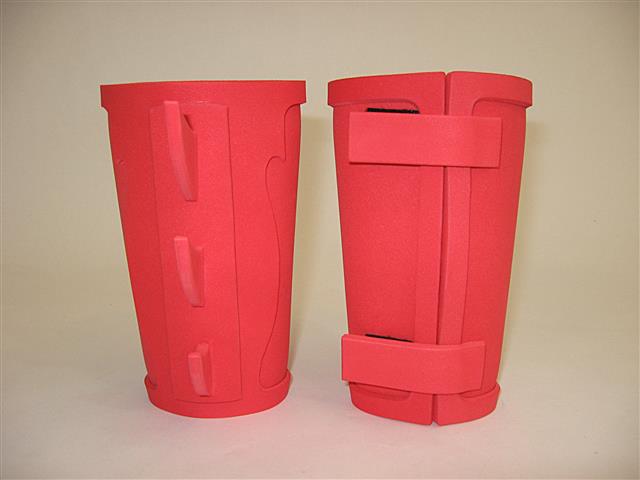
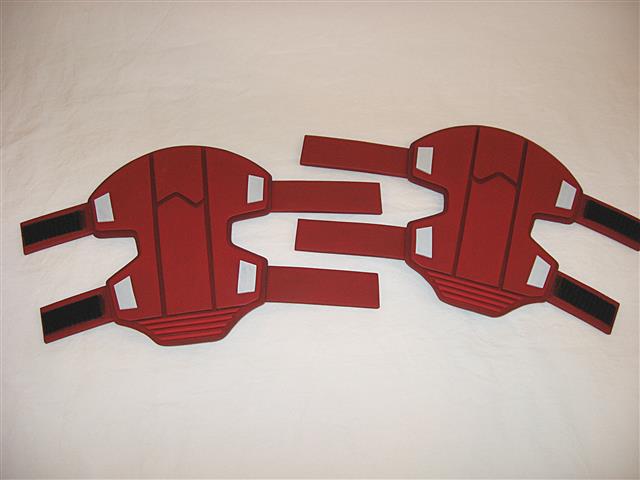
My Sinestro gauntlets secure with velcro on the inside, and my Batwoman gauntlets secure with velcro backed with foam on the outside:
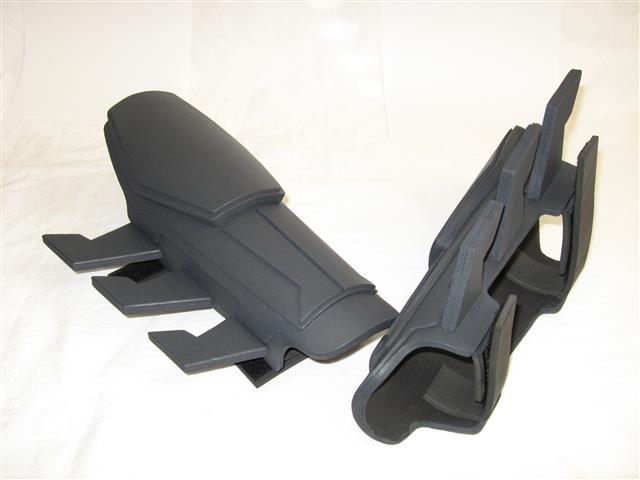
The Batman Arkham video game series and Captain America gauntlets all use straps for fastening:
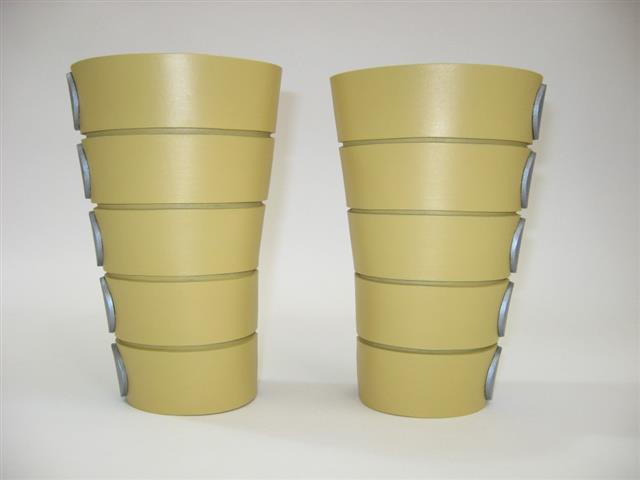
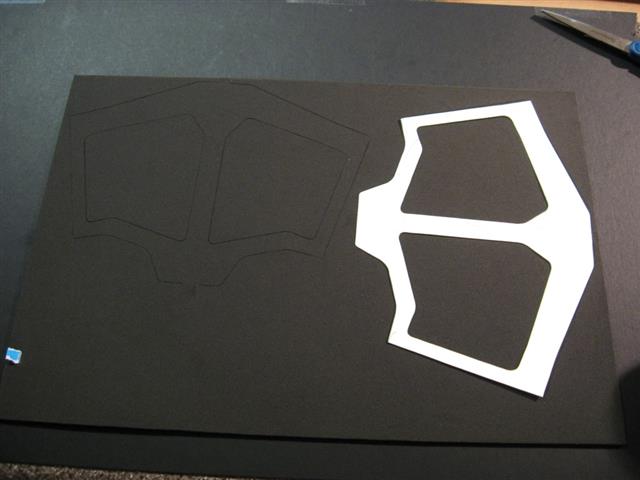
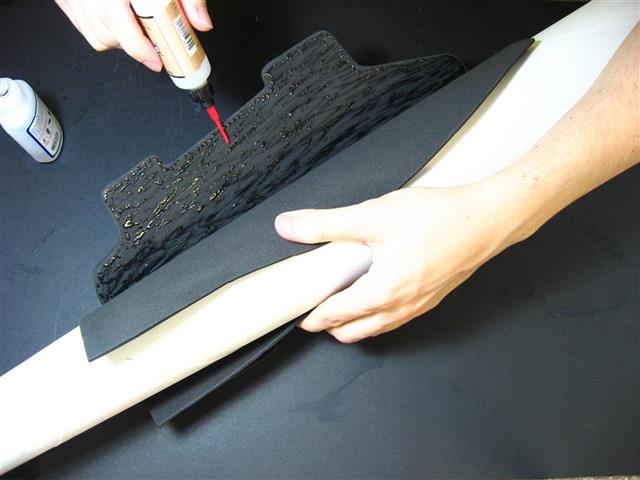
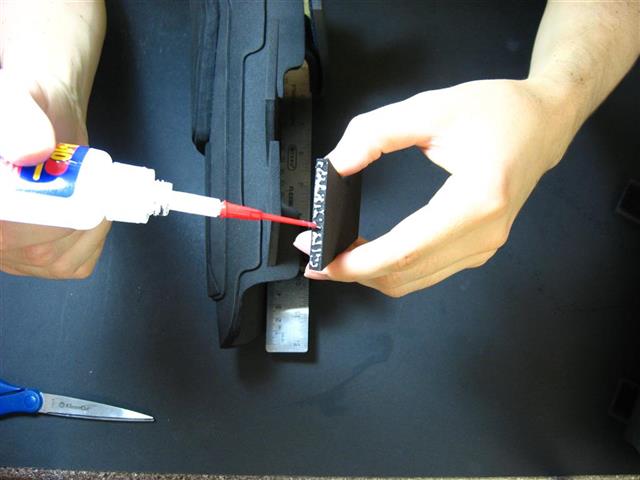
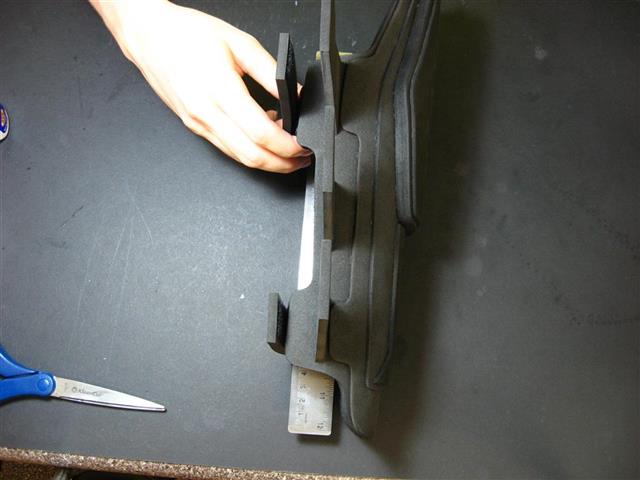
Once you get your template finalized, print it out onto paper, cut out the shapes and trace them onto foam. I use two layers of 3mm thick eva foam for most of my gauntlets. Use a regular pair of office scissors to cut all the shapes out of the foam. Most items can be made by cutting out each layer separately and then gluing them all together. I like to use super glue for its fast drying time and strength.
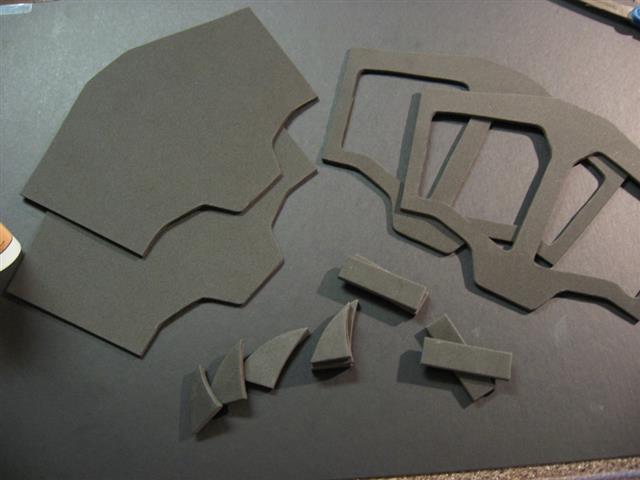
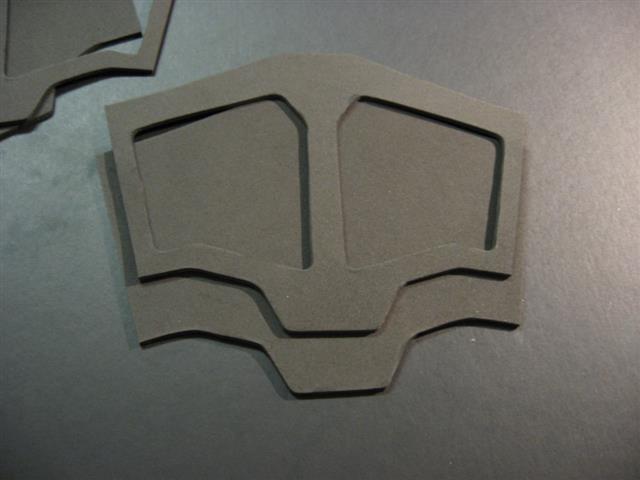
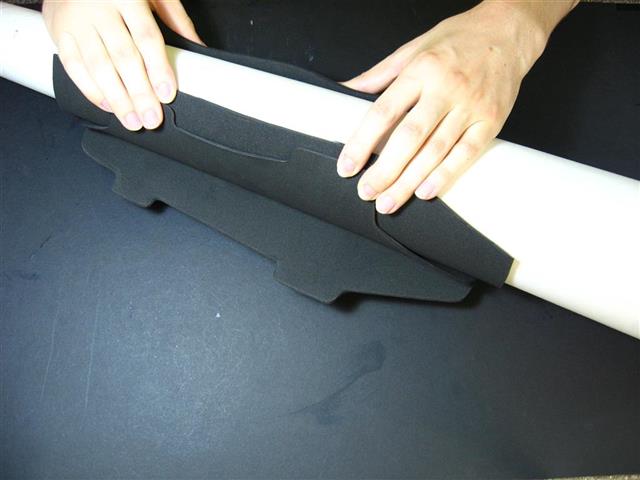
If there are more than two layers it is best to glue them together while holding a curve in the foam. That way it will retain that curvature after it dries, instead of potentially being too stiff to wrap around your arm. I made a simple cone shaped tool out of rolled up poster board paper stuffed with plastic grocery bags to help with curved gluing. If the edges of the gauntlets are not quite aligned properly, or come out a little rough after cutting, they can be smoothed out using a dremel with a sanding bit.
Glue on velcro or your strap system of choice, as well as any fins or other external pieces.
See the painting tutorial for info on painting the gauntlets.
And that’s it! You’ve got yourself some sweet new gauntlets. For more detailed instructions on any specific part of the process, see the other gauntlet tutorials.
Check out the shop and the gallery for templates and project ideas. Have fun!