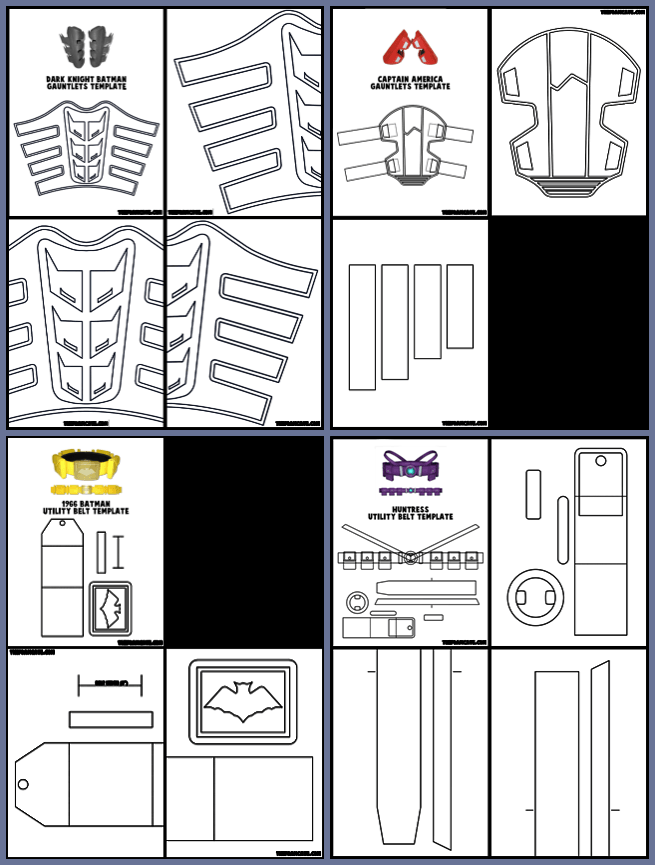
This tutorial will walk you through the construction of the Bat gauntlets. You can download a free copy of the Batman gauntlets template here: 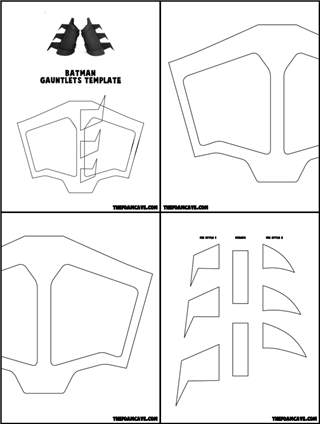
If this is your first build, check out the Introduction Page first,
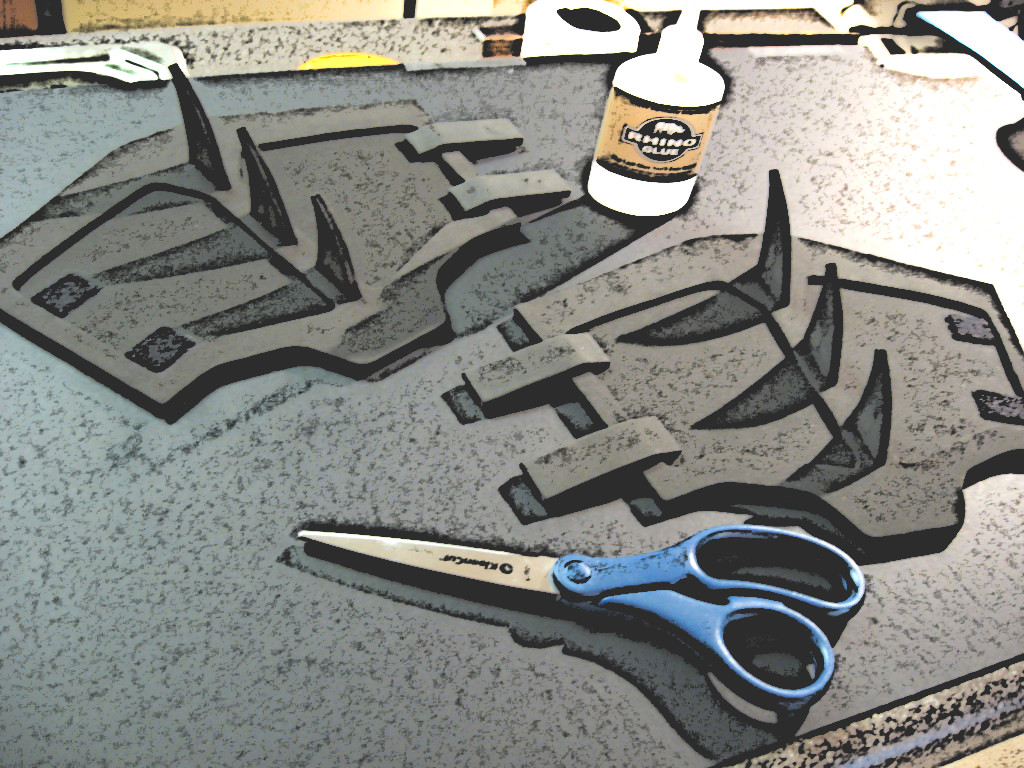
as well as the Supply Page for links to the foam, glue, and necessary tools.
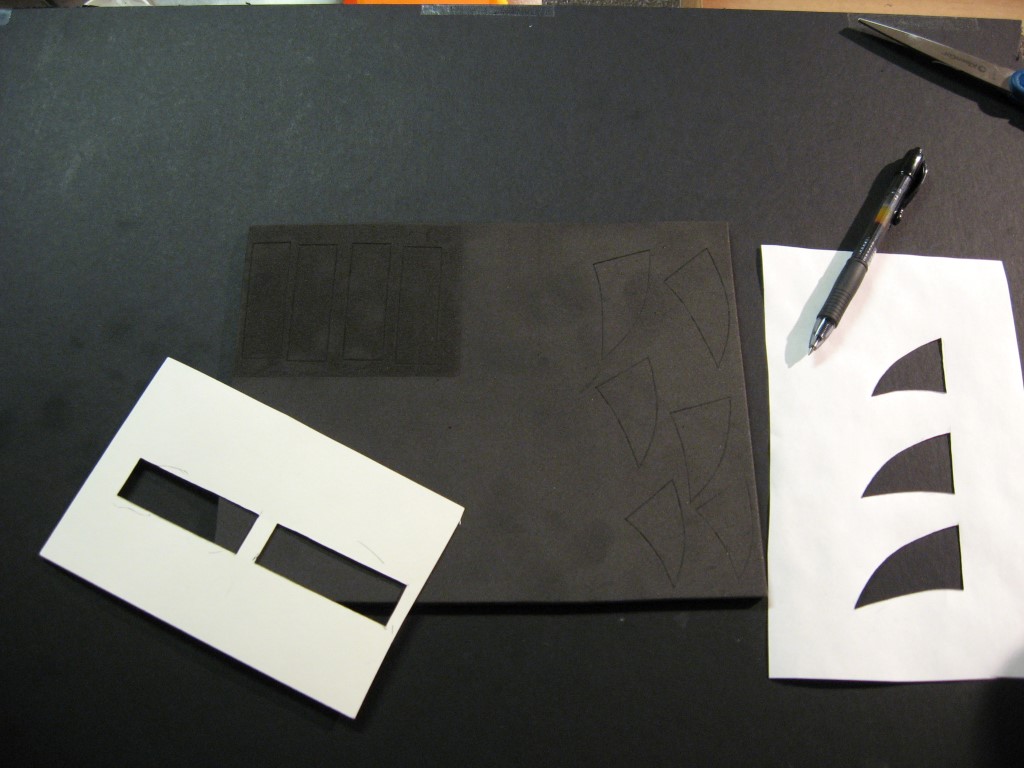
Print out the template onto thick printer paper (ideally a poster board paper) to make it easier to trace. Tape together the two halves of the template base – hold it up to light or place the printouts on a sun-facing window to see through the paper and correctly align both halves.
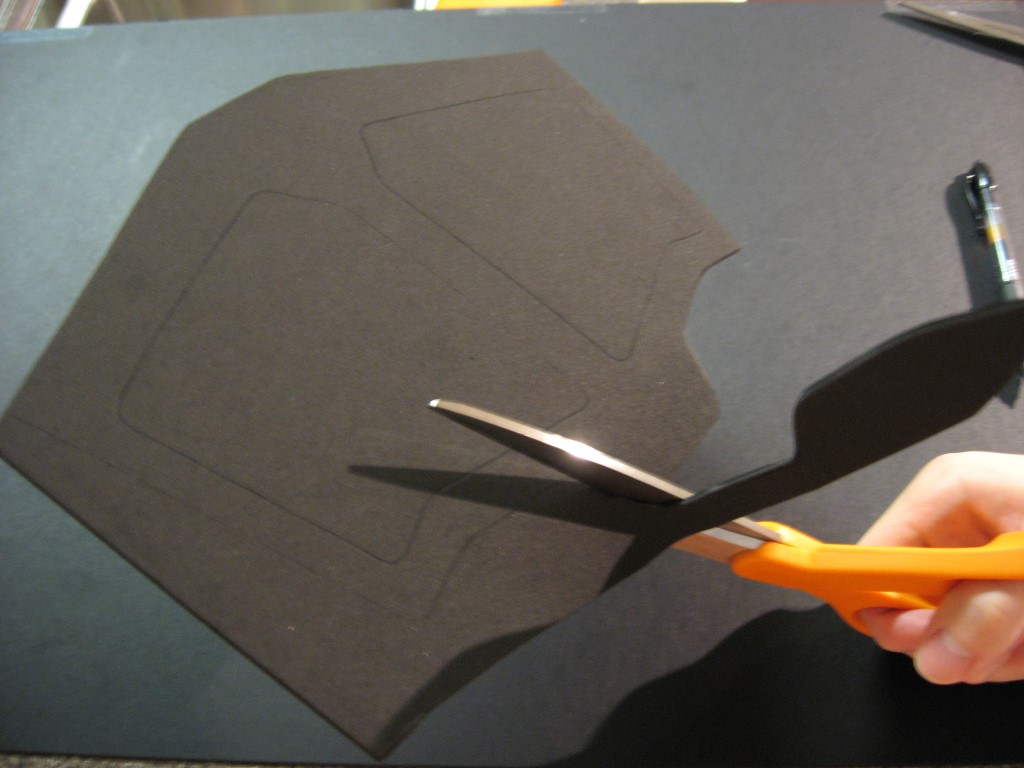
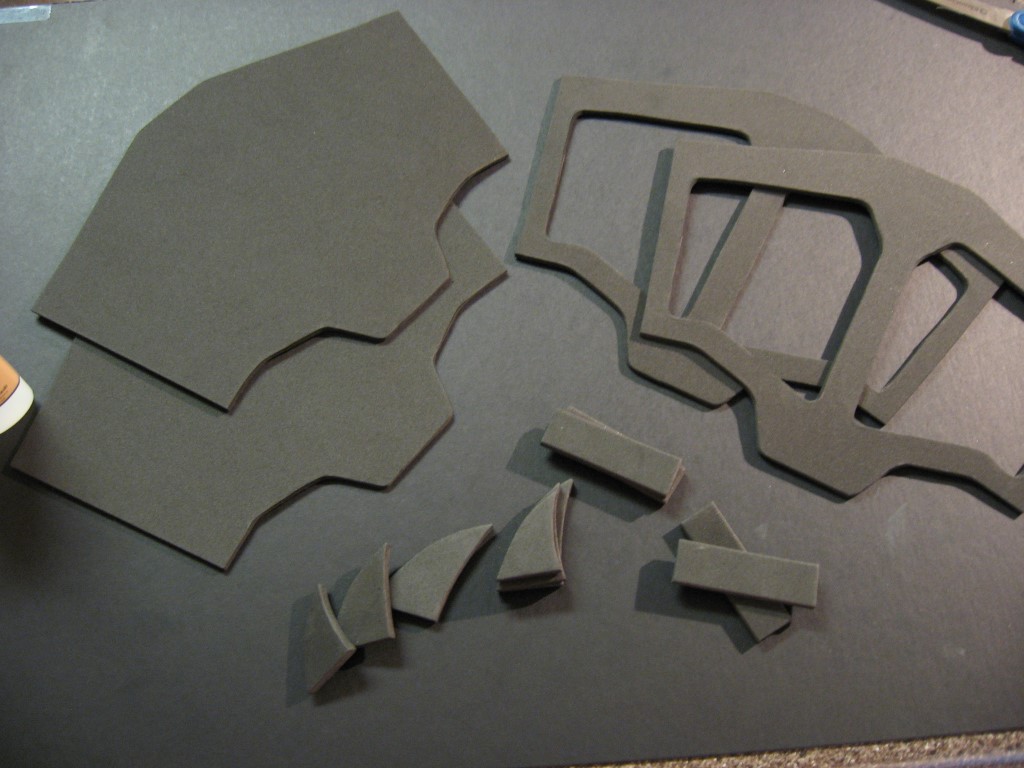
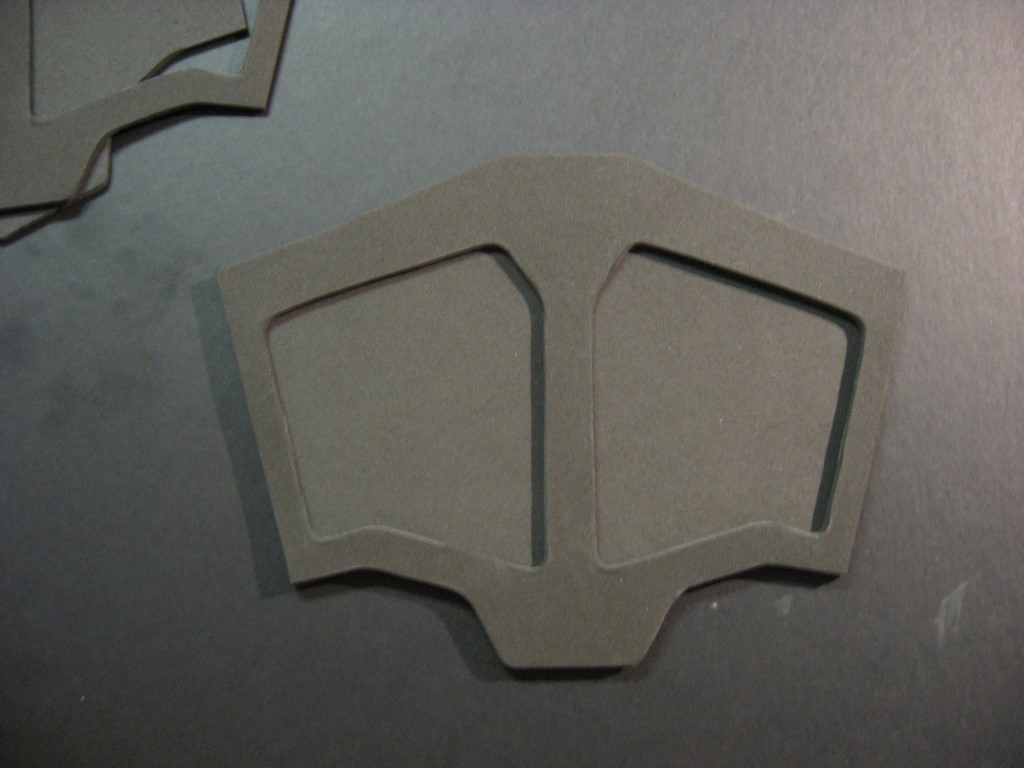
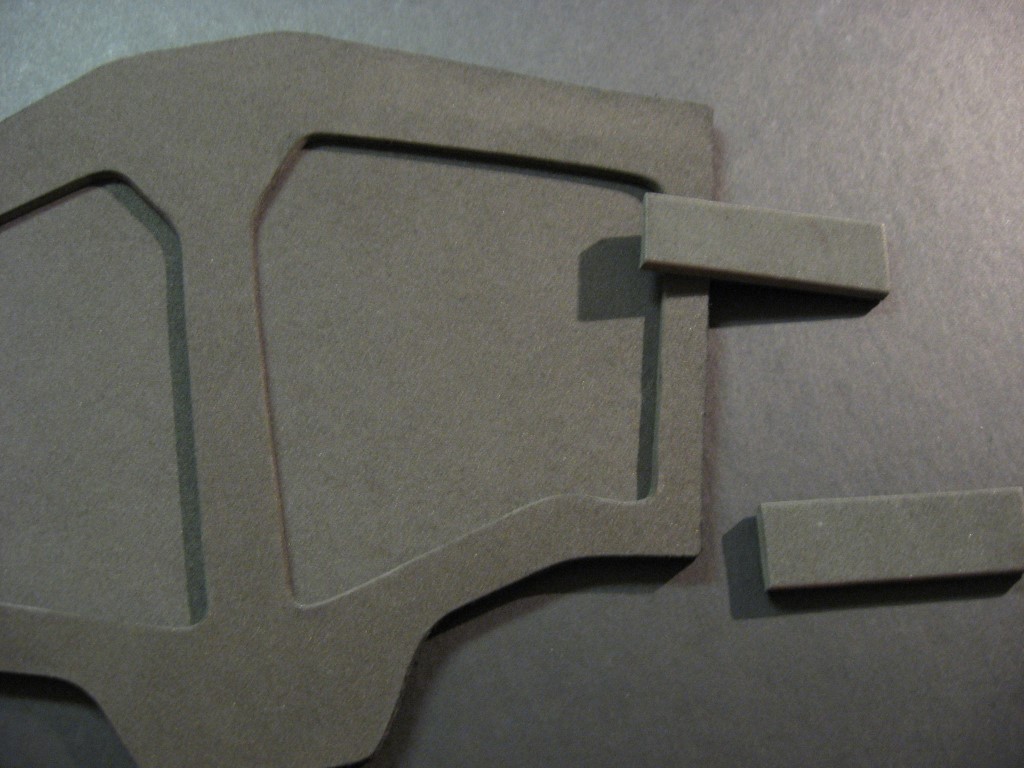
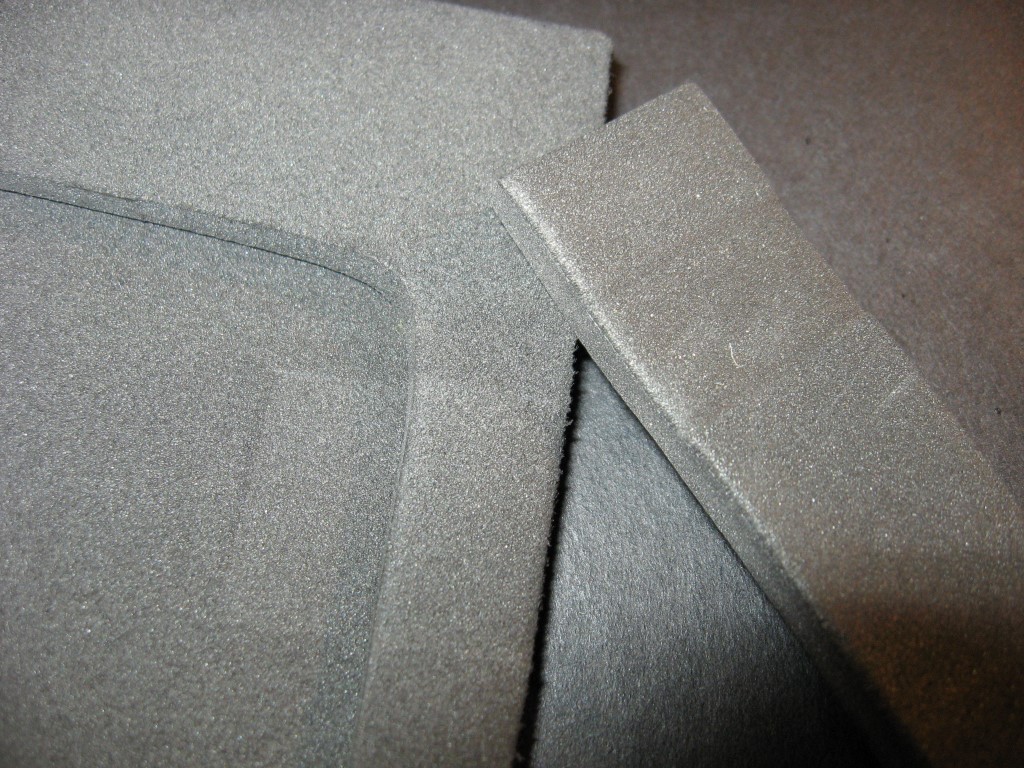
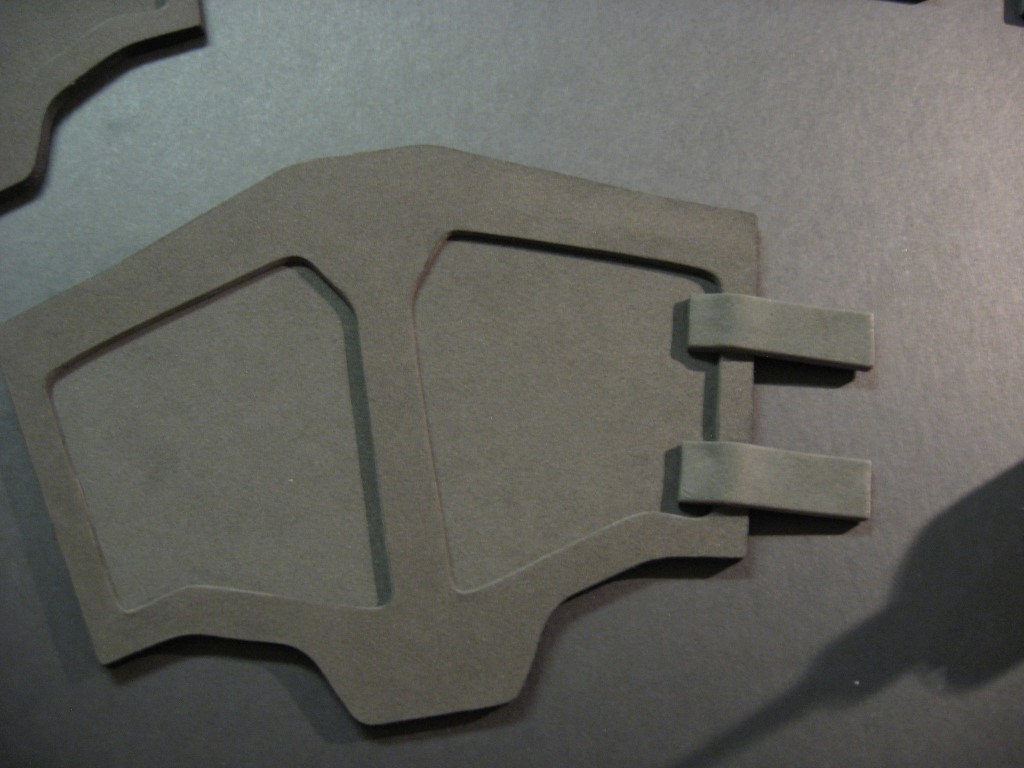
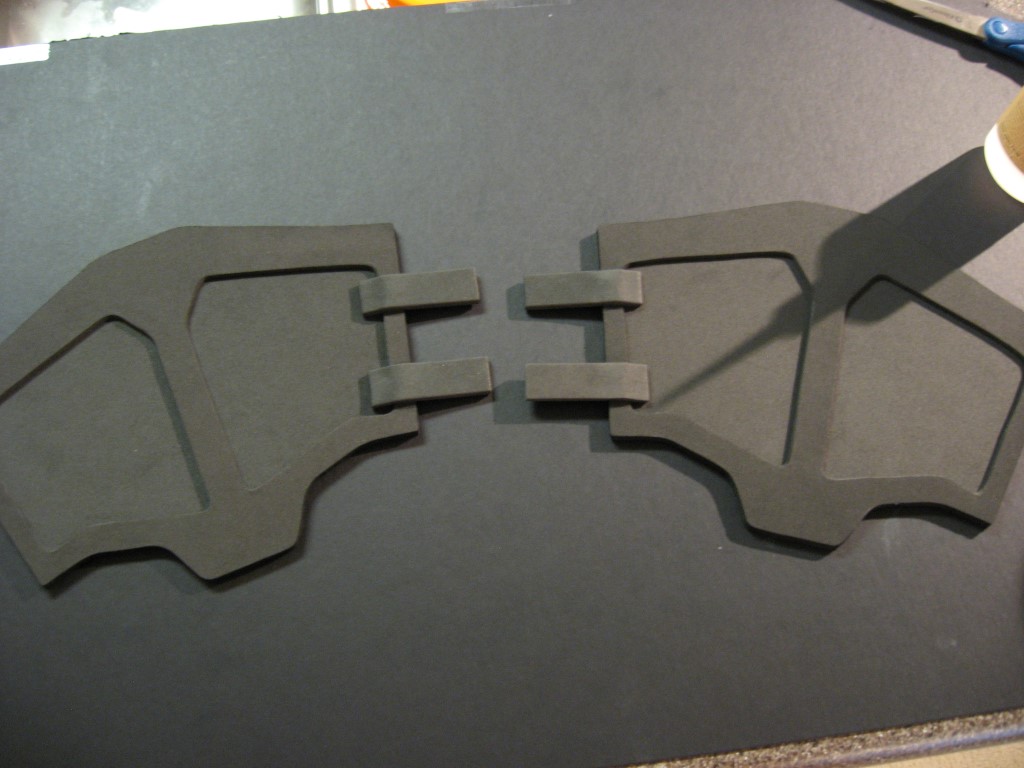
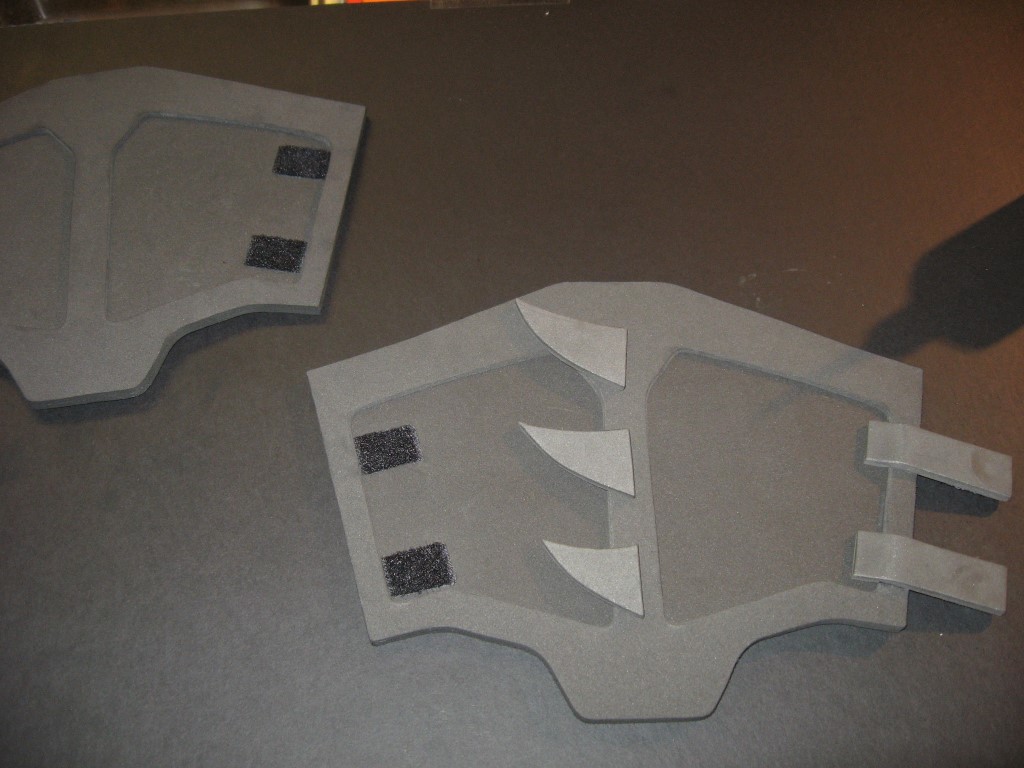
Cut out all the pieces and trace them onto your foam sheets. Use a few pieces of scotch tape to hold the template in place on the foam when tracing. The outer line of the main piece is the base layer of the gauntlets, the outer line plus the inside lines is the top layer. I recommend 3mm thick foam for the two main gauntlet layers and 5mm thick foam for the straps and fins. The Supply Page has links to sources for foam sheets.

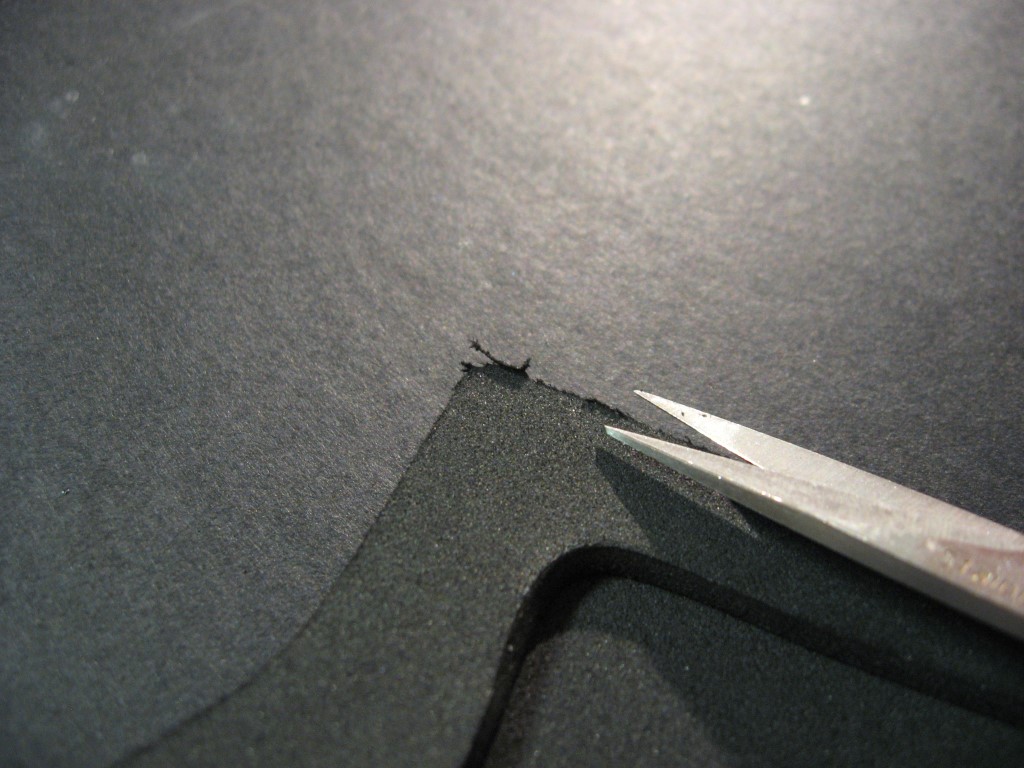
Cut out the shapes using a regular pair of office scissors
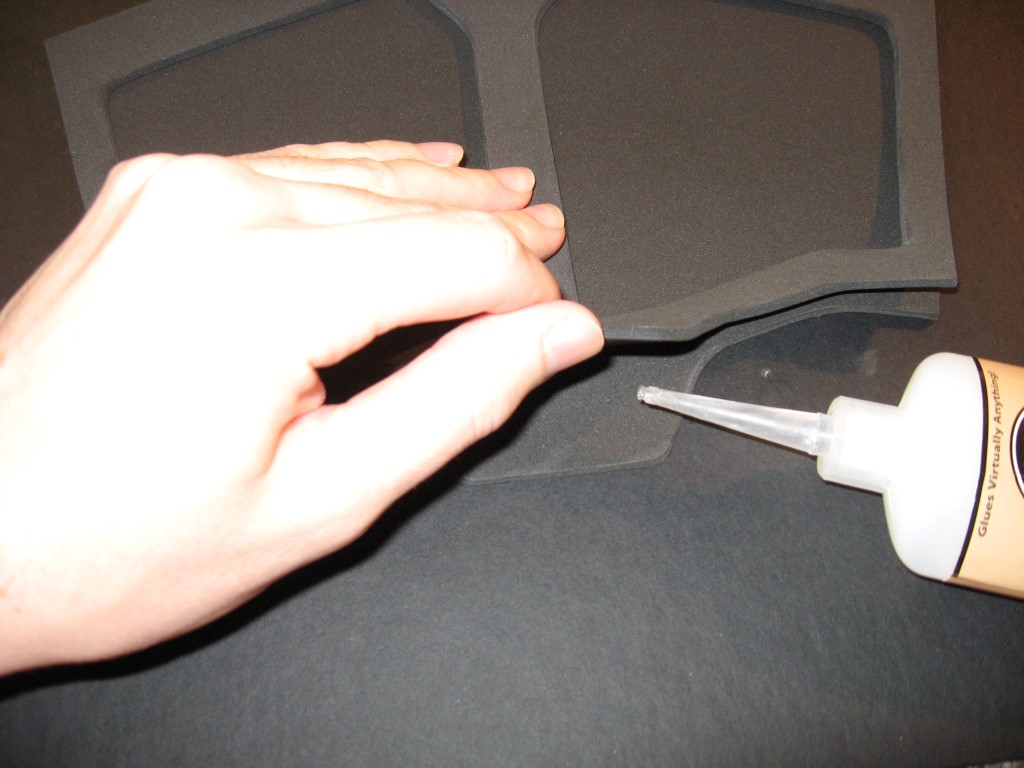
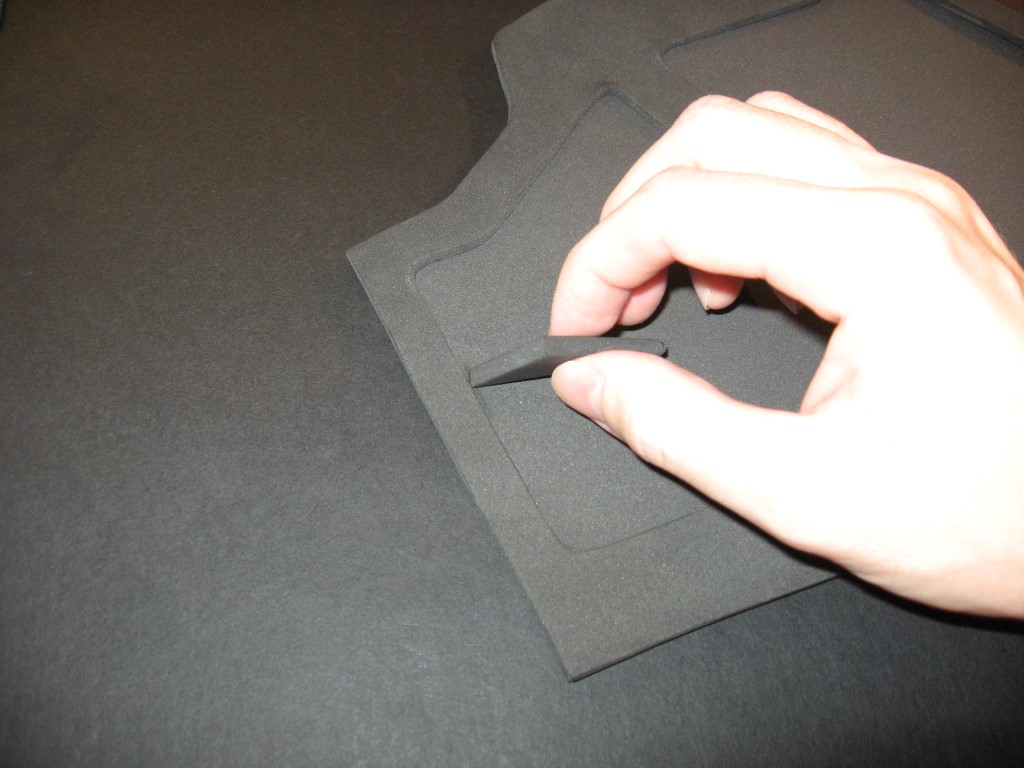
Align the top and bottom gauntlet layers as best as possible. Its alright if they do not align perfectly, as that can be fixed later. Once aligned to your satisfaction, press down on the top layer to hold it in place and peel back the bottom tip of the top layer. Apply a small but even amount of glue to the exposed underside of the top layer. I like a type of super glue called Rhino Glue. Slowly lower the tip back down, ensuring that the alignment hasn’t changed, and press down gently on it for about 10 seconds to let the glue set.
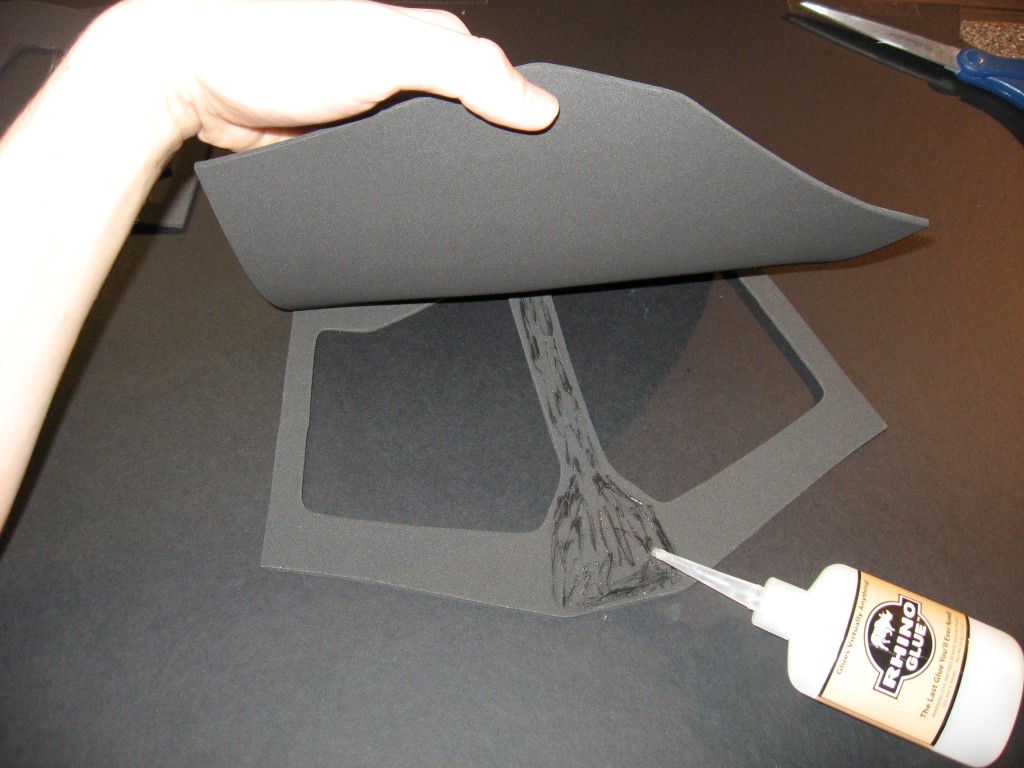
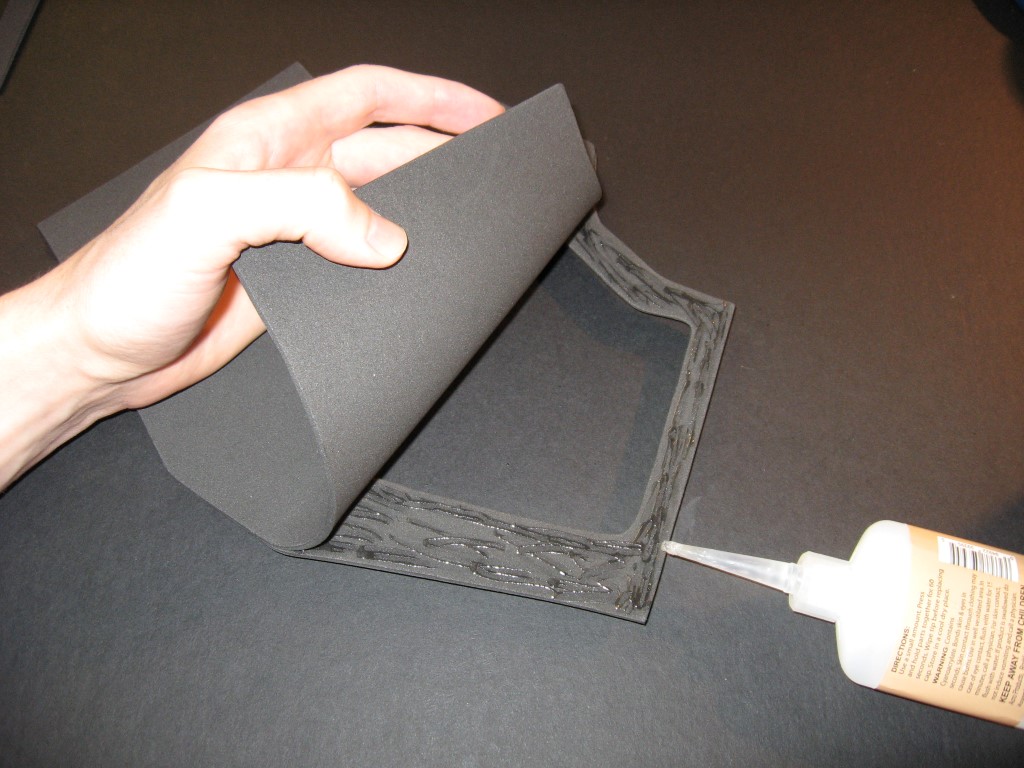
Flip the two layers over and apply glue down the middle of the underside of the top layer. Flip it over again and slowly lower the top layer onto the bottom layer, again ensuring the alignment hasn’t changed. Press down on the glued area for about 10 seconds to let the glue set. Flip it over again and repeat the process for the two remaining unglued sides. A little glue goes a long way, and too much will cause it to start oozing out the sides. Use a scrap of foam to wipe any excess glue that oozes out.
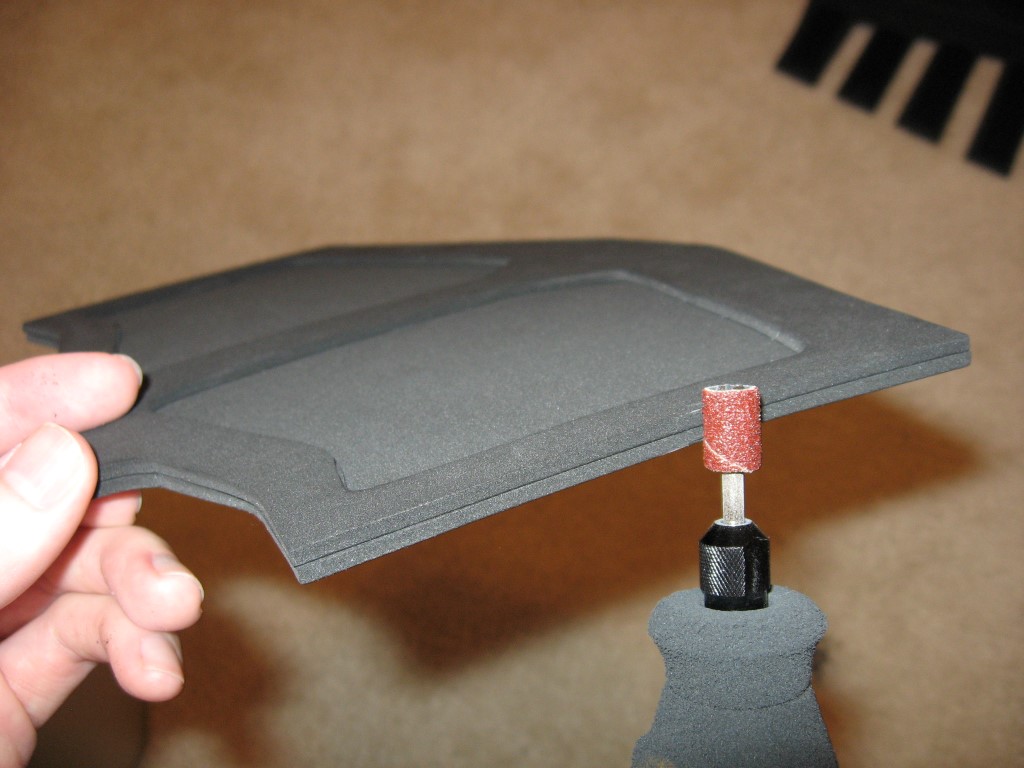
If you are satisfied with the finish of the edges of the gauntlet, you can move onto the adding straps step. If the edges of the gauntlets are uneven and you would like to straighten them you can do this with a dremel.
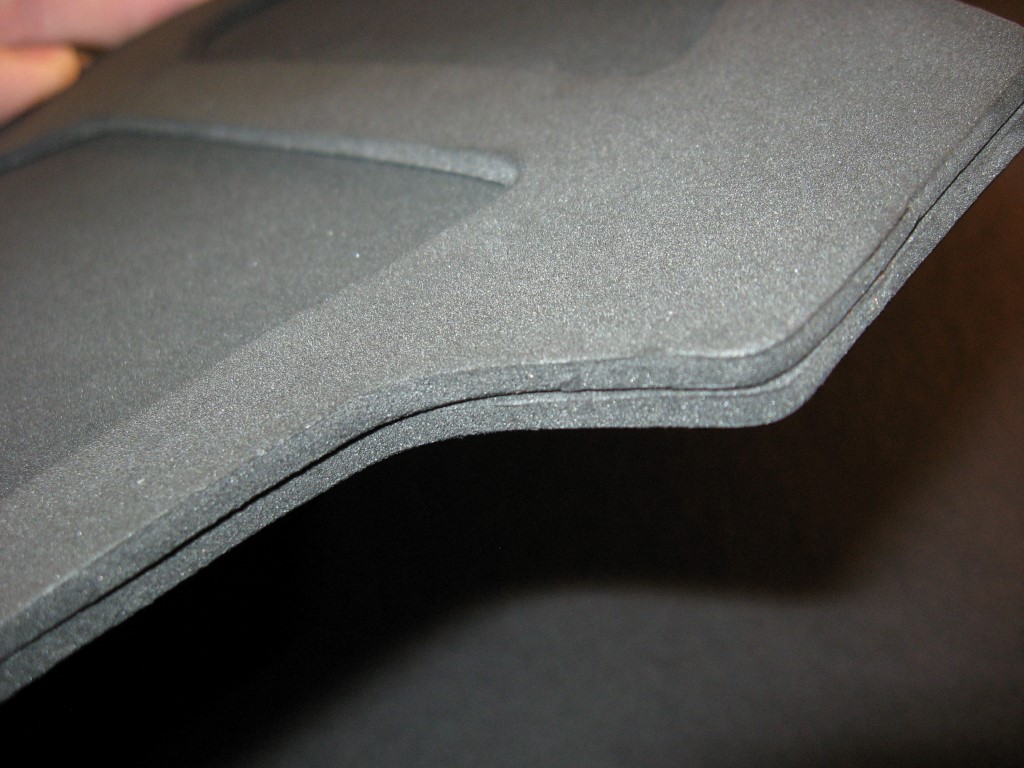
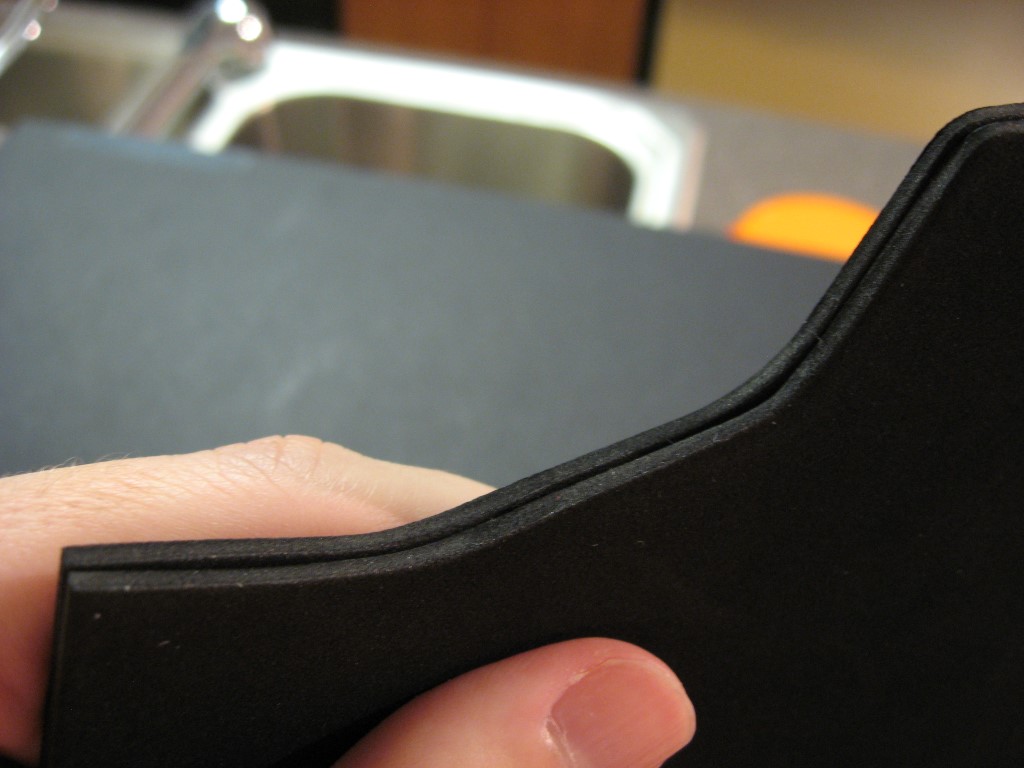
Use a dremel with a sanding bit attachment to smooth out the edges. A cheap, $10 dremel from Harbor Freight works just fine for this. Gently stroke the edges using the slowest setting on the dremel. The foam gets ground down very quickly, so be careful not to do too much. Afterwords it should almost look like there is only one layer of foam instead of two. Wipe the foam dust off with a wet rag and trim any frayed edges left over with scissors.

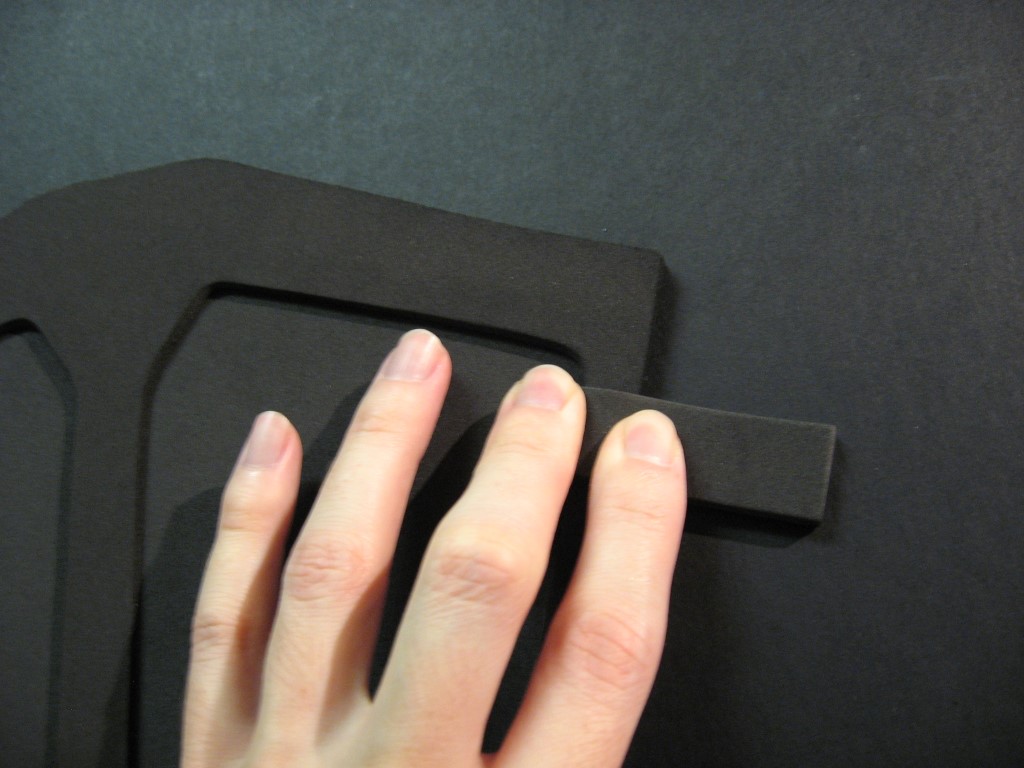
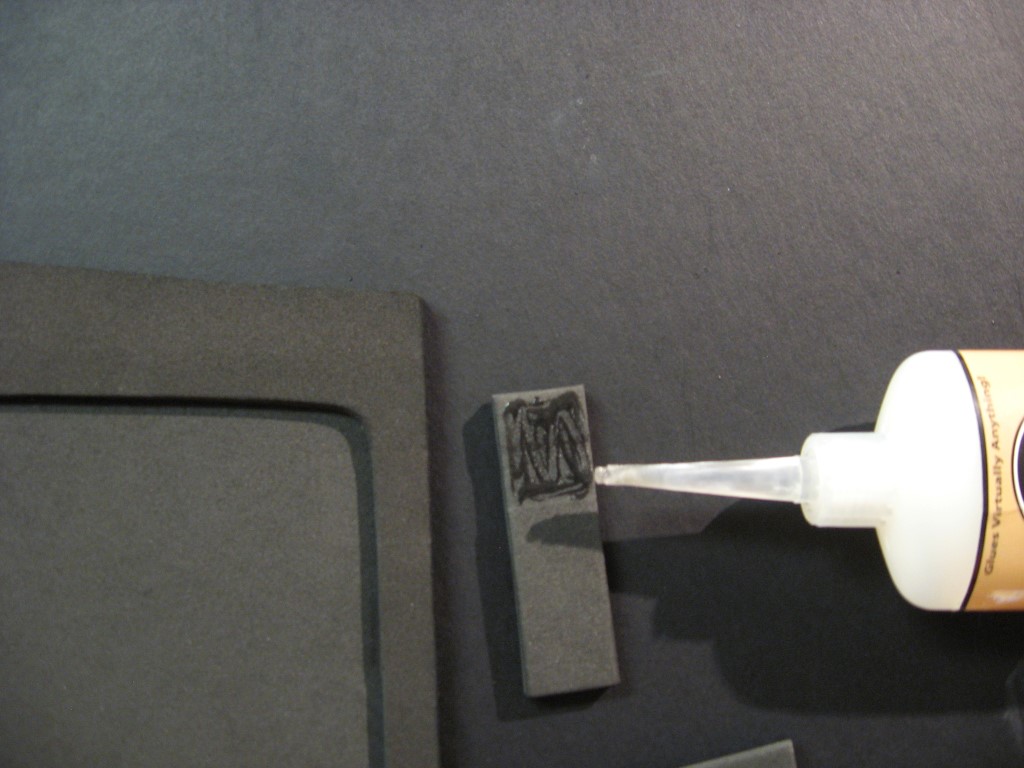
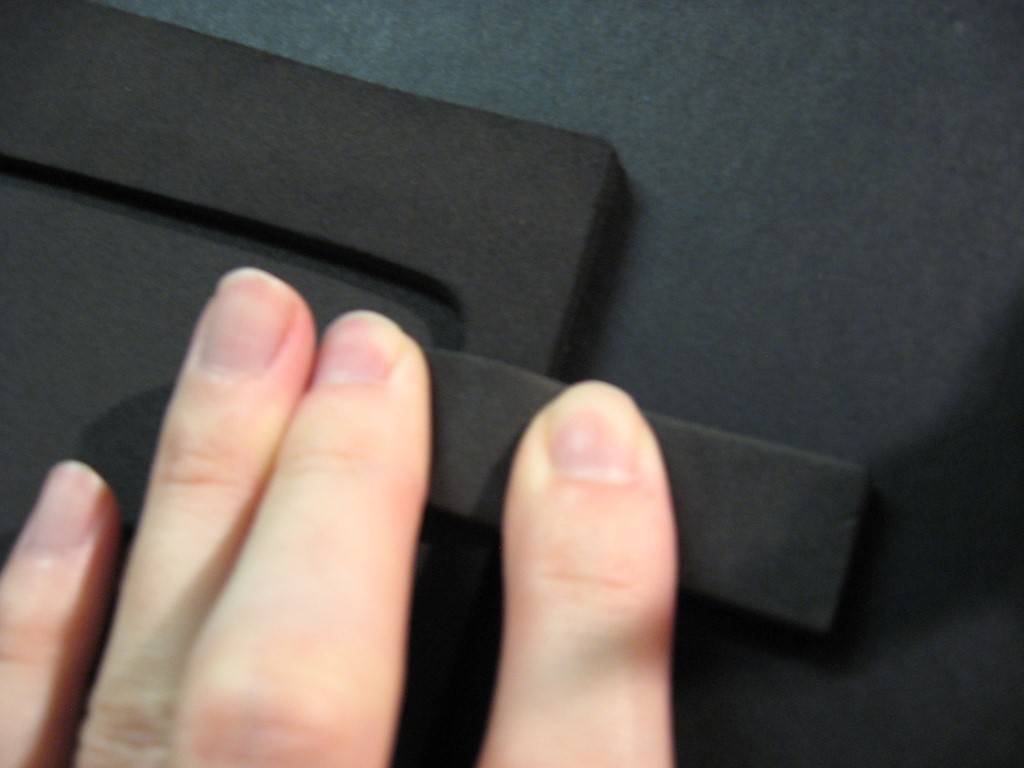
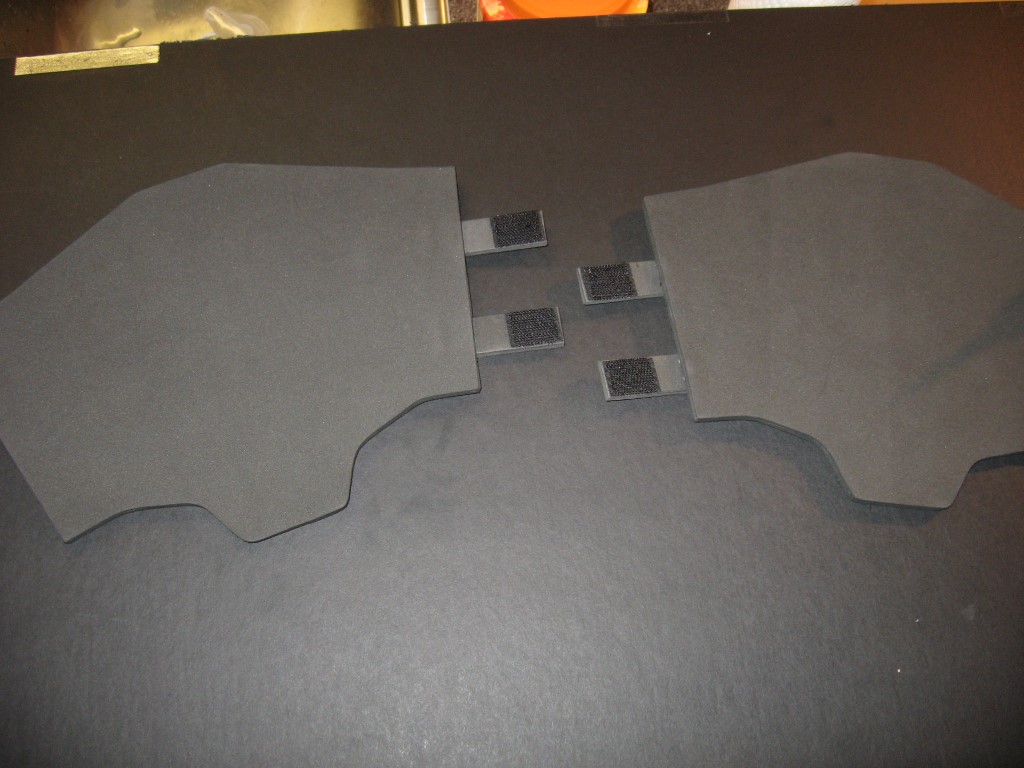
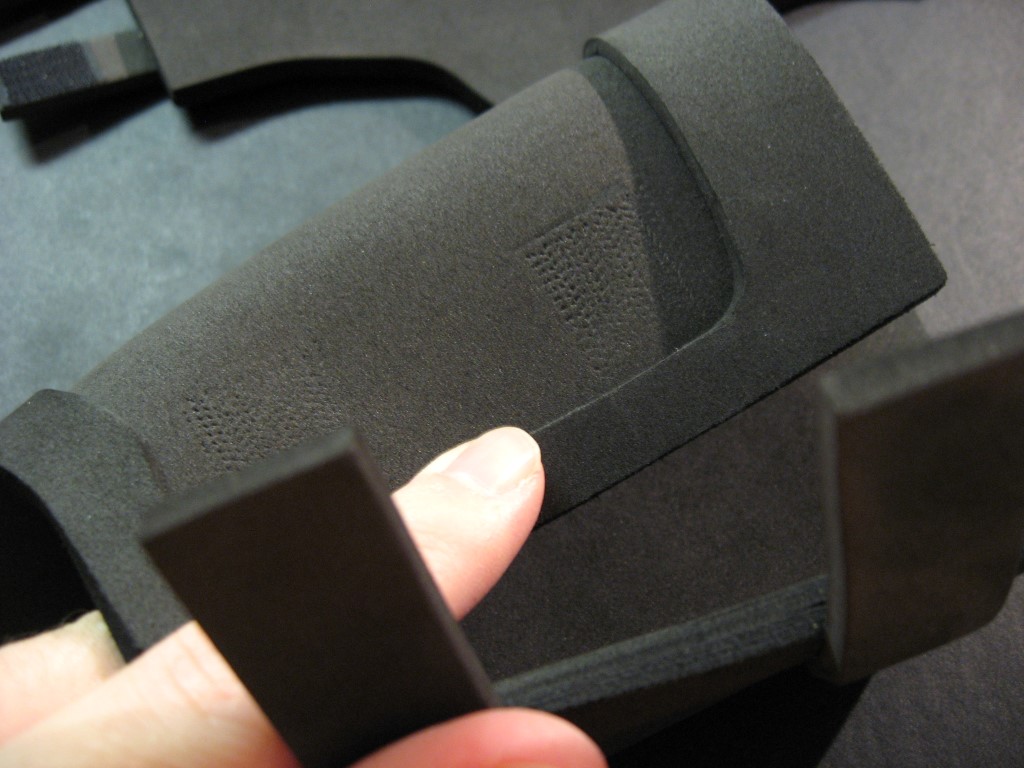
Align the straps where you would like them on one side of the gauntlet and press it down into the foam. This will create a visible indentation that you can use as a guide for putting on the glue and placing the strap back down again.
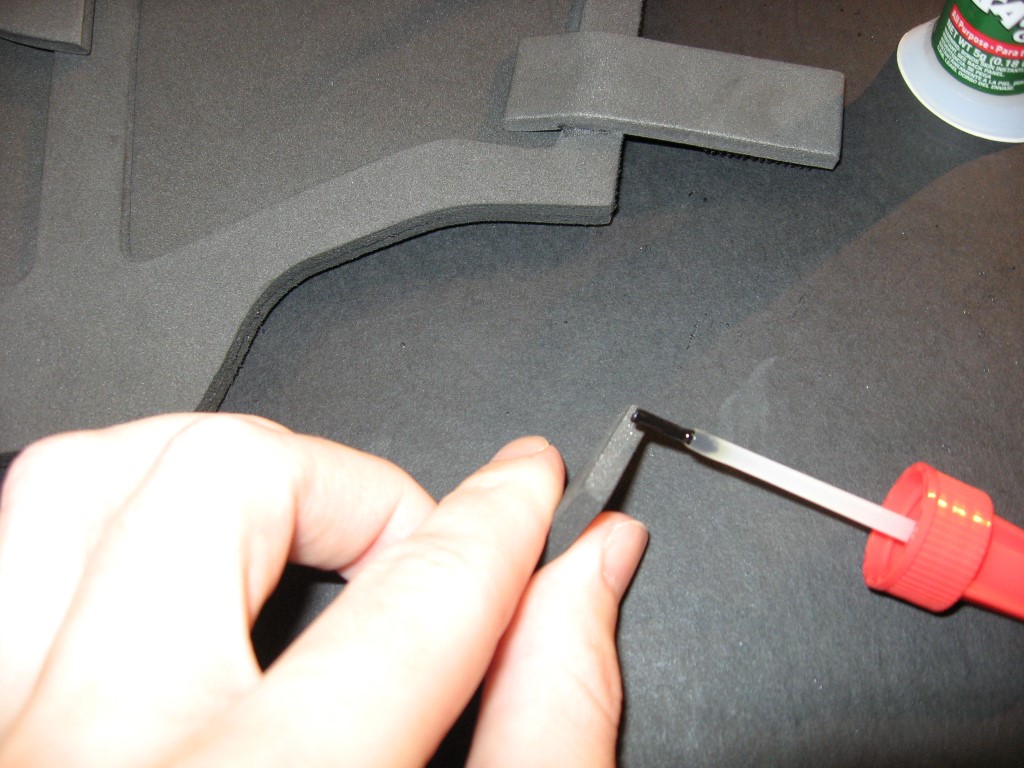
Apply a small amount of glue to the indented area of the strap and press it down onto the indented area of the gauntlet. Hold it for about 10 seconds. Wipe any excess glue with a foam scrap. Repeat for the second strap. Place the other two straps on the opposite side of the other gauntlet.
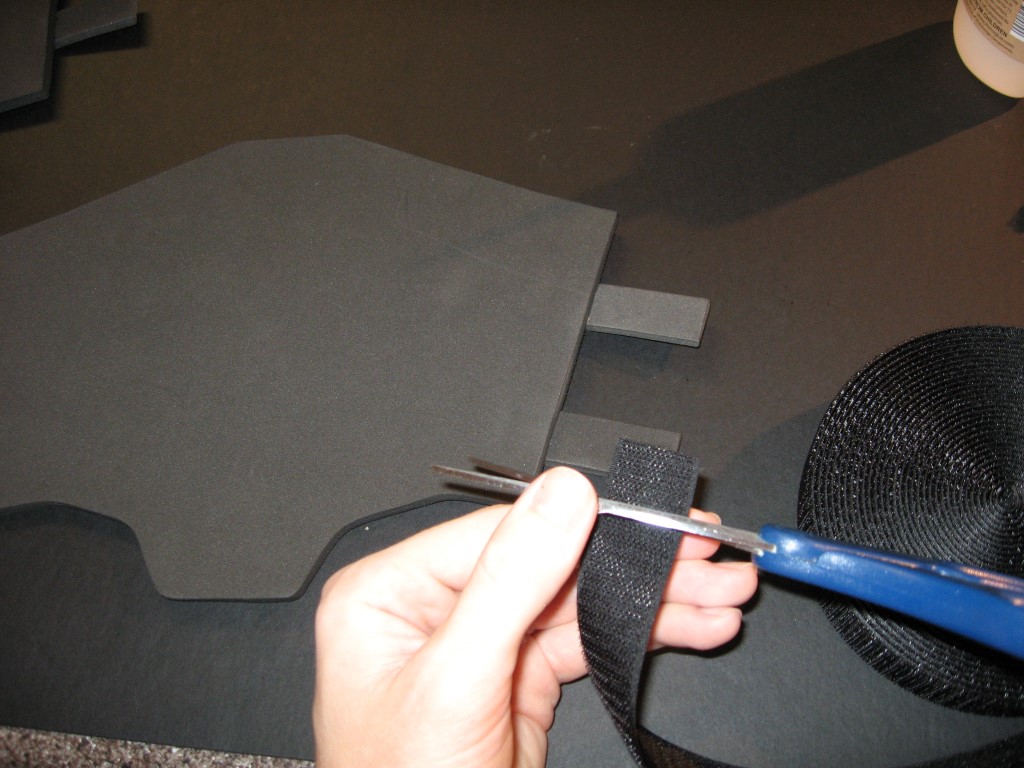
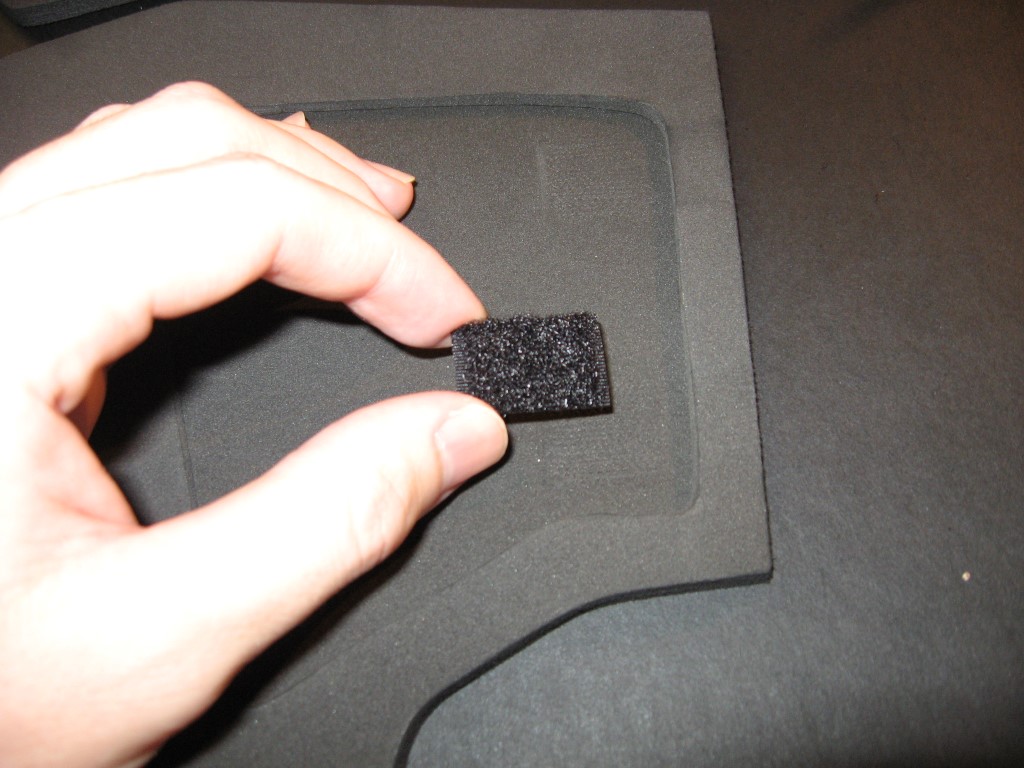
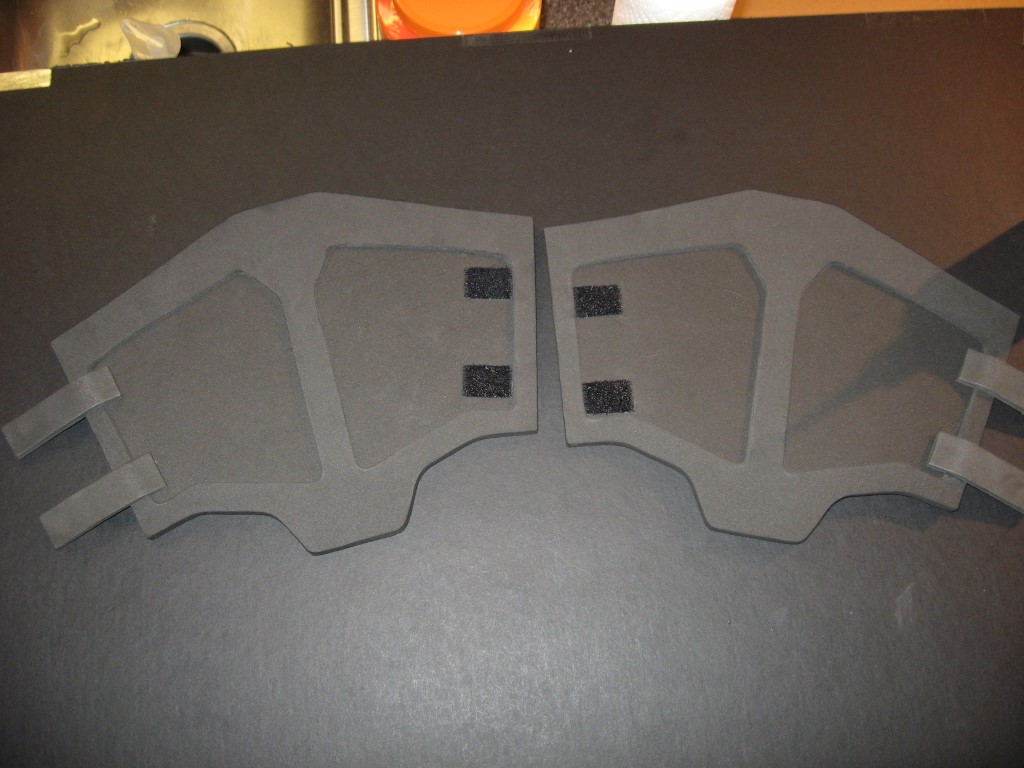
Flip the gauntlets over. Cut a small piece of velcro (the hook side) to the size of the width of the straps and glue it to the underside of each strap. You can use a piece of plastic packaging to press down on the velcro to prevent the super glue from getting on your fingers. Repeat for the other straps. If the velcro is having a hard time sticking, try using a little less glue, and hold the velcro down in place for a full 30 seconds or more until it sticks.

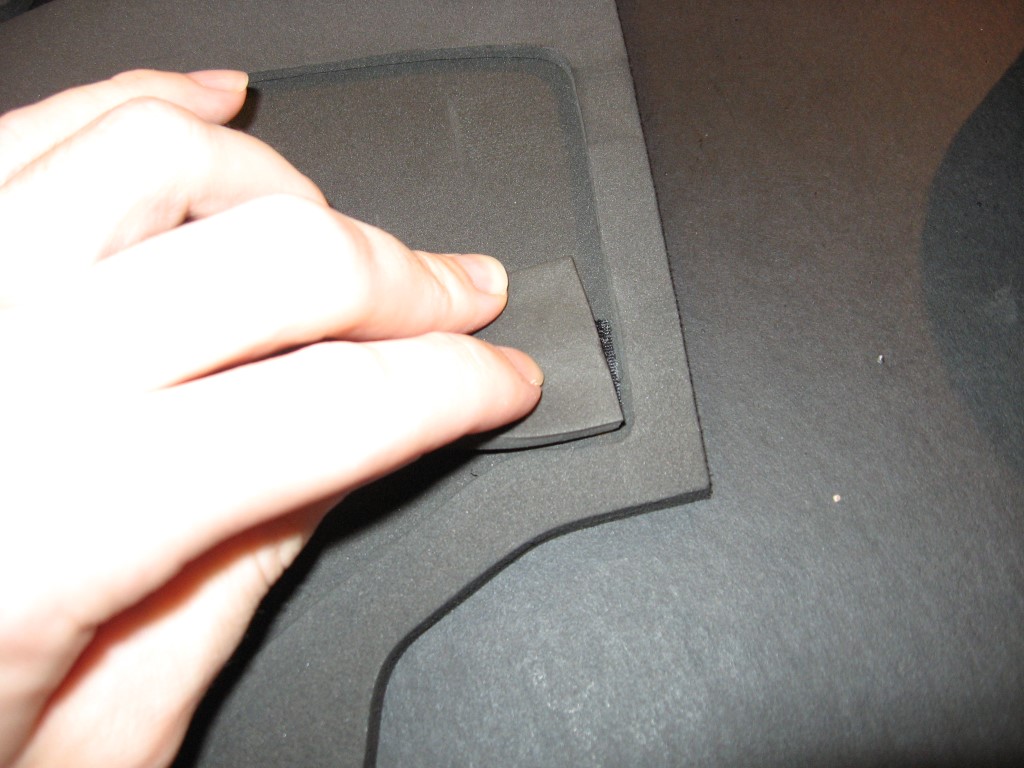
Bring the edges of the gauntlets together and press the straps into the foam. The hook side of the velcro will create a visible indentation exactly where you want the loop side of the velcro to go.
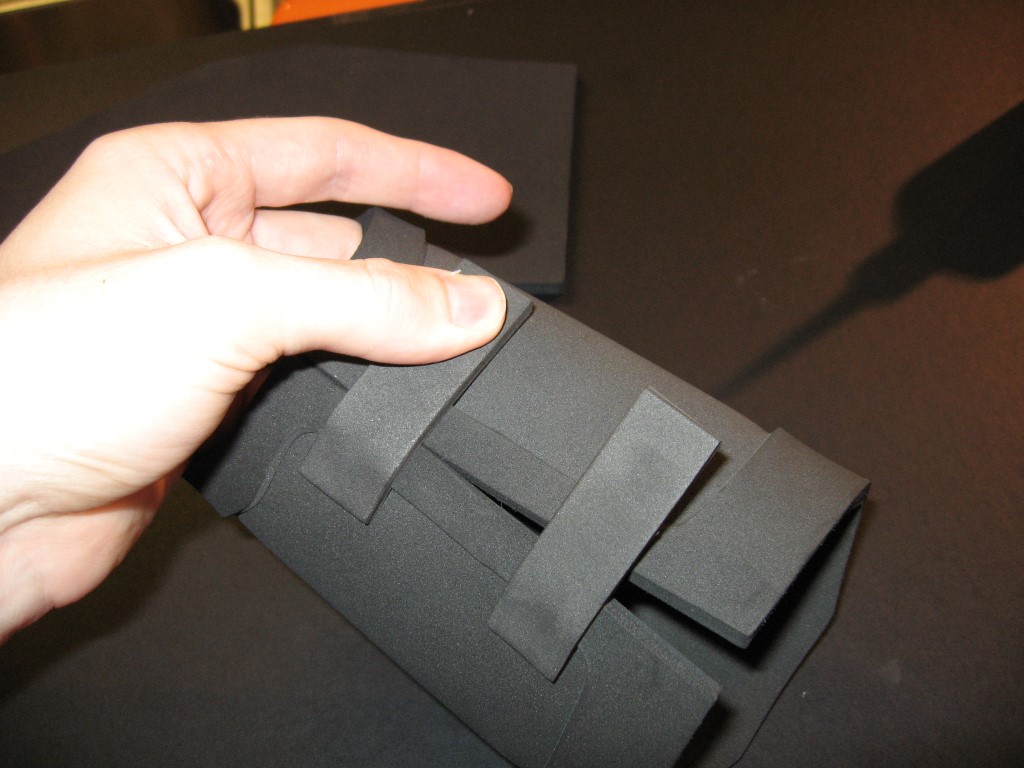
Cut small pieces of velcro (loop side) about the same size as before and glue them ontop of the indentations. You can use a piece of plastic packaging again to avoid gluing your fingers, or a piece of scrap foam- just don’t hold it down long enough for it to get glued itself.
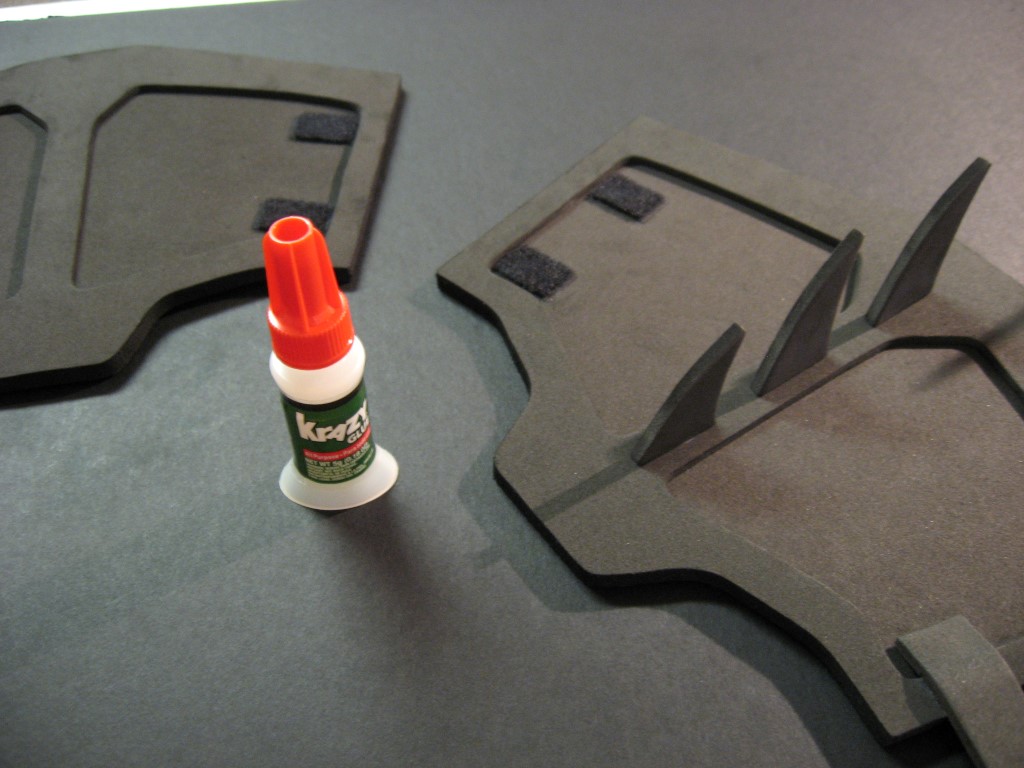
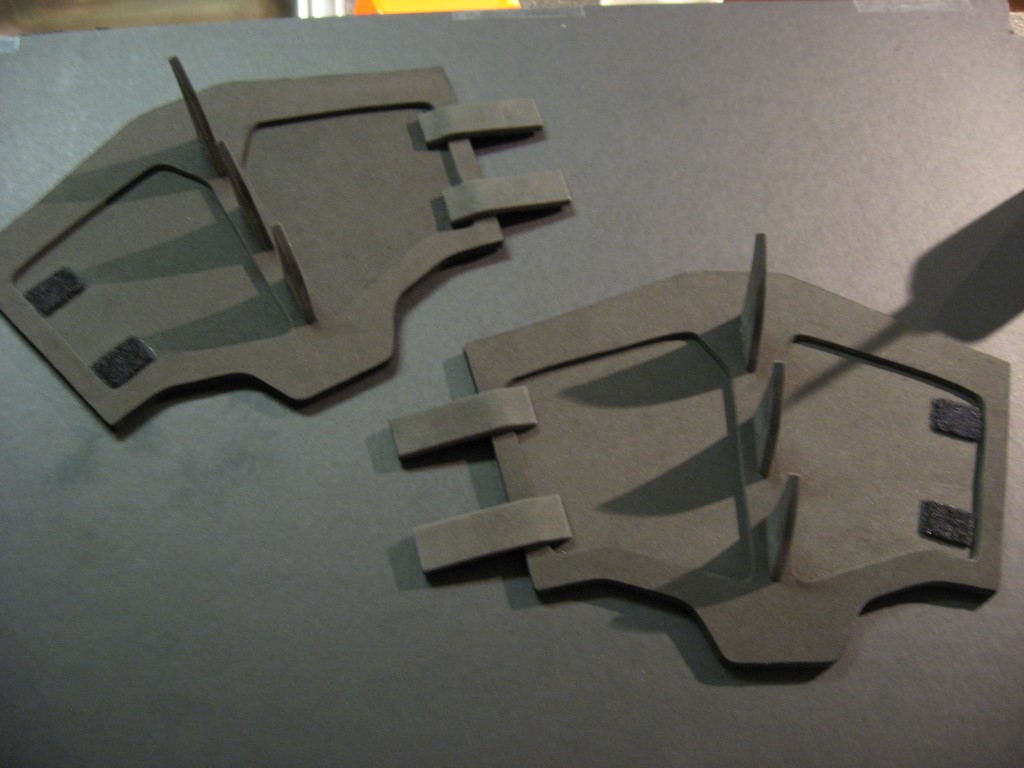
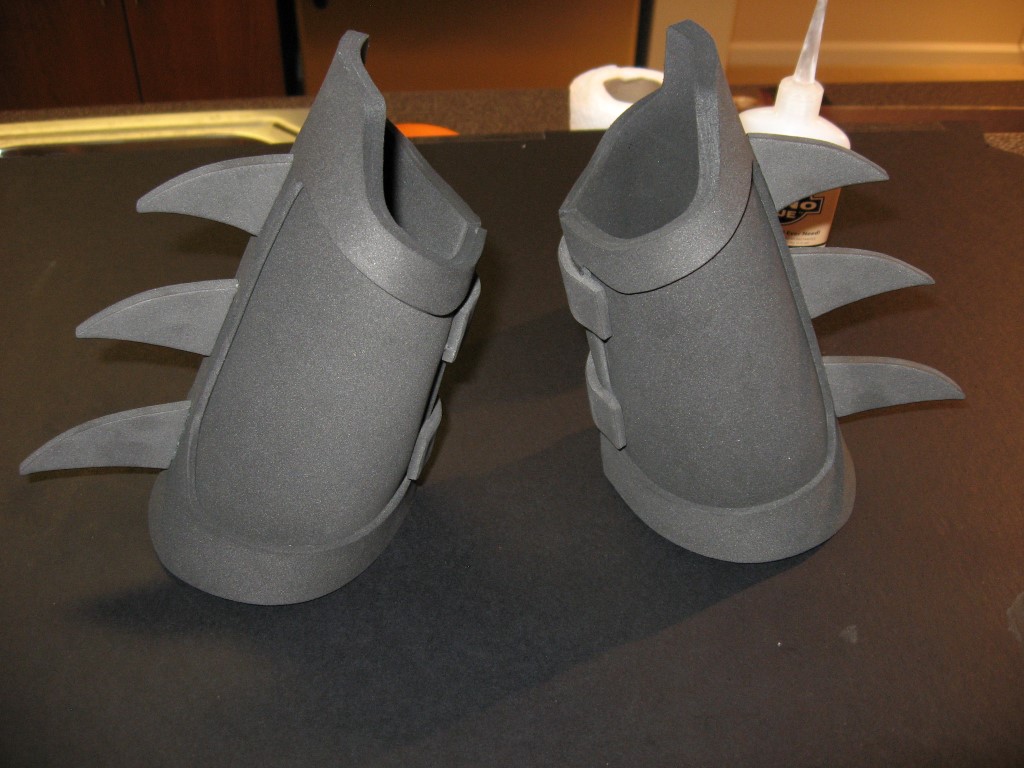
Lay the fins on top of the gauntlets and align them where you would like them to be. You can mark their locations with a pencil if it helps you place them when gluing. Put a small amount glue on the base of each fin and press it onto the gauntlets. I recommend Krazy Glue’s All Purpose brush for this, as it allows for a controlled, even application.
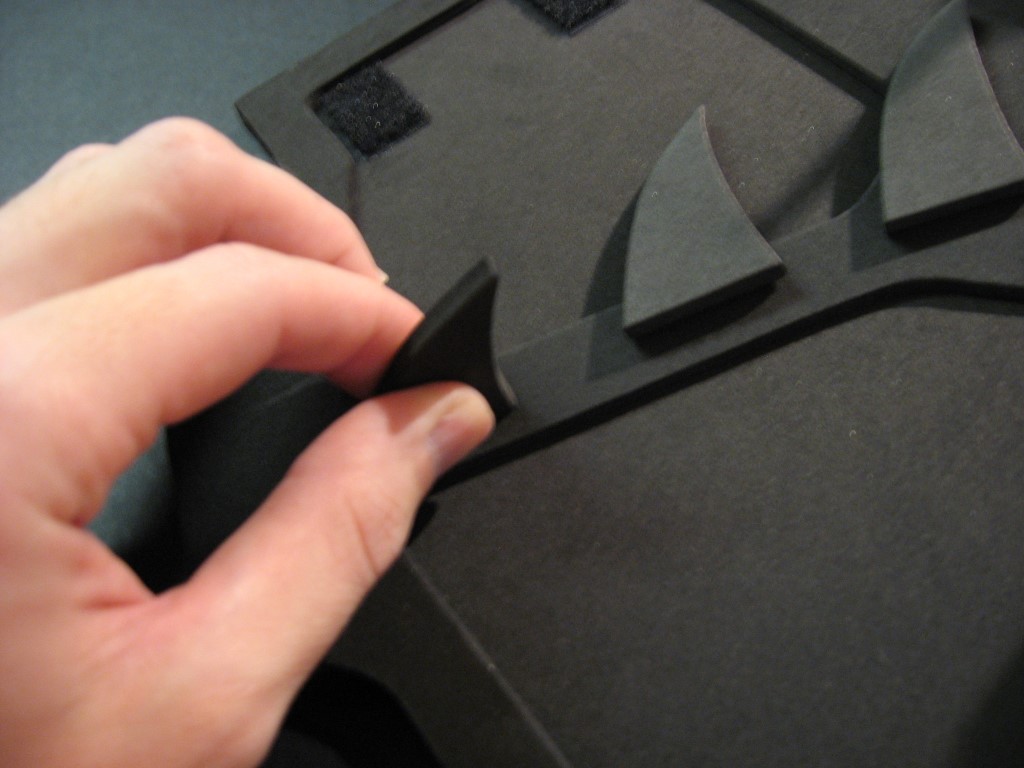
Finish gluing the rest of the fins and strap the gauntlets closed.