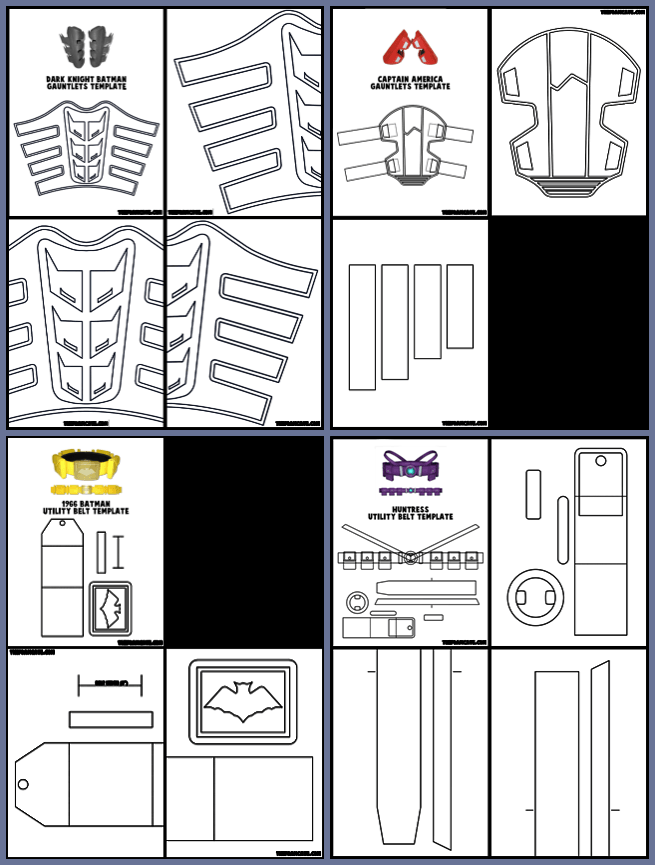
This tutorial will walk you through the construction of the Ark City Bat gauntlets. The template for these gauntlets is available for purchase here:
If this is your first build, check out the Introduction Page first,
as well as the Supply Page for links to the foam, glue, and necessary tools.
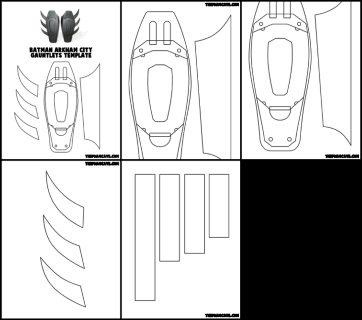
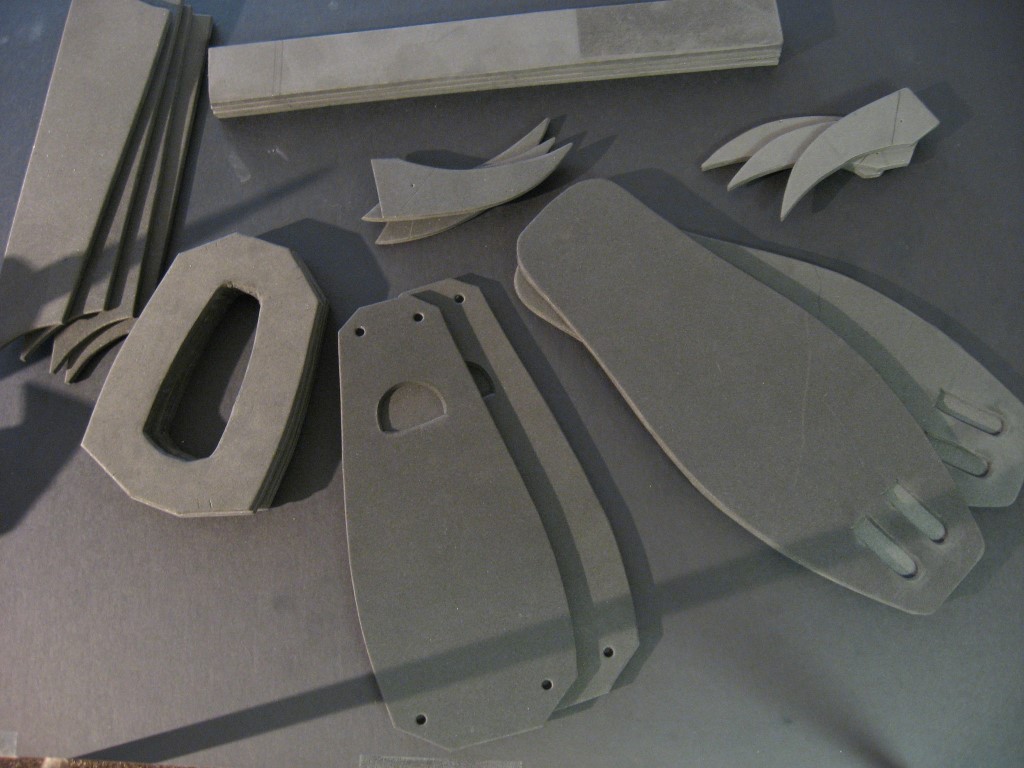
Print out the template onto thick printer paper (ideally a poster board paper) to make it easier to trace. You may want to print it out a couple of times to get enough copies to cut out all the layers separately. Tape together the sections that extend across two pages- hold it up to light or place the printouts on a sun-facing window to see through the paper and correctly align both halves.
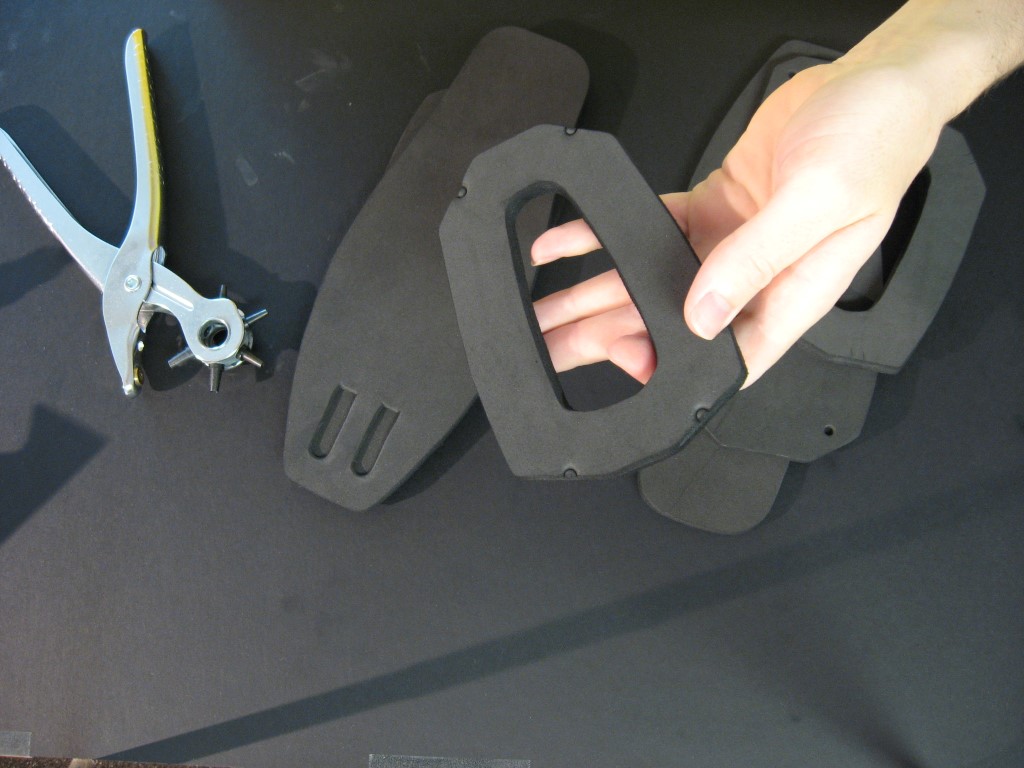
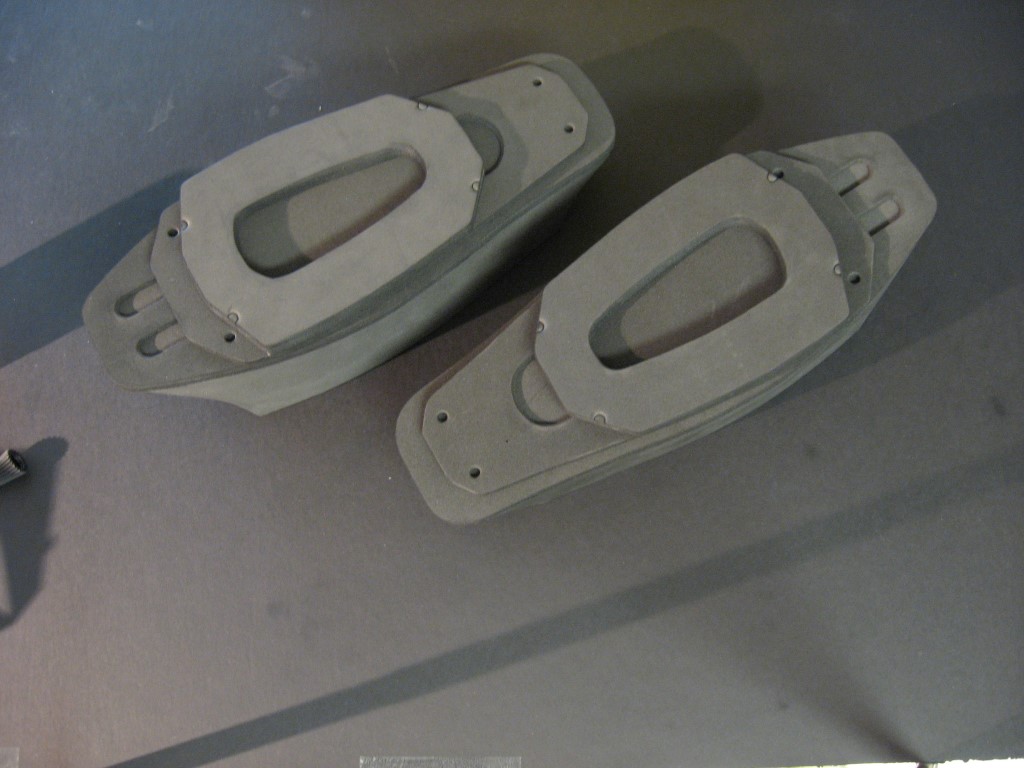
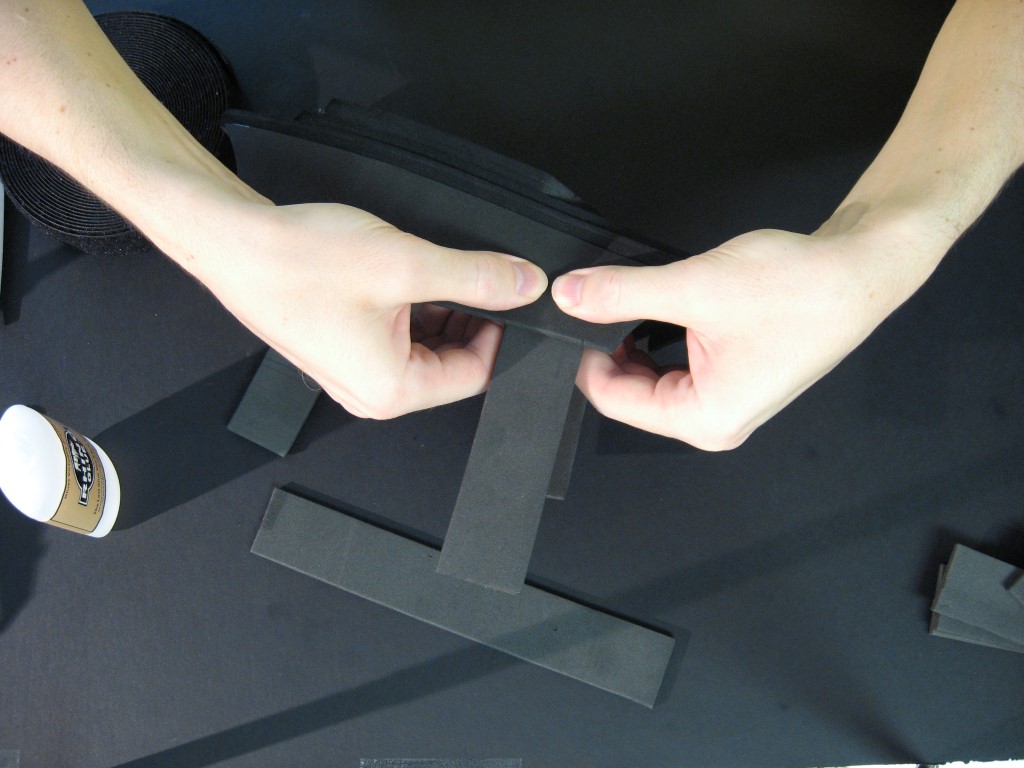
Cut out all the pieces and trace them onto your foam sheets. Most of the pieces will be two layers of foam thick; for the top piece I use two layers of 5mm thick foam, for the mid piece 2 layers of 3mm, the base is a layer of 3mm on top a layer of 5mm, and the straps, sides, and fins are 5 or 6mm. For the pieces that are two layers, trace all the details for the top layers, and trace only the outer edge for the bottom layers.
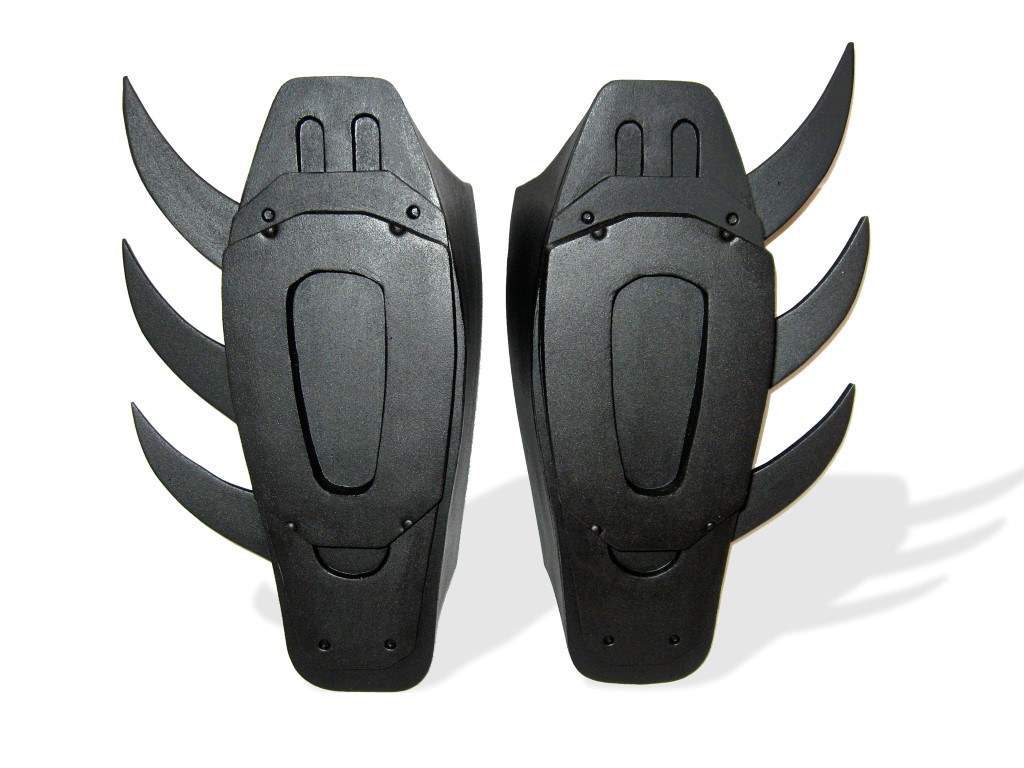
After tracing the fins, mark what number fin each one is, just underneath it. This will help identify them later, as they look very similar.


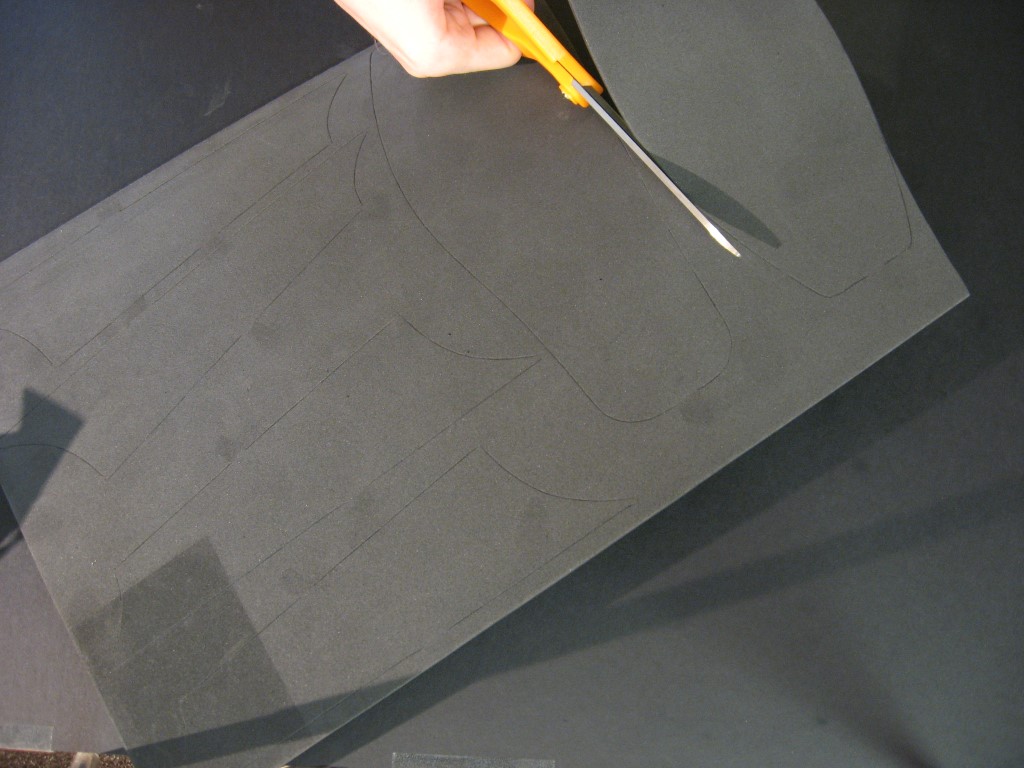
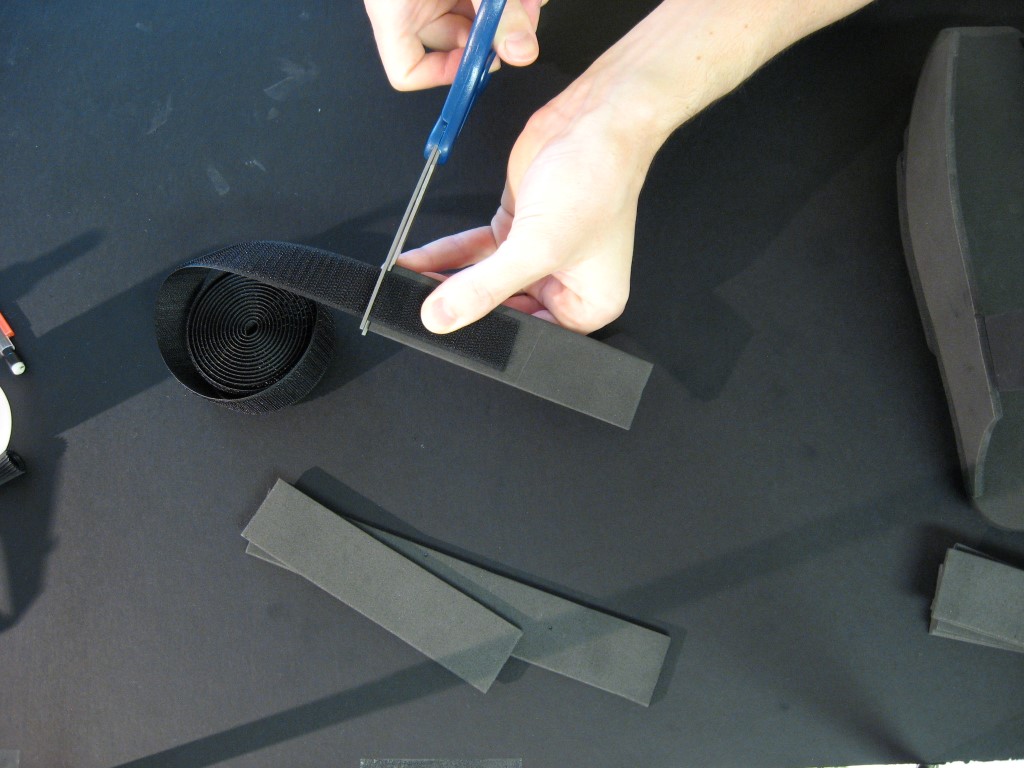
Cut out the shapes using a regular pair of scissors. Use a hole punch for the holes. Don’t cut the bottom edge of the fins just yet. Cut around the number marks of the fins so you can use it later for reference.
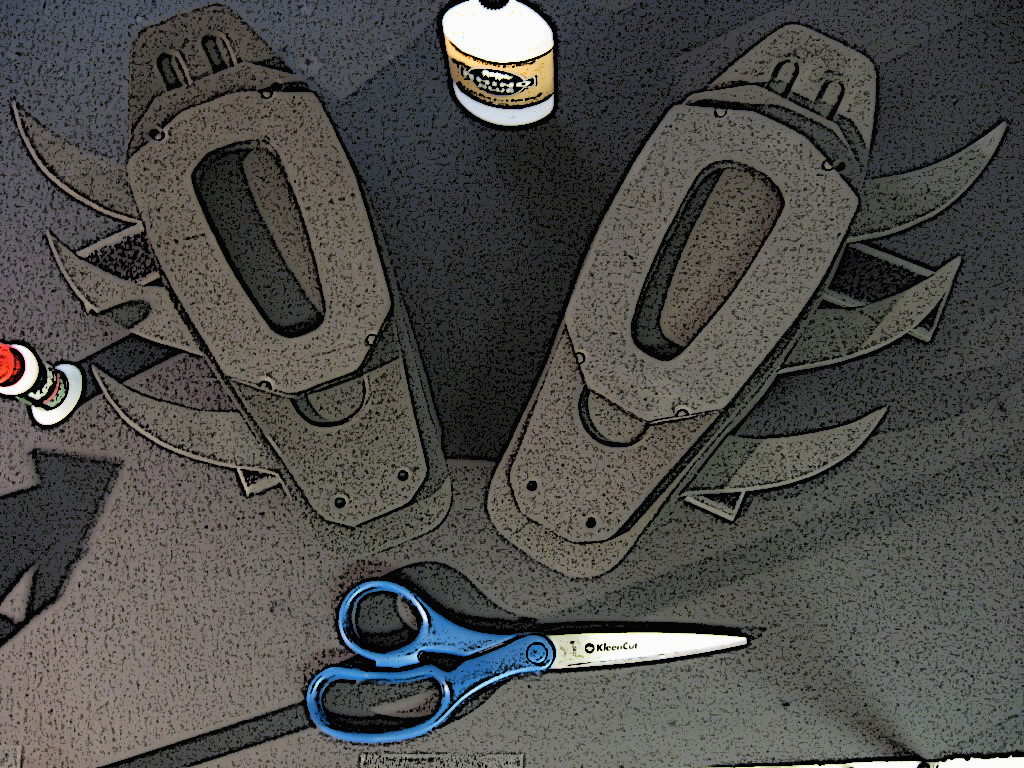
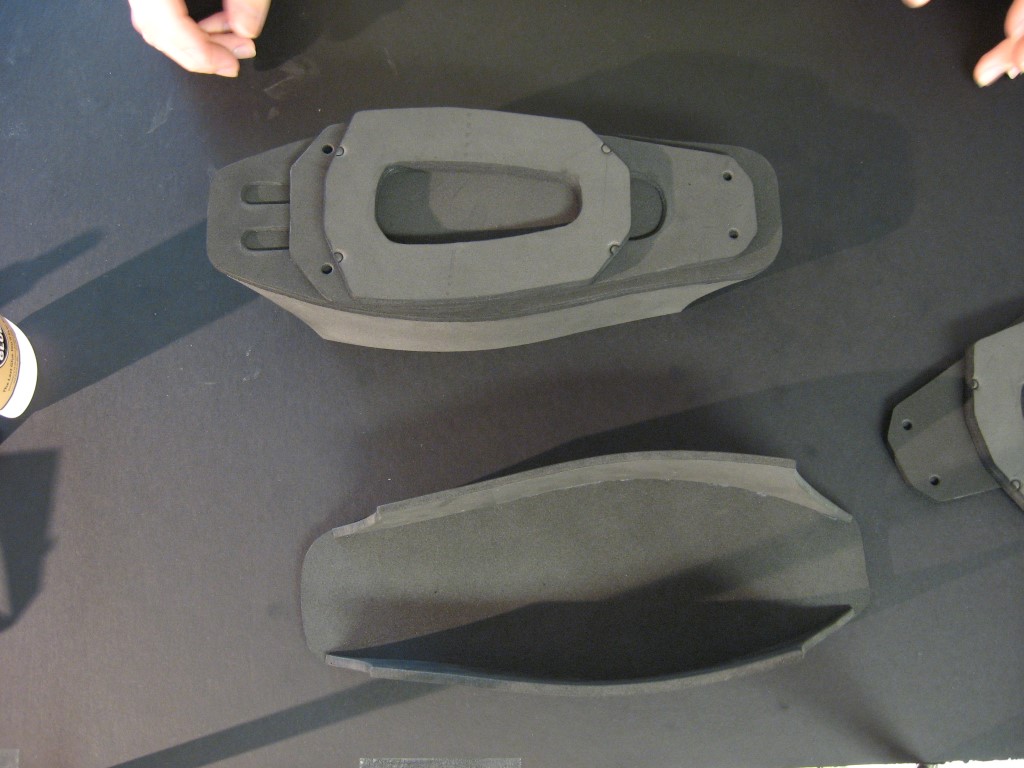
Glue all the top layers onto their base layers for the two layer pieces. I use a variety of super glues, mainly Rhino Glue. You can align both layers first, and then bend back a corner while holding the layers in place, and apply a small amount of glue under the corner first. This will ensure proper alignment when finishing gluing the rest of it.

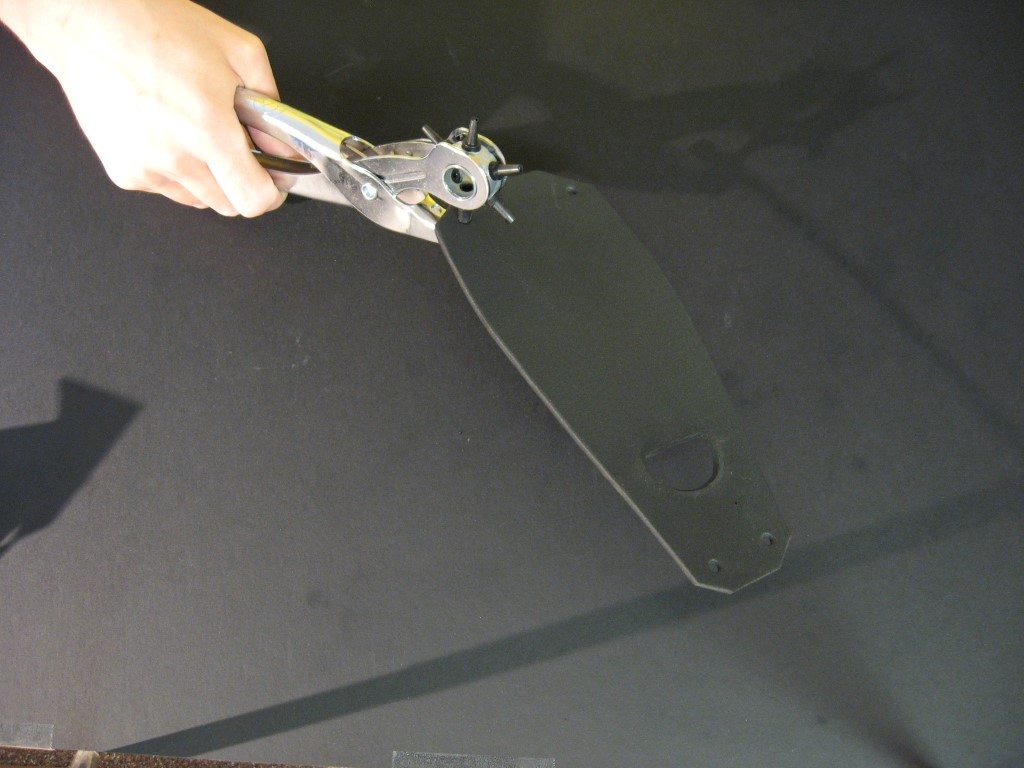
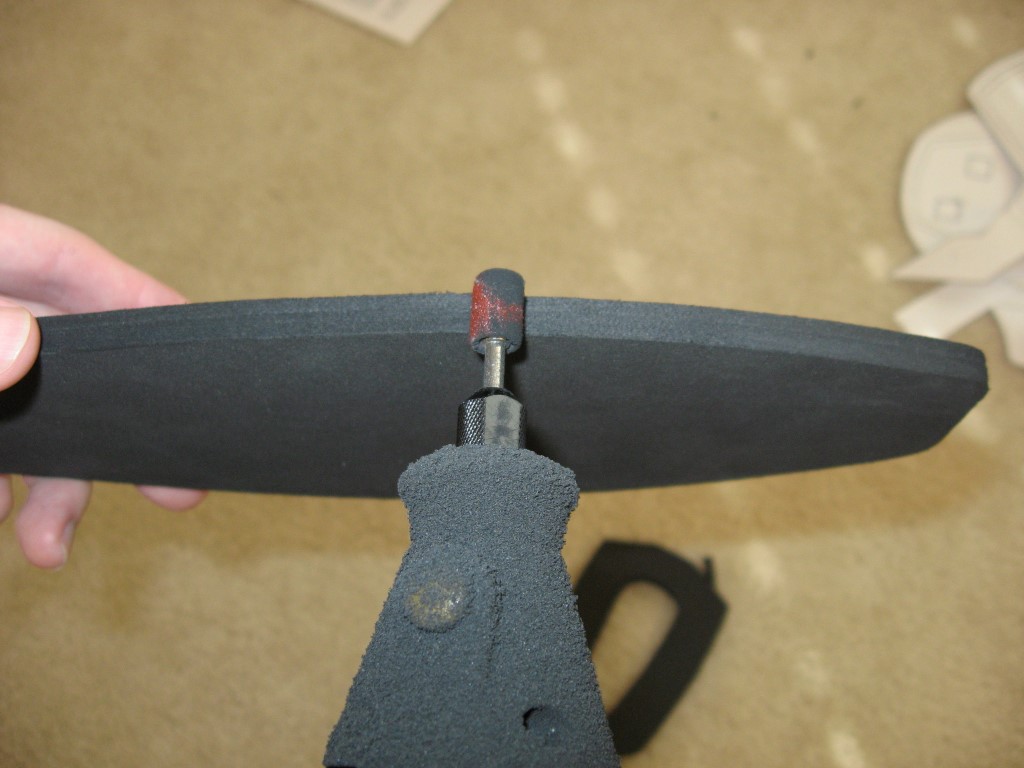
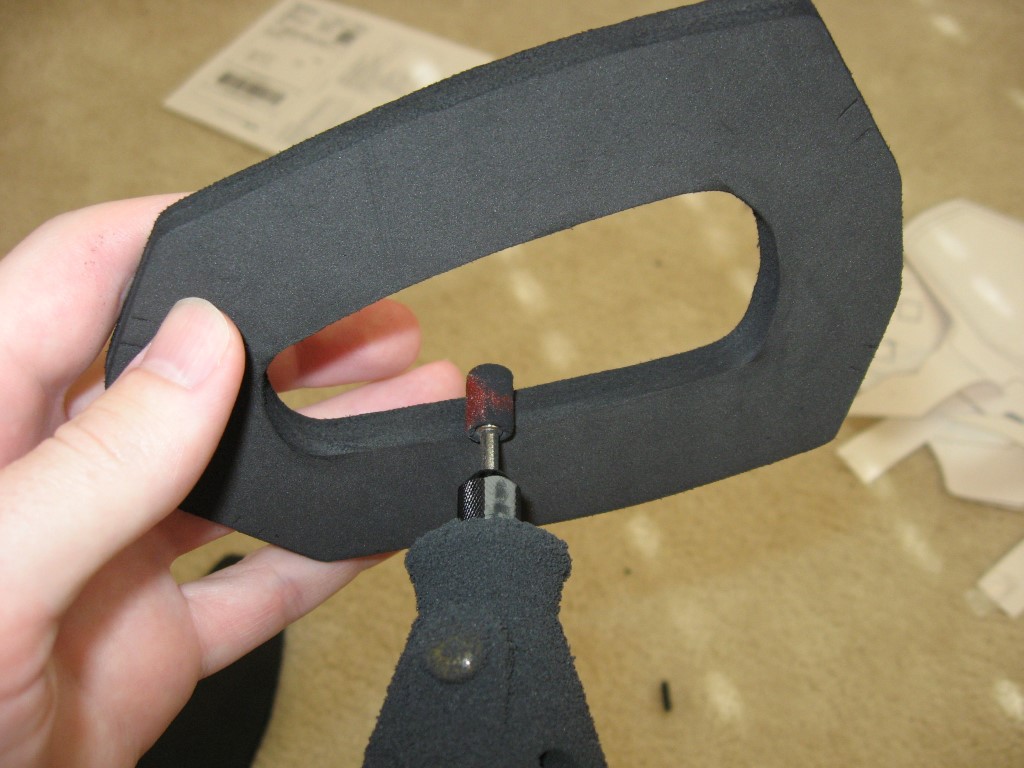
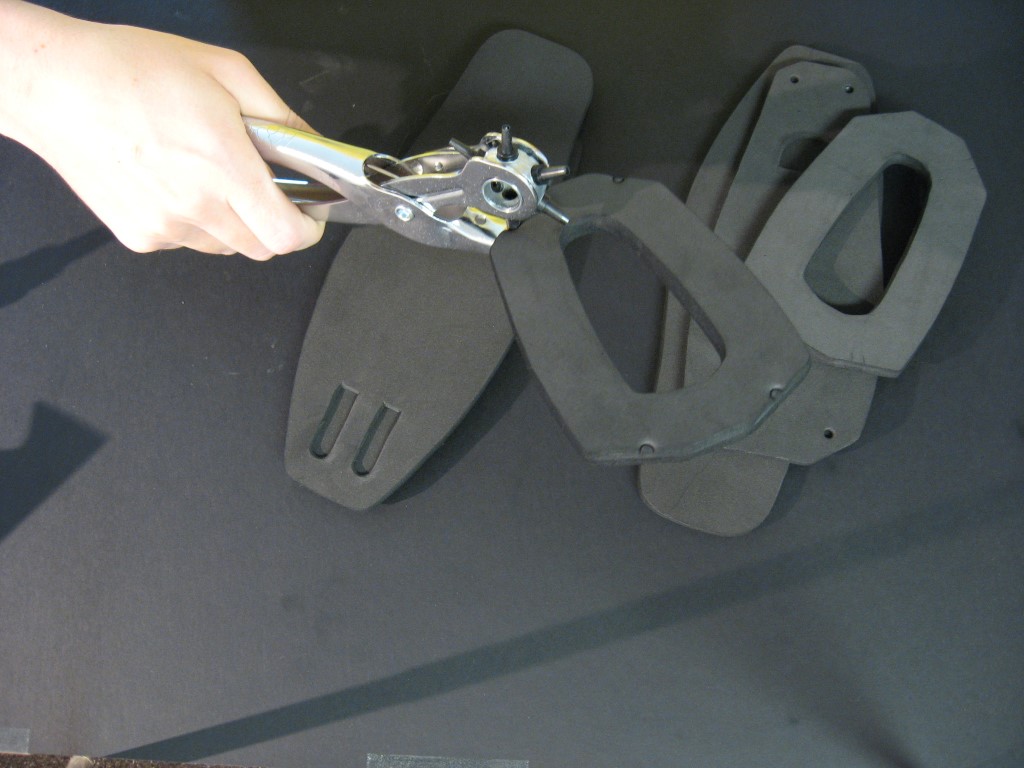
Use a dremel with a sanding bit to clean the outside edges, along with the inside edge of the top piece. Stroke the edges very gently with the dremel as it works fast. Use the hole punch to make the indentations on the top piece. Don’t punch all the way through, just about 2/3 of the way, to get the indentation.
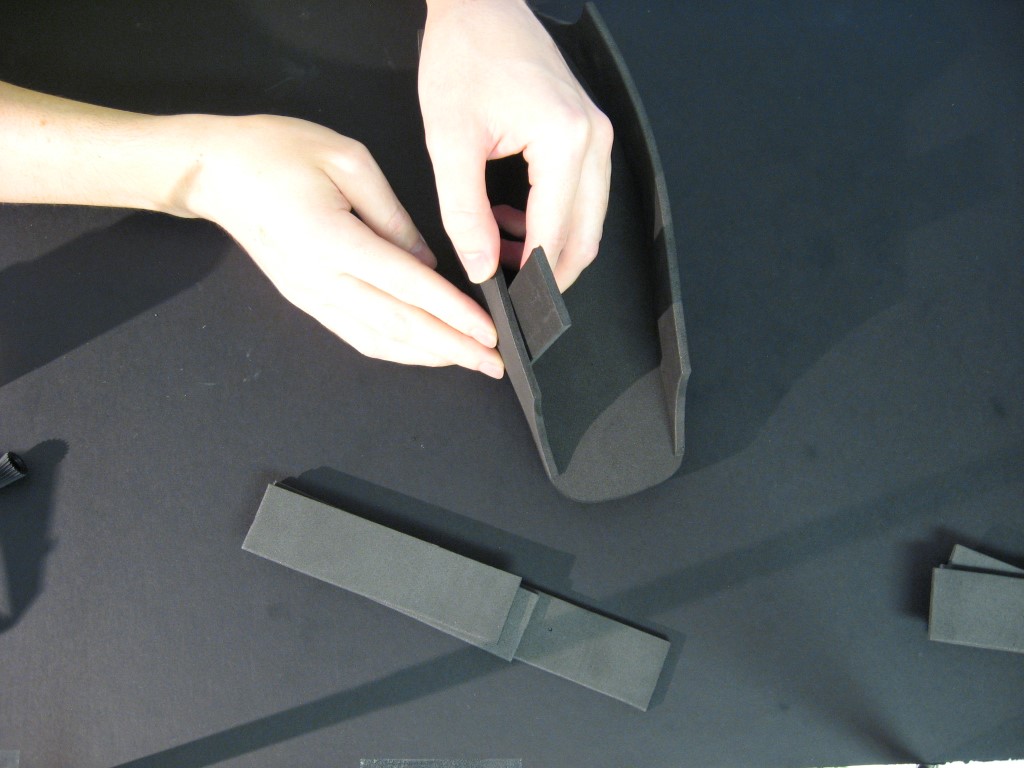
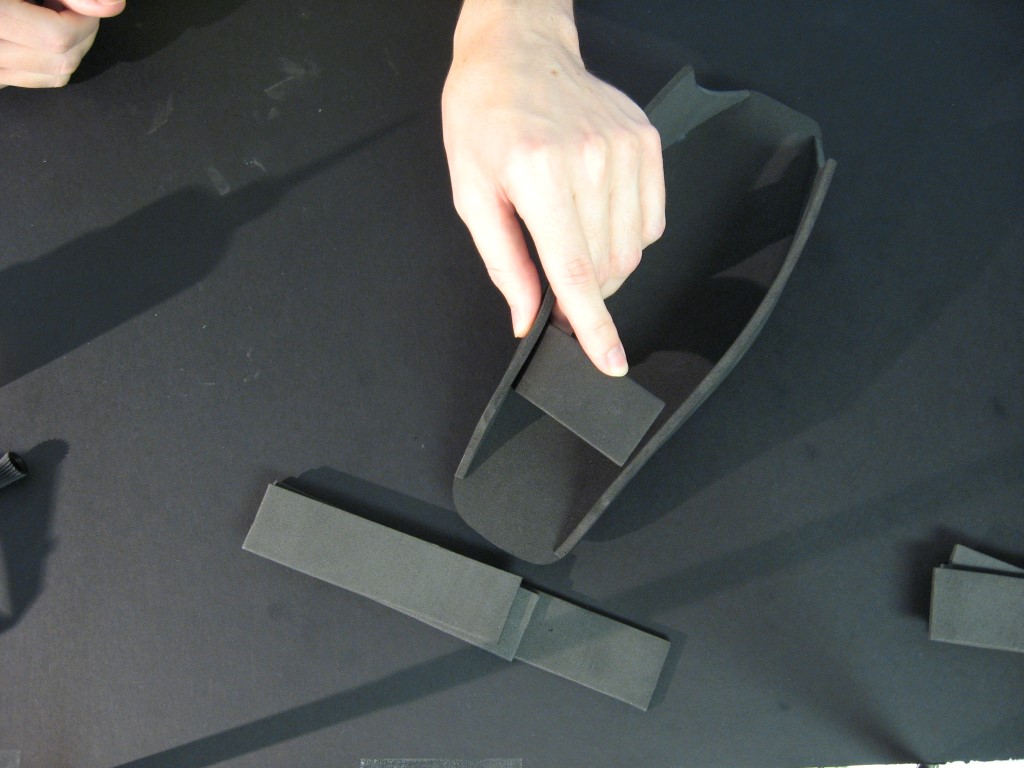
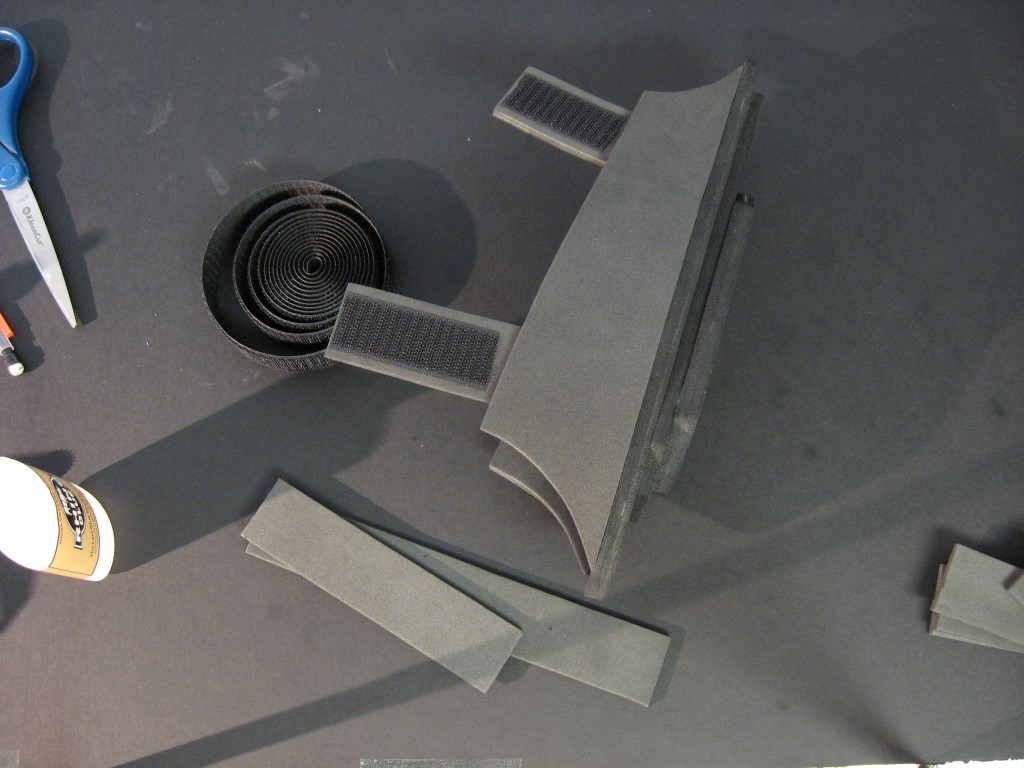
Apply some glue to the first inch or so of the side piece edge. Carefully align it and hold it in place till it dries. Finish gluing the rest of the edge and walk it slowly into place, giving it some time to dry as you go along.

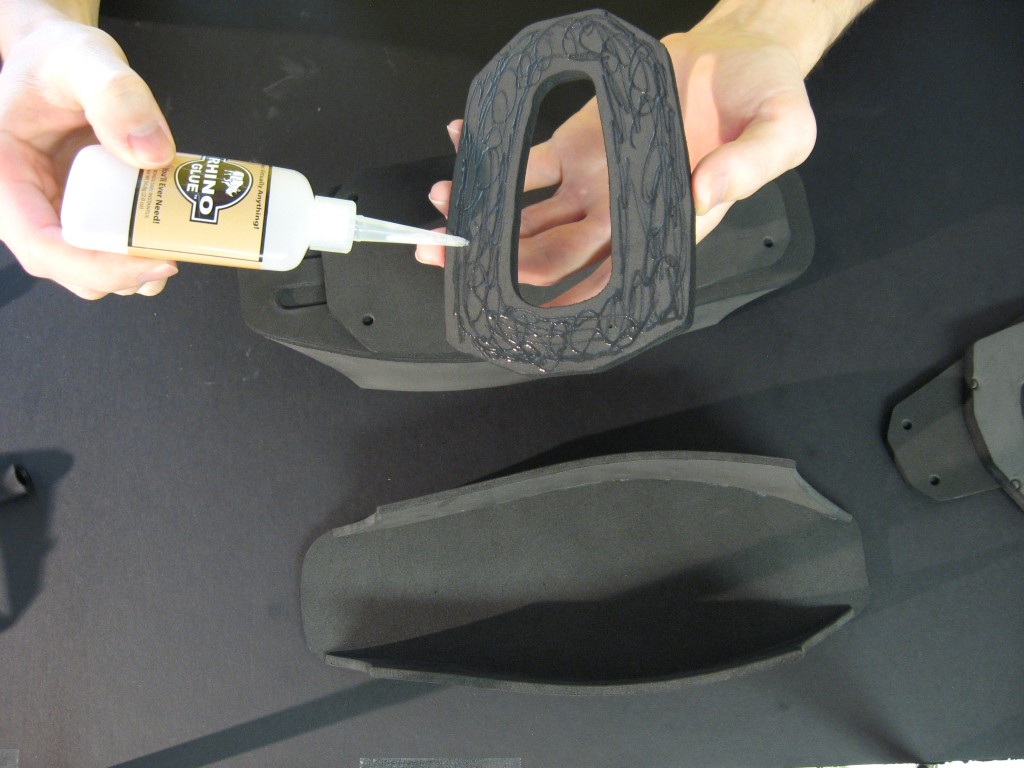
Align the middle layer on the base. Bend back one side while holding the rest in place and apply glue. Finish gluing the rest of it after it dries.

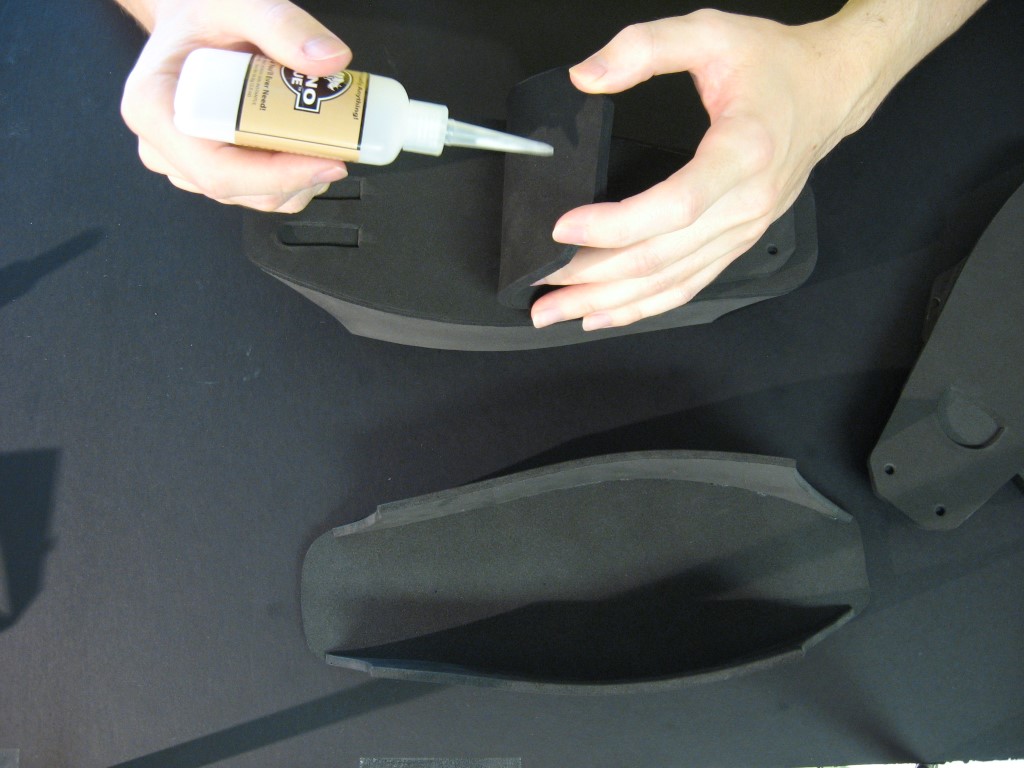
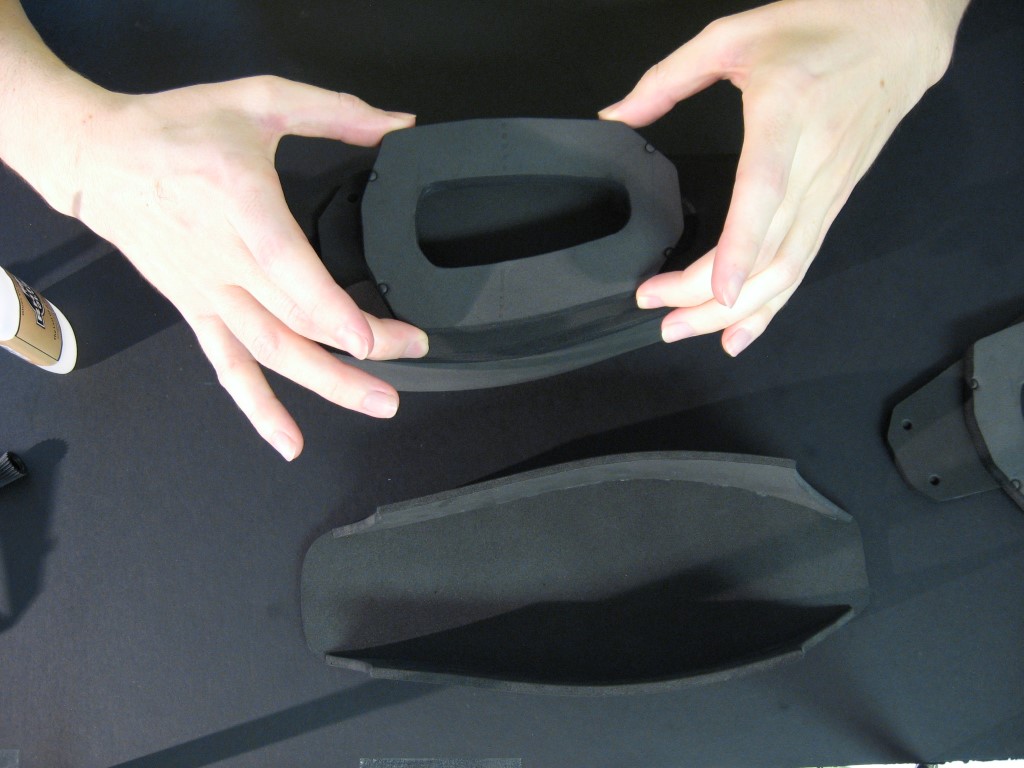
Align the top piece. Because it is much thicker you will probably have to glue it all at once. Just lower it in place slowly and use both hands to guide it to the proper spot. You don’t have much adjusting time with super glue, but you do have about a second or two to make last-second adjustments. If it goes down horribly wrong just yank it off immediately it you can, otherwise you can cut it off pretty cleanly with an xacto knife.
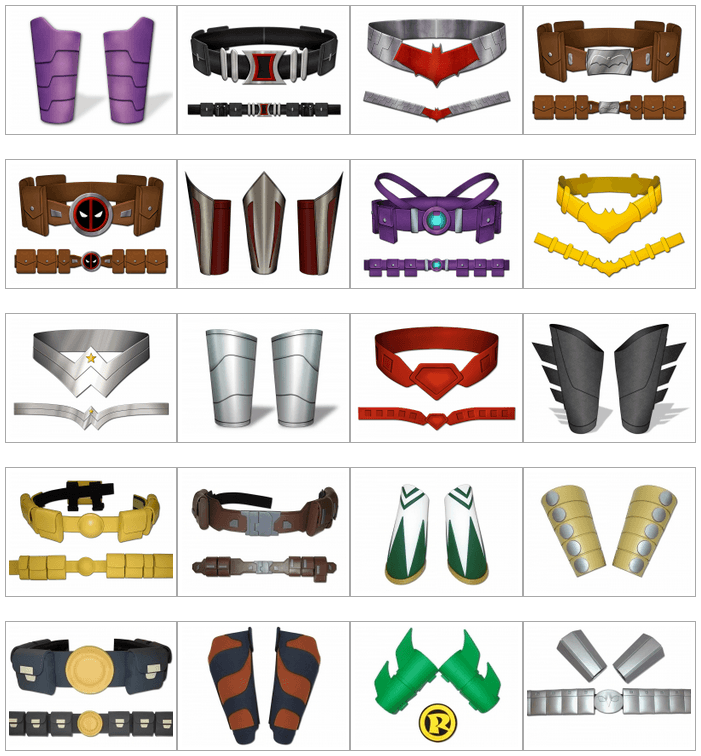
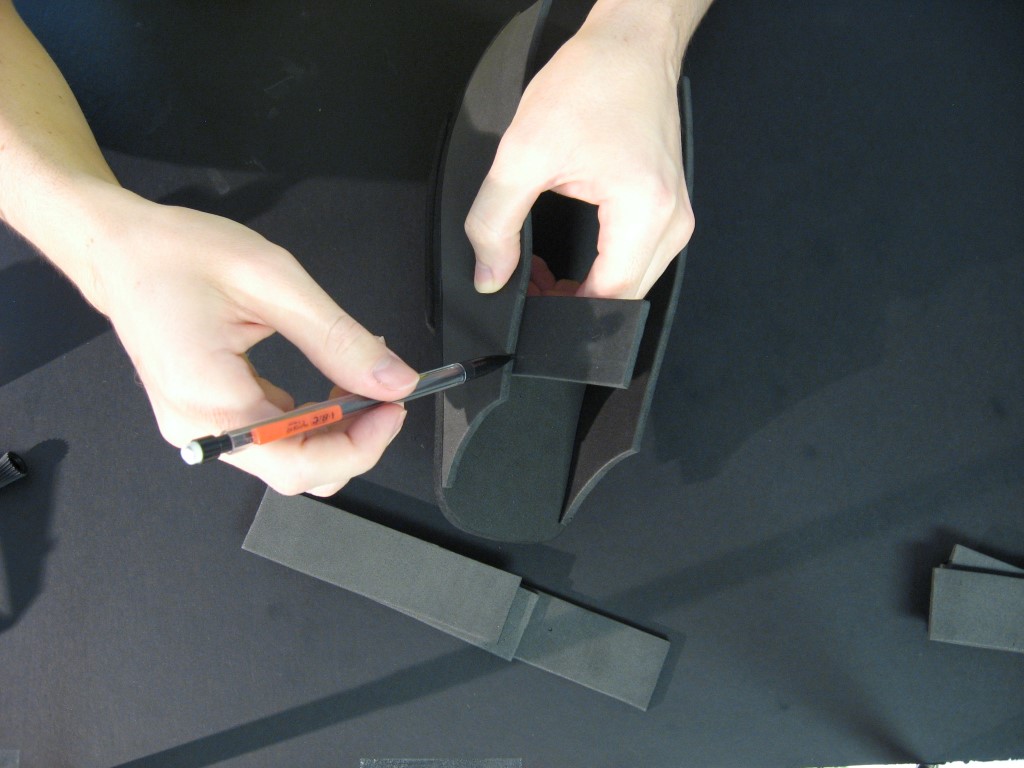
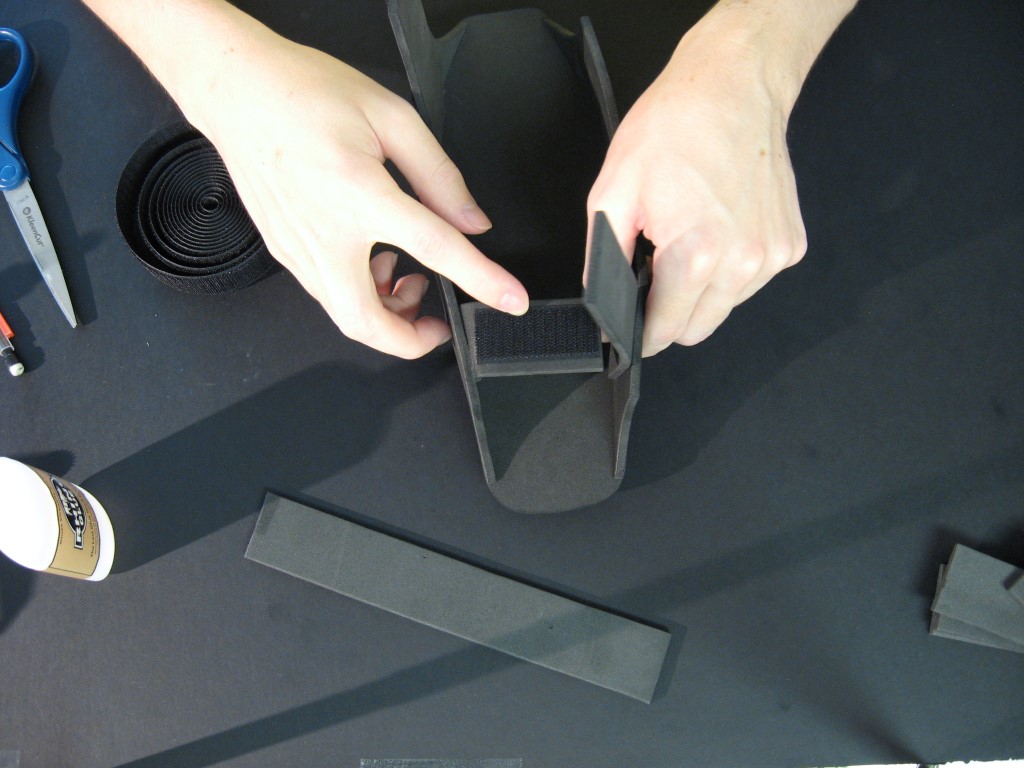
The two shortest straps go on the outside edge of the gauntlets (which will be different between the right and left arms). Position the shortest strap where you want it to sit on your wrist and bend it to the side to see what angle it needs to be at to meet to other side of the gauntlet at roughly the same spot. Mark where the side of the gauntlet meets the strap with a pencil.
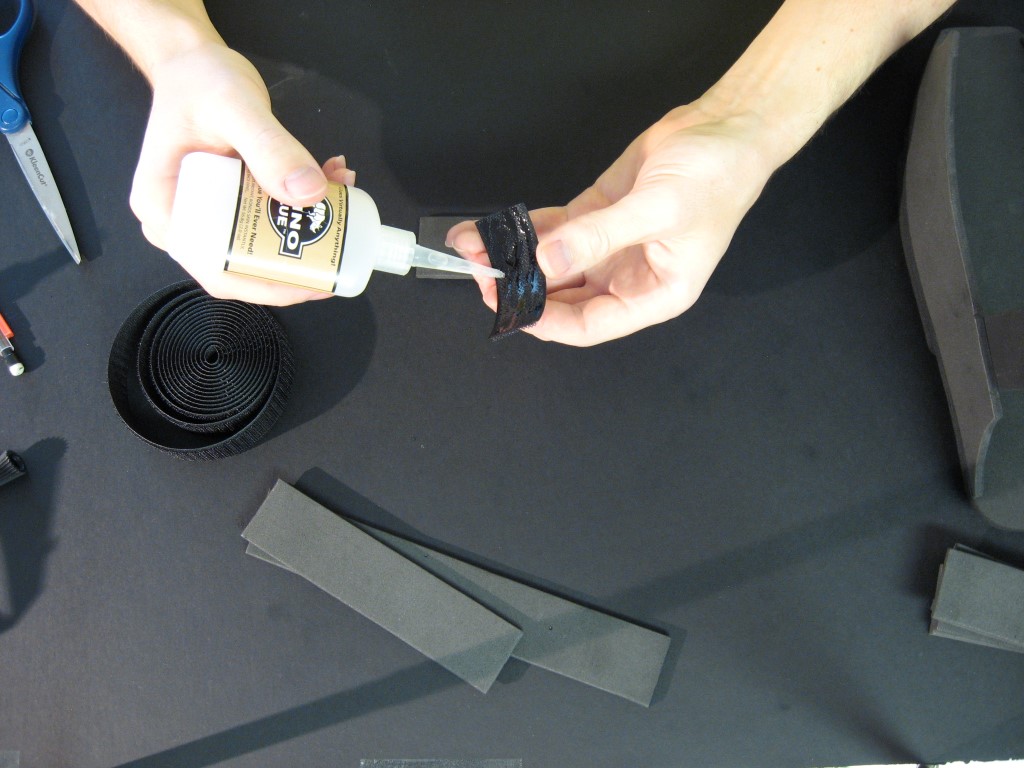
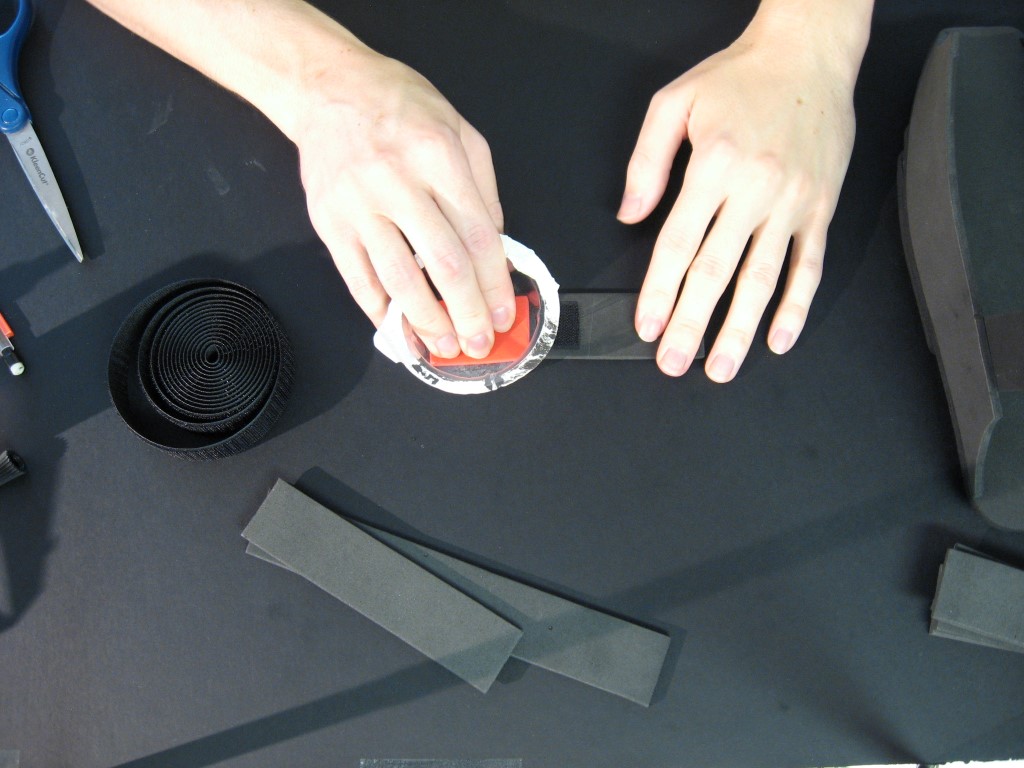
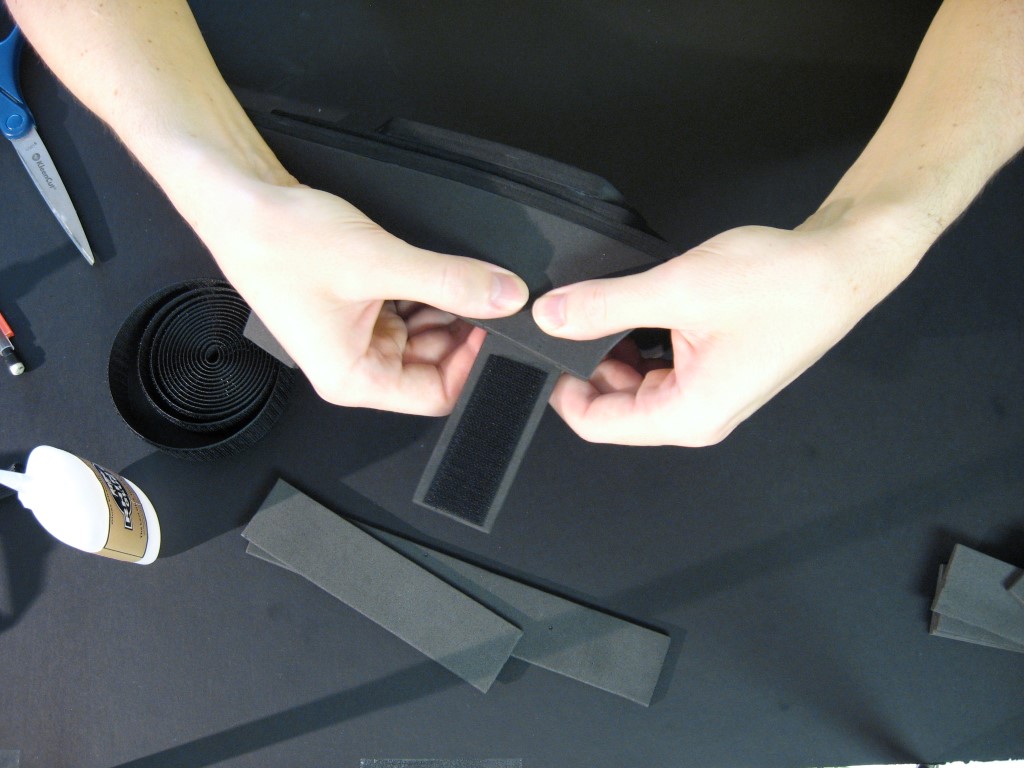
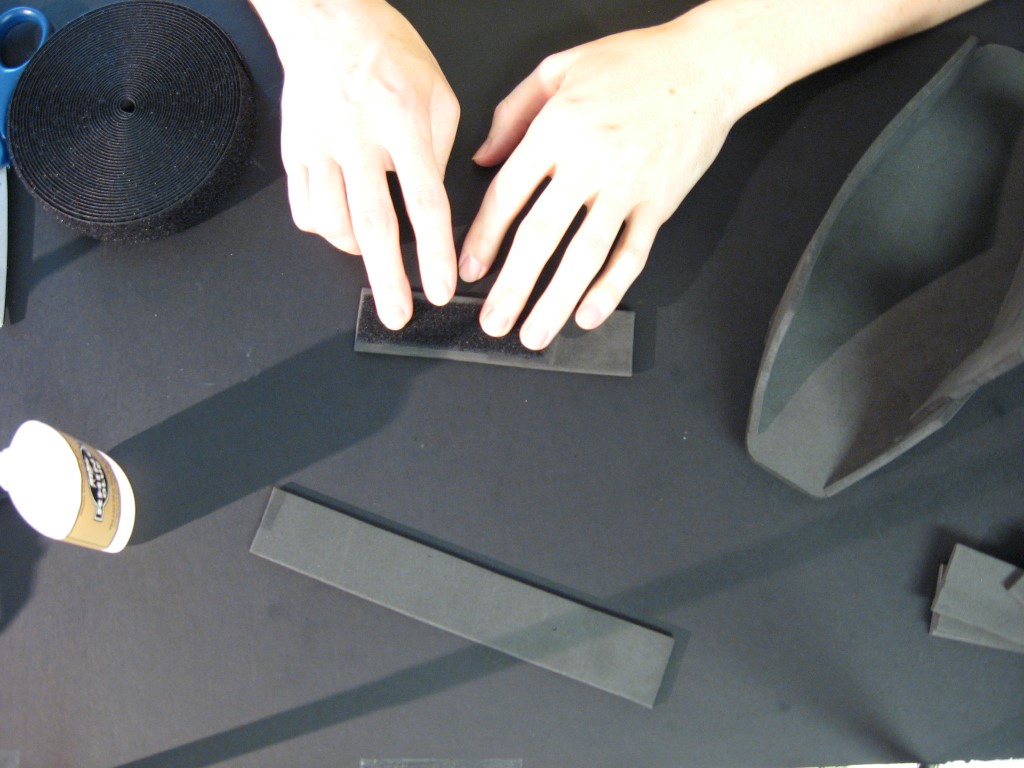
Cut a length of hook-side velcro that reaches to the pencil line and glue it to the same side of the strap that the line is on. I use a piece of plastic packaging to hold the velcro in place when gluing to avoid gluing my fingers down as well.
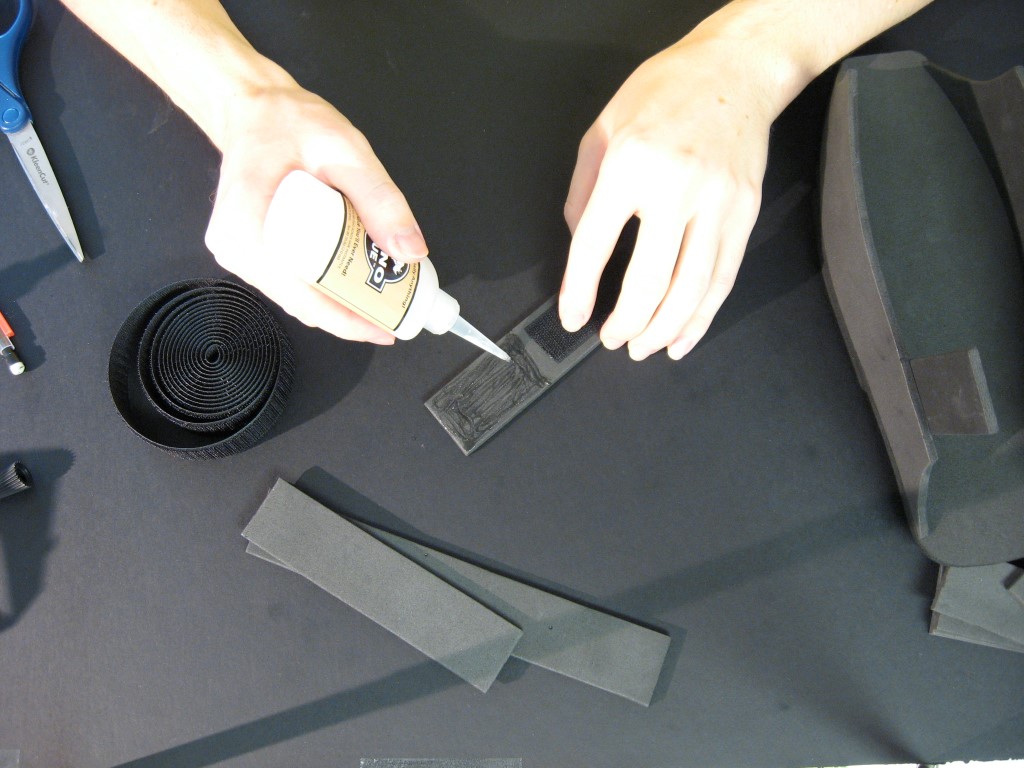
Apply glue to the rest of the strap on the same side and glue it in place using the pencil mark to get it in the correct angle. Glue the forearm strap the same way.
Glue the two longer straps to the other side of the gauntlets in the same way, with the only difference being using loop-side velcro and this time the velcro will go on the other side of the straps so it comes into contact with the velcro on the other straps.


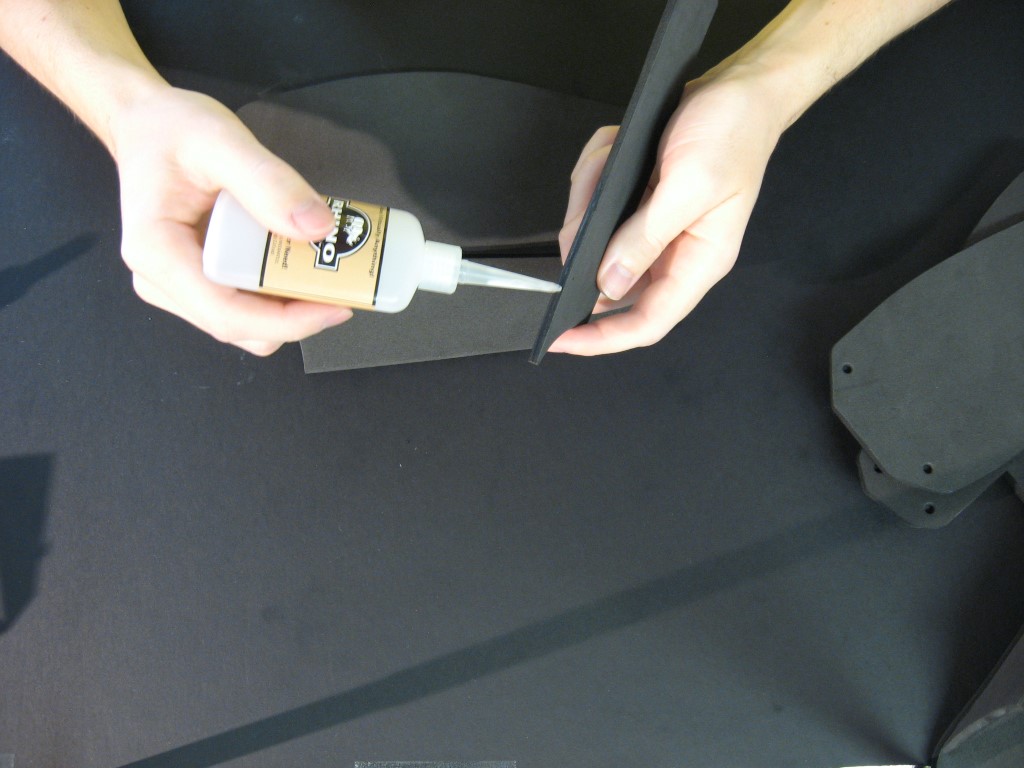
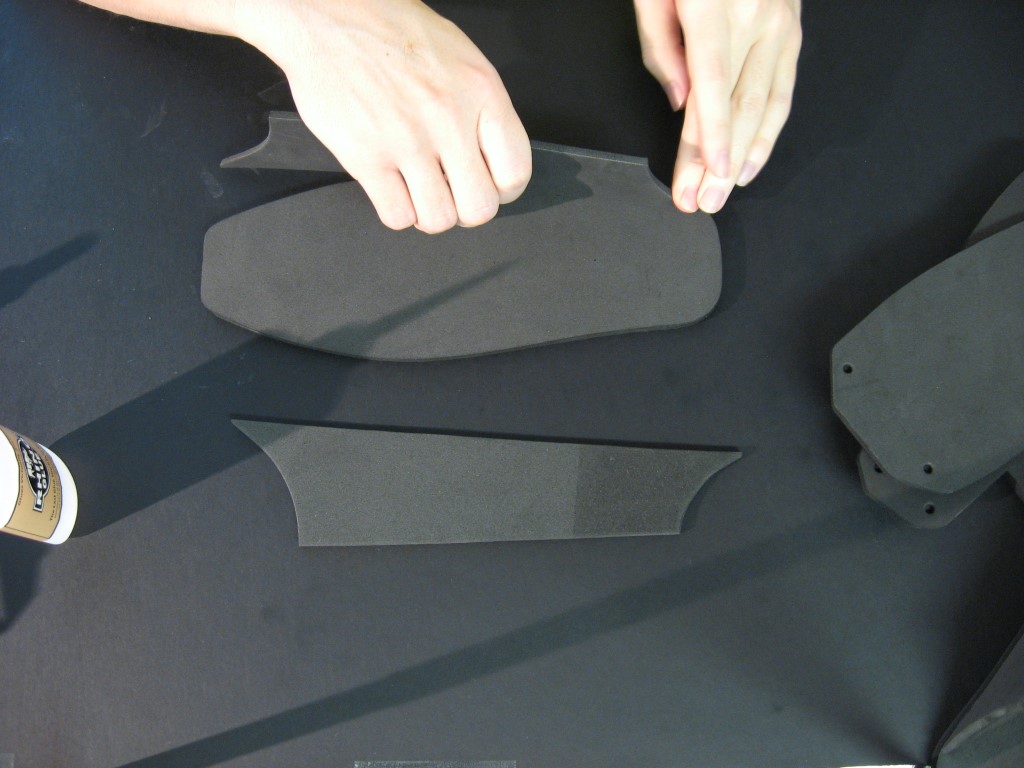
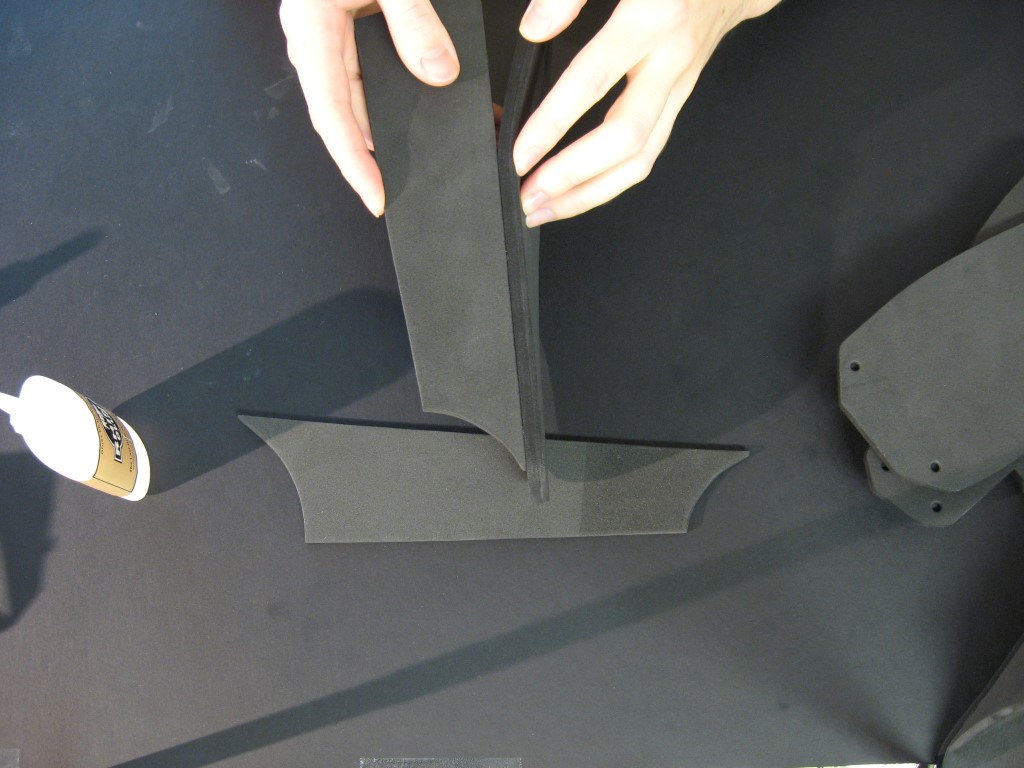
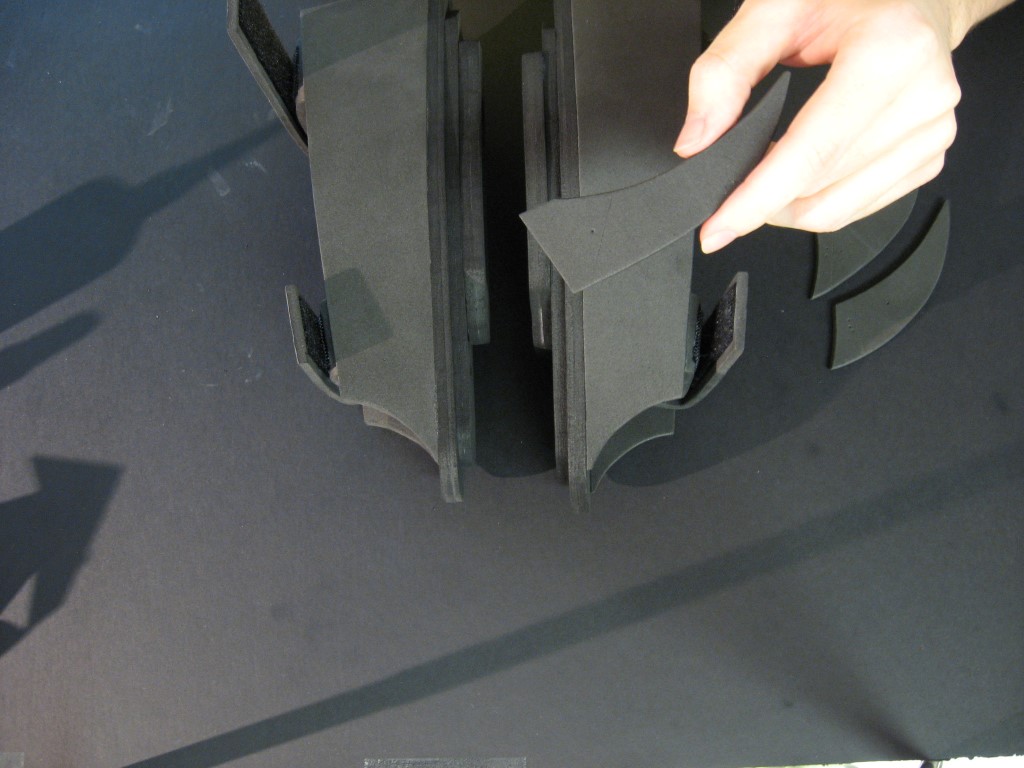
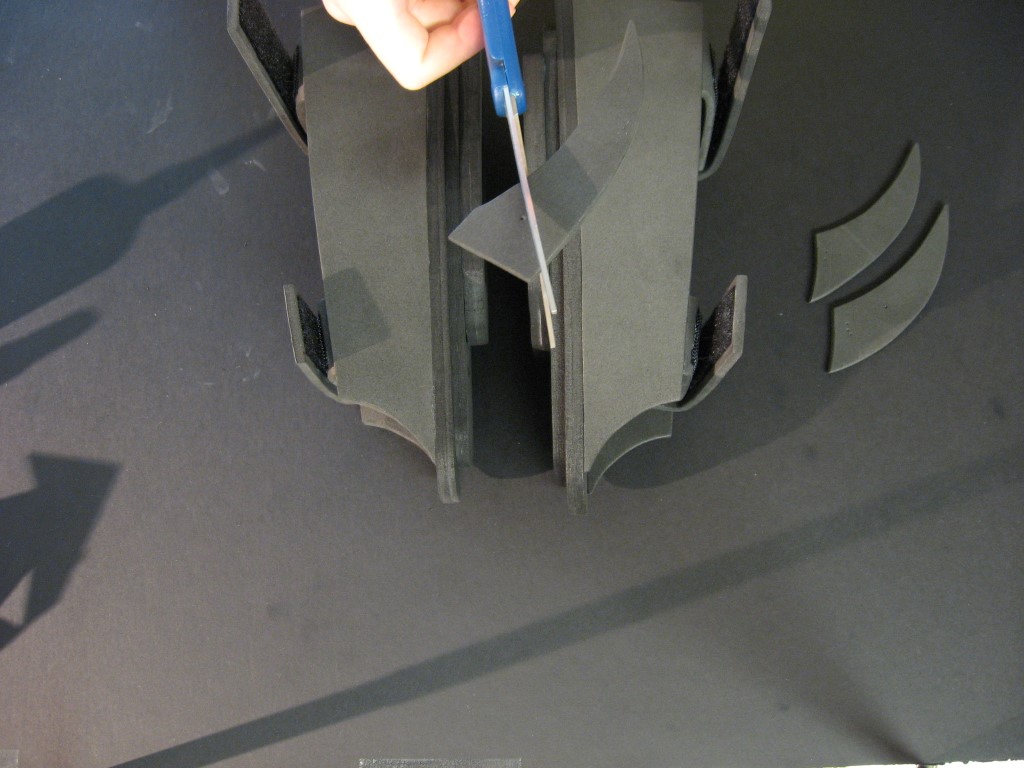
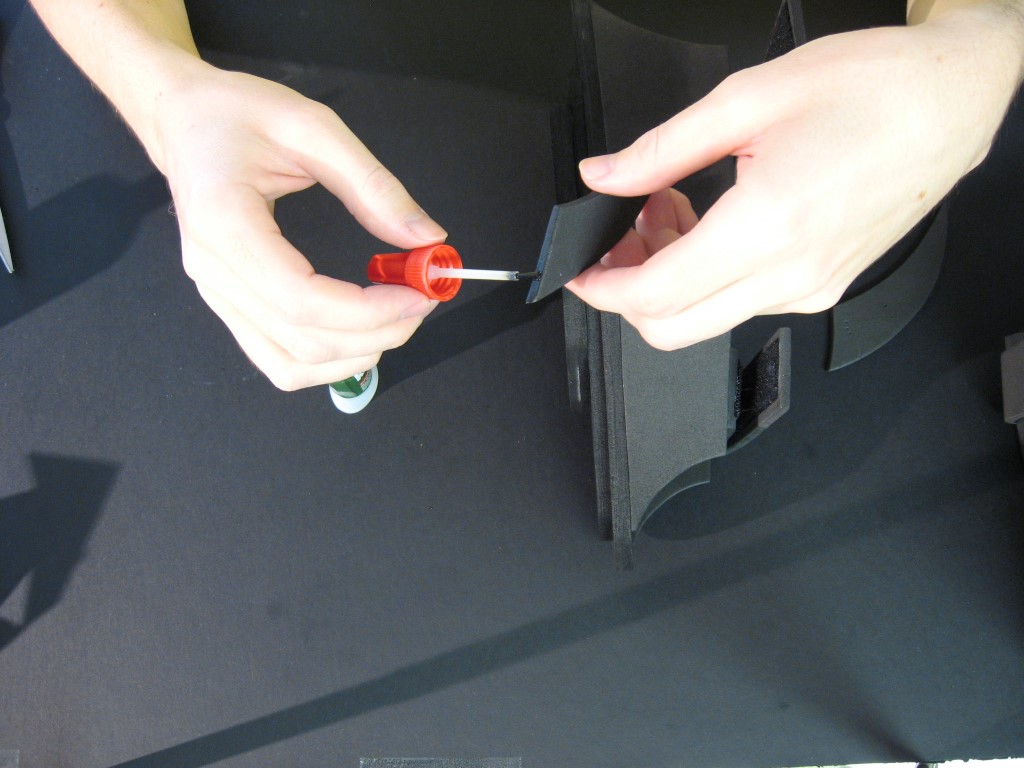
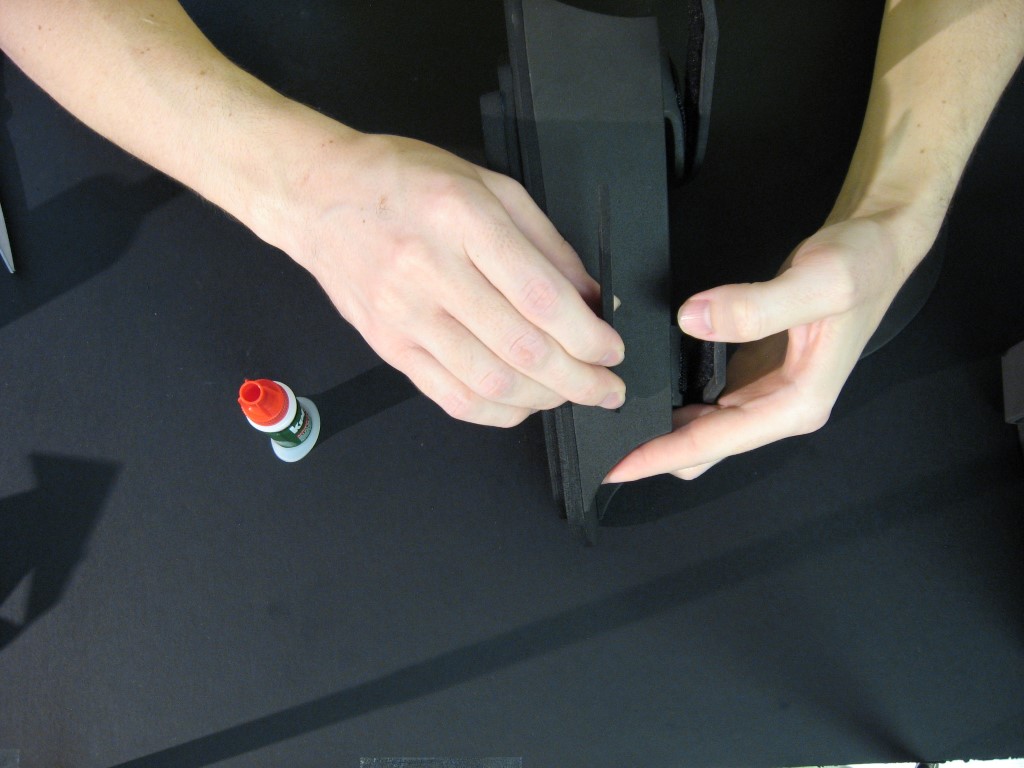
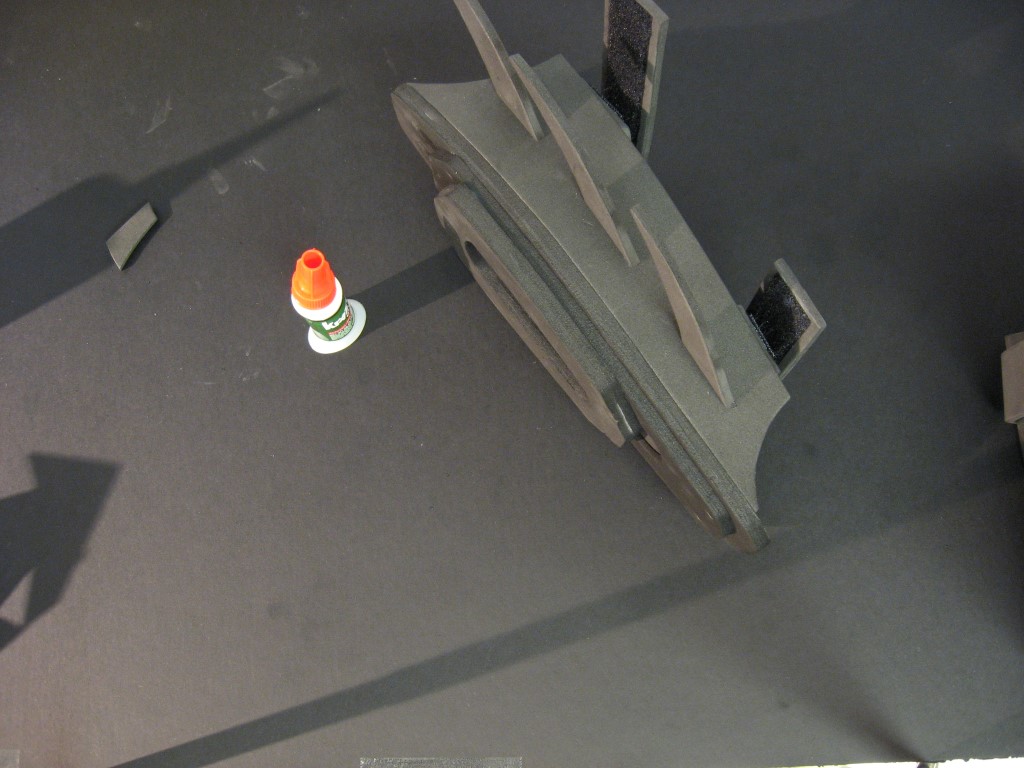
The fins go on the outside edge of the gauntlets (again, pay attention to which gauntlet is for the right arm vs the left arm). Locate one of the fins with the number you assigned to the fin closest to the wrist. Cut the bottom edge of each fin just before you glue it. Make sure to cut the bottom edge of each fin at a nice right angle, as any slight angle in this cut will cause the fin to tilt to the side once glued instead of standing straight up. I use a Krazy Glue brush for the fins, as it allows for good coverage while using a small amount of glue. Glue the rest of the fins the same way, spacing them out evenly.
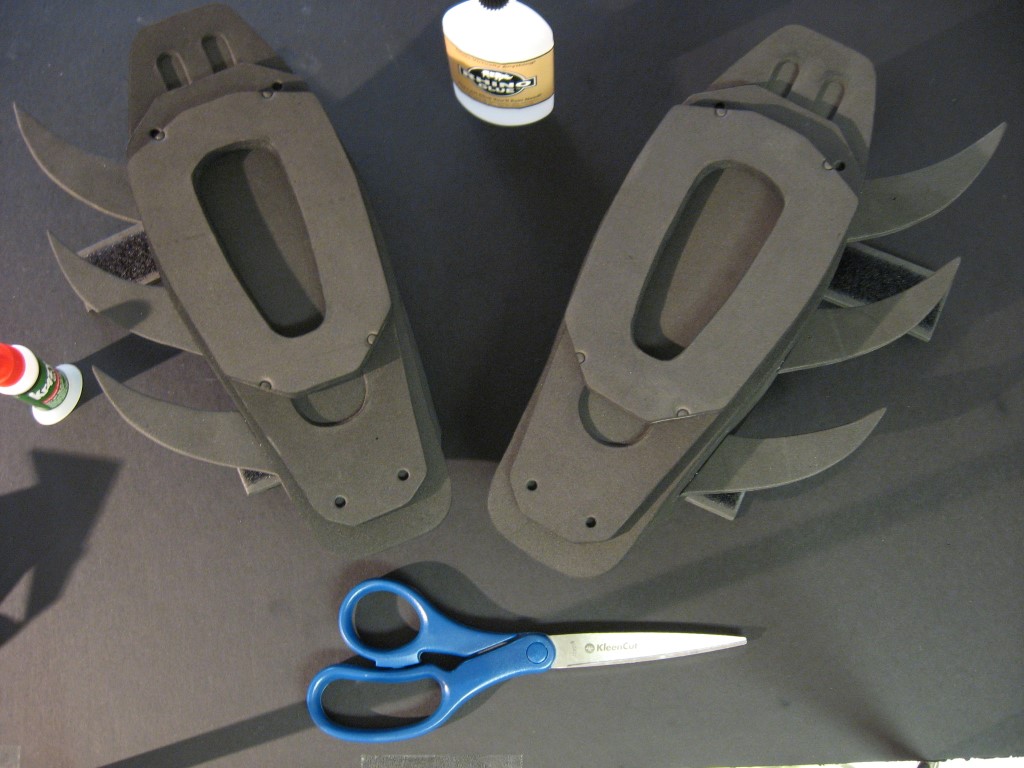
Check out the shop and the gallery for more templates and project ideas. Have fun!