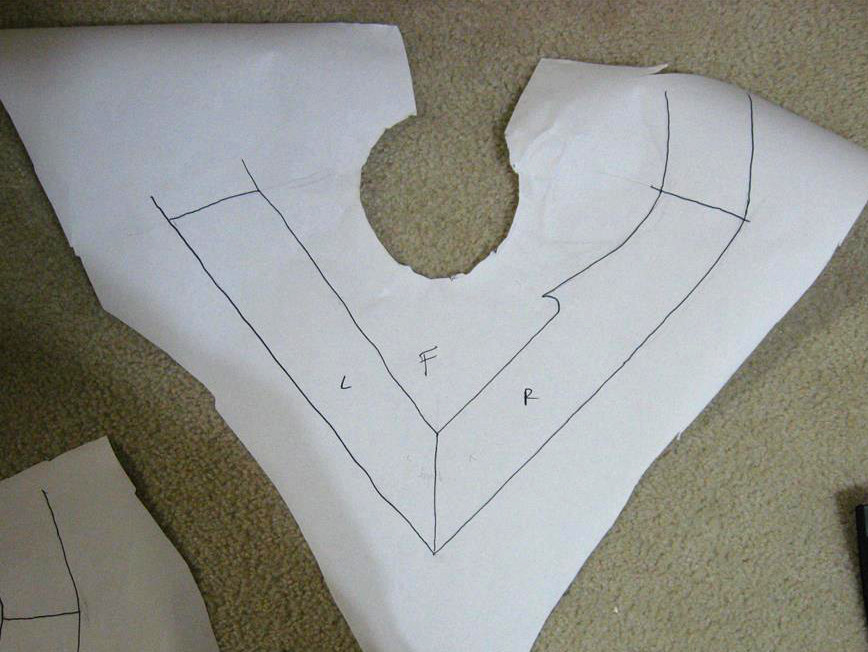
Here’s a quick look at the template making process for an over-the-shoulder’s item like the Nightwing shoulder armor. I draped poster paper over a dress form mannequin (amazon link) and sketched out the rough shape of the shoulder armor. You don’t have to worry about getting it all the right size and shape yet, this first step is mainly to give you a rough idea of the overall size and the angle of the “V”, as well as how the front and back sides will connect with each other at the top.
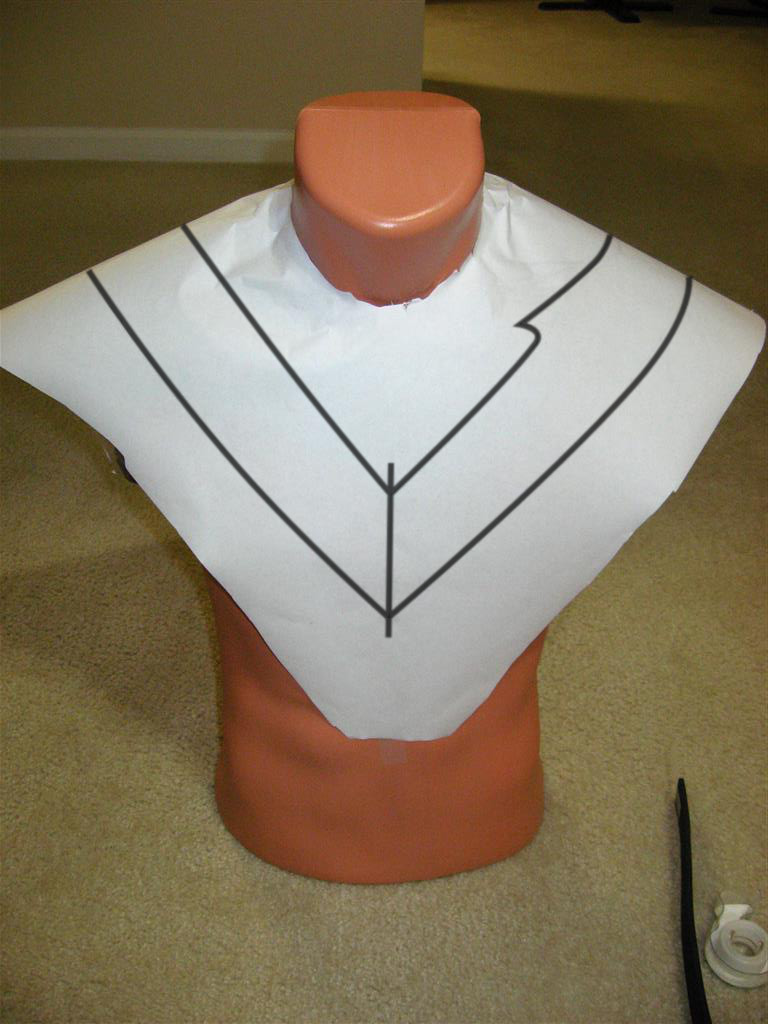
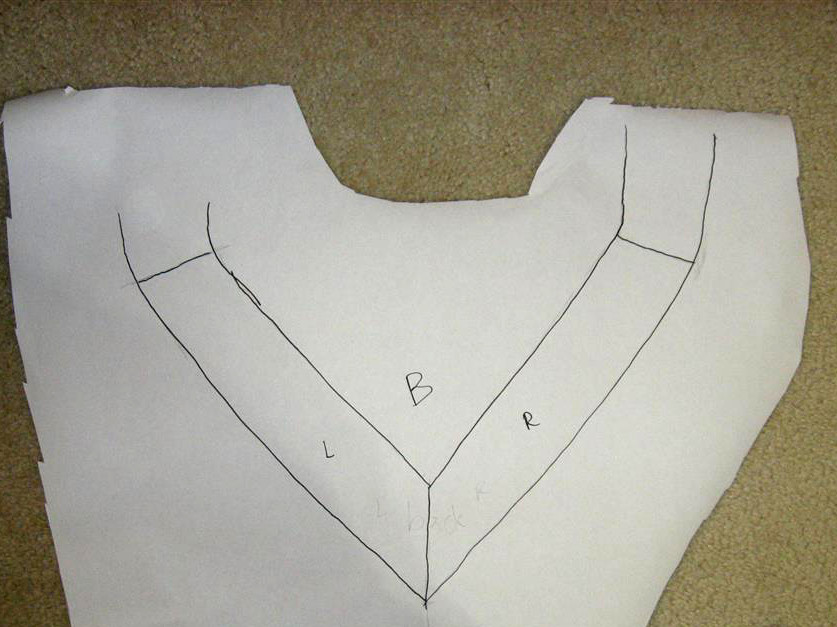
I marked where the center of the shoulders were for alignment reference later and then removed the paper and laid it all out flat.
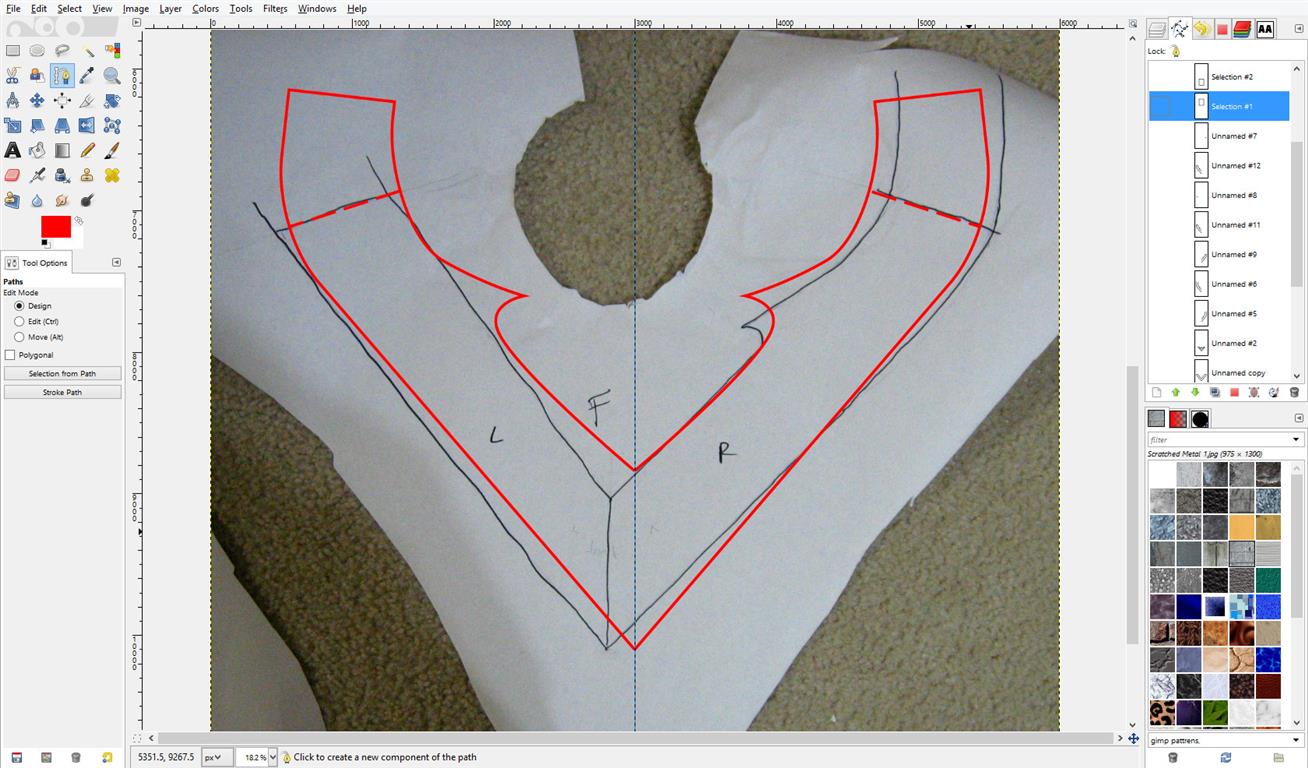
Scanning the papers to digitize them would be best, but since these are bigger than a scanner could fit, I took the above photos of the papers instead, making sure that the camera was held directly over the center of each paper and as level as possible.
After uploading the images into Gimp and re-sizing them to the actual size of the paper cut outs, I traced the shape with the path tool and began the process of straightening the lines and fixing the overall symmetry, while making sure to not alter the angle and points at the shoulders where the front and back sides will meet.
For the nightwing logo in the middle of the chest, I found an image of the logo online and adjusted the size and shape a bit so it would fit correctly, and then made sure the wings were symmetrical and centered.
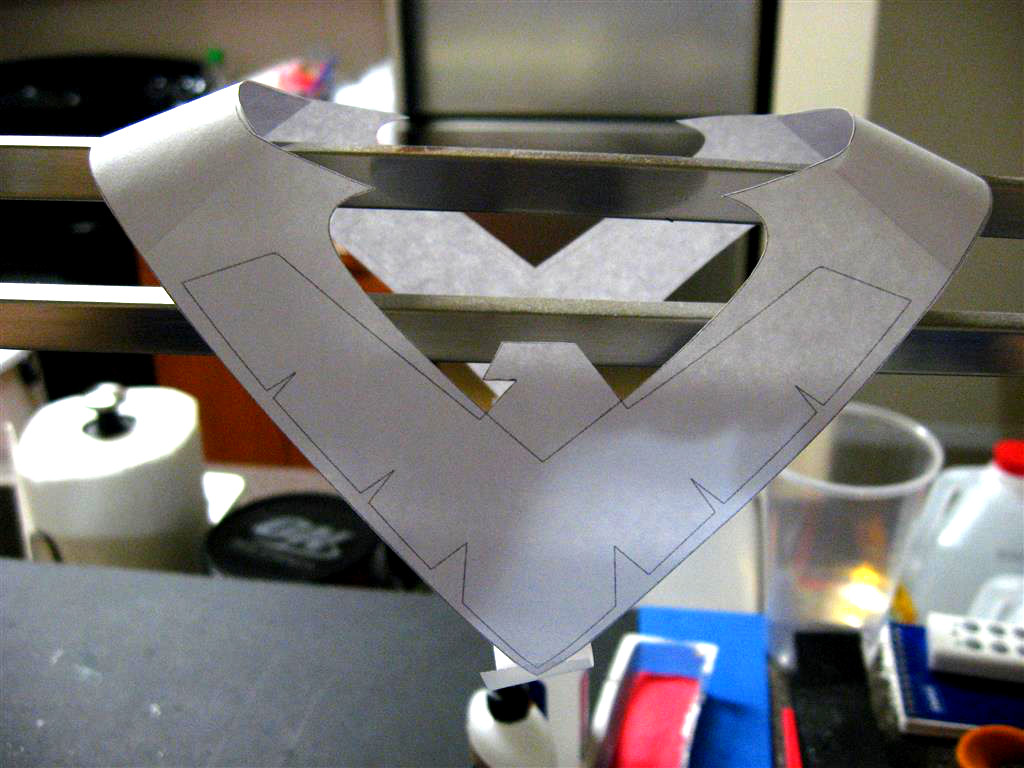
 After repeating the process for the back side of the shoulder armor, I divided the image up into 8.5 x 11 inch sections so that it could be printed out full size on standard printer page sheets. I’ll go into more detail on how to make a template in a later tutorial.

The final template is available for purchase in the shop here.